When rendering in Solidworks, there are primarily two available options. PhotoView 360 and Visualize are two of these options. SolidWorks has PhotoView 360, which may be used to create rapid renderings directly from the application. Renderings of expert quality may be created with the standalone software Visualize.
The ideal alternative is PhotoView 360 if your model needs a lot of alterations or if you don’t want the greatest quality. When your model is finished or only needs minor adjustments, or when you require high-quality renderings for consumer use, Visualize is your best choice.
Tips on How to Render in Solidworks Easily
PhotoView 360 is the fastest of the two alternatives since it is embedded within the SolidWorks application.
PhotoView 360
A visualization and render tool called PhotoView 360 is offered as an Add-in and is a part of SOLIDWORKS Professional and SOLIDWORKS Premium. Its foundation is SOLIDWORKS Intelligent Feature Technology.
Its user-friendly interface offers an interactive setting for examining designs and for producing photorealistic renderings that may be used to present your creations. Within the SOLIDWORKS window, PhotoView 360 enables you to produce a representation.
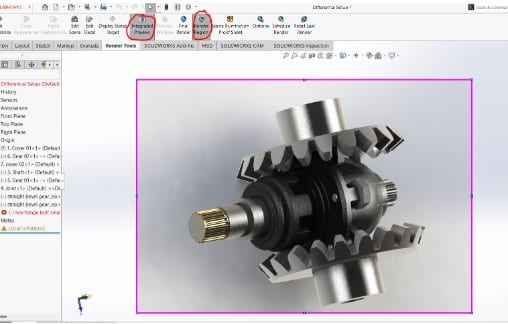
When you mouse-click Render Tools and Display Manager, the options to build a scene, add and modify lighting, as well as the option to add a camera if you’d like, are displayed. When you’re done, select Final Render to launch a PhotoView 360 rendering.
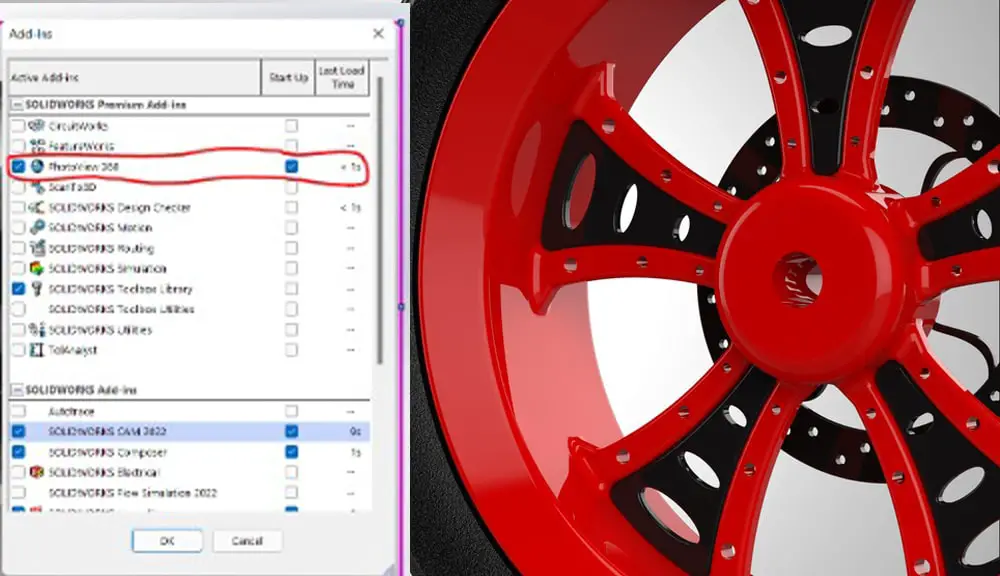
The PhotoView 360 must be enabled in SOLIDWORKS Add-Ins before the Render Tools can be accessed. To accomplish this, navigate to Tools>Add-Ins and make sure Photoview 360 has a checkmark next to it. (If you check the box next to Start Up, Photoview 360 will launch each time Solidworks is opened).

If you do not find Photoview 360 in the list, it is likely that your plan does not contain Photoview 360. This is not included in some of the simplest packages, such as student licenses. This implies you won’t be able to produce Photoview renderings.
To create a fast render, go to:
- Render Region
- Integrated Preview
Solidworks Visualize
SOLIDWORKS Visualize offers industry-leading rendering capabilities, as well as visual design-oriented tools and workflows. This makes it possible to quickly and easily create visual material that conveys a designer’s vision and beautifully illustrates your contribution.
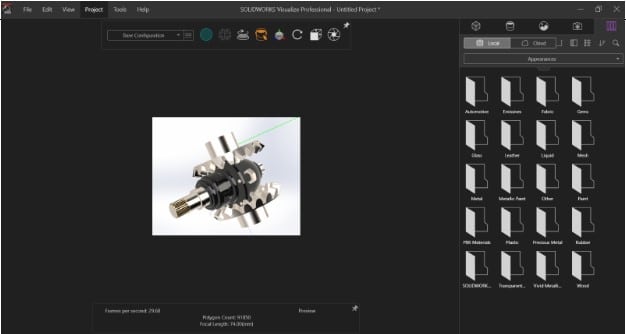
With SOLIDWORKS Professional and SOLIDWORKS Premium, SOLIDWORKS Visualize Standard is included. You see an improved environment with a wide range of modifications and customization possibilities when you run SOLIDWORKS Visualize.
Additionally, Visualize Professional enables more complex file outputs including 360-degree rotations of components and assemblies and even virtual reality footage! There are several ways to differentiate your designs from those of competitors.
Visualize will import every SOLIDWORKS appearance, which may then be modified or updated there. The SOLIDWORKS Appearance Library may be used to add appearances to your model, or you can prepare it by giving each component material.
Activate the add-in before exporting to Visualize.

Click Export Advanced/Export Simple on the Visualize CommandManager tab. This organizes components of the same color or appearance to speed up changing appearances in Visualize.
Change the model’s colors and look by clicking the appearance button. To update everything with the same appearance, drag and drop a new appearance onto a part.
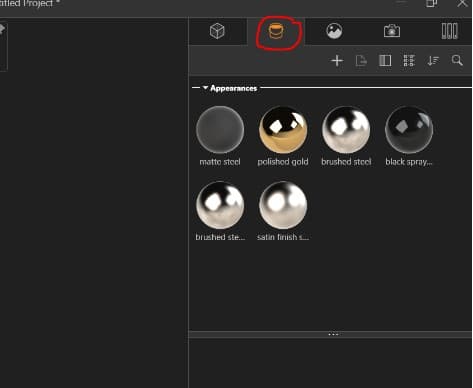
On the Library Tab, you can find new appearances, and you may get even more for no cost from the Cloud Library.
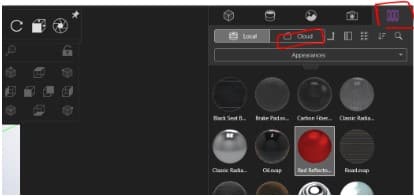
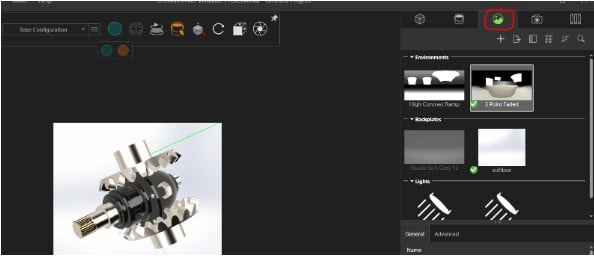
The background environment may be changed by clicking the Scene button; libraries and cloud libraries are also accessible. Drag and drop a setting into the Viewport to modify the scene.
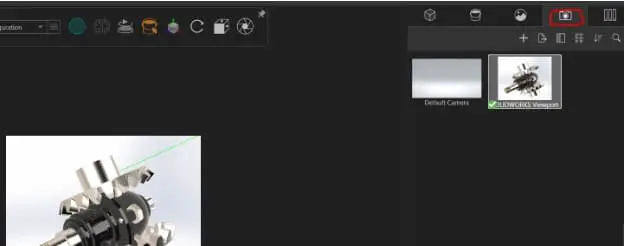
To change the brightness and perspective, click the Camera button (which works best when combined with the scroll wheel on your mouse).
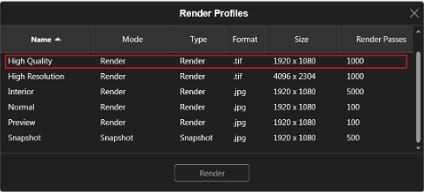
To choose the rendering profile for this image, right-click the Render button to bring up the Render Profiles Pane.
Let your image render as you relax right now! Utilize various settings, settings, and camera effects. Look into Visualize Professional if you’d want to have more control or be able to generate animations.