
DISCLOSURE: This post may contain affiliate links, meaning when you click the links and make a purchase, we receive a commission.
Are you having trouble connecting to a remote server using Remote Desktop Services (RDS)? If you are encountering the error “Remote Desktop Services has taken too long to load the user configuration from the server,” you are not alone.
Various issues can cause the RDS error, which can be frustrating to resolve. However, with the right approach, you can troubleshoot this error and get back to accessing the resources on your remote server. In this article, we will explore the possible causes of this error and provide some helpful tips for fixing it.
What Does The “Remote Desktop Services Has Taken Too Long To Load The User Configuration From Server” Error Mean
The RDS error appears when a user tries to connect to a remote server using Remote Desktop Services, and there is a problem with the connection or the server. It means that the RDS is taking longer than expected to load the user configuration from the server, preventing the user from successfully connecting to the remote server.
The RDS error message can have various causes behind it. These may include resource-related issues, connection quality problems, or improperly configured registry values. Failure to fix the RDS error will restrict your ability to connect to the remote server using Remote Desktop Services.
This will prevent you from accessing the resources on the remote server, such as files, applications, and other resources.

What Causes The “Remote Desktop Services Has Taken Too Long To Load The User Configuration From Server” Error
It is important to carefully consider the potential causes before taking the necessary steps to troubleshoot and resolve the RDS error so that you can restore your access to the remote server. These causes are discussed below:
- Resource-Related Issues
The “Drives” and “Printers” option in Remote Desktop Services controls whether or not the local drives and printers of the client computer are redirected and made available to the remote session when connected to the remote server.
In some cases, this option in a remote session can cause problems, such as conflicts with resources on the remote server, indirectly causing the RDS error.
- Connection Quality Problem
The “Detect connection quality automatically” option in Remote Desktop Services can be used to adjust the connection settings based on the connection quality between the client computer and the remote server.
For example, if the connection quality is poor, RDS may reduce the color depth or screen resolution to improve the connection’s performance.
Due to the significance of this option, one can say that its invalid state may indirectly assist in the RDS error you get while trying to establish the connection to the remote server.

- Improperly Configured Registry Values
It is possible that the registry value could impact the RDS error, as the registry is a central database that stores configuration settings for the operating system and installed programs.
For example, if a registry value is set incorrectly or is damaged, it may prevent certain features from working correctly, indirectly causing the RDS error.
Best Troubleshooting Solutions for the “Remote Desktop Services Has Taken Too Long to Load the User Configuration From Server” Error
After understanding the causes, you may be wondering what to do next. Pay close attention as we’d be discussing step-by-step instructions for resolving each of them separately. The troubleshooting methods are listed below:
Solution 1: Freeing Resources
Unchecking the option to share printers and disk drives on the client side of a Remote Desktop Services connection might help to resolve issues with these resources if there is a problem with the way they are being shared. This is doable in the following steps:

- On the client’s computer, open the Remote Desktop Connection app.
- In the “Remote Desktop Connection” window, click on the “Show Options” button.
- In the “Options” tab, click on the “Local Resources” tab.
- In the “Local devices and resources” section, uncheck the “Printers” and “Drives” options.
- Click “OK” to save the changes.
- In the “Remote Desktop Connection” window, enter the address of the RDS server and click “Connect”.
Remember that this will only uncheck the options on the client’s side of the RDS connection. You will also need to ensure that the printers and disk drives are available on the server and that the users have the correct permissions to access them.
To ensure that the users have the correct permissions to access resources on the RDS server, you can follow these steps:
- Log into the server.
- Open the “Server Manager” app.
- In the “Server Manager” dashboard, click on the “Tools” menu and select “Remote Desktop Services”.
- In the “Remote Desktop Services” snap-in, click on the “Collections” node in the left pane.
- Select the collection you want to modify in the right pane.
- In the “Overview” section of the right pane, click on the “Edit Deployment Properties” button.
- In the “Deployment Properties” dialog, click on the “Permissions” tab.
- In the “User groups” section, add the users or groups you want to give access to the resources.
- In the “Remote Desktop Services Permissions” section, select the permissions that you want to give the users or groups (e.e. “Connect”, “Full control”).
- Click “OK” to save the changes.
Solution 2: Changing Connection Quality Auto Flag
Flipping the “Detect connection quality automatically” option can improve the connection’s performance and stability and help resolve issues such as the RDS error. You can follow these steps:
- On the client’s computer, open the Remote Desktop Connection app.
- In the “Remote Desktop Connection” window, click on the “Show Options” button.
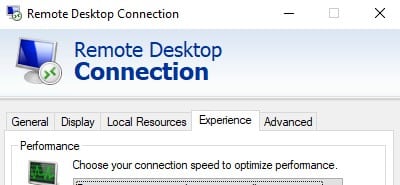
- In the “Options” tab, click on the “Experience” tab.
- In the “Connection settings” section, uncheck the “Detect connection quality automatically” option and vice versa. Also, uncheck everything under the “Allow the following” line.
- Click “OK” to save the changes.
- In the “Remote Desktop Connection” window, enter the address of the RDS server and click “Connect”.
Remember that unchecking the “Detect connection quality automatically” option might also impact the performance of the RDS connection. If you find that the connection is not performing well after unchecking it, you may want to consider checking it again.
Solution 3: Rightly Configuring Registry Values
If you think that the registry value might be causing the issue, you could try overviewing the registry to see if there are any problems with the values related to the Remote Desktop Services. We recommend opening the Registry editor before moving forward. You can open it using the following steps:
- Log into the server.
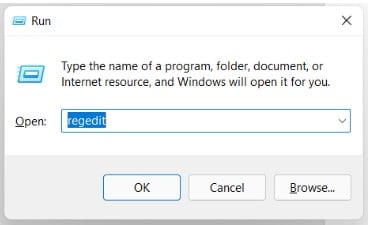
- Press the Windows key + R to open the Run dialog.
- Type “regedit” into the Run dialog and press Enter. This will open the Registry Editor.
Now that you’ve opened the Registry Editor, we have listed some specific values you must look into to resolve the RDS error:
- DisableTaskOffload
The “DisableTaskOffload” registry value is a DWORD value that is used to enable or disable task offload for the TCP/IP protocol. Task offload is a feature that allows certain networking tasks, such as checksum calculation and segmentation, to be offloaded to specialized hardware or software.
In some cases, disabling task offload can improve the performance of the network connection. You can try enabling or disabling the value to see if it makes a difference. To do this, follow these steps:
- In the Registry Editor, navigate to the following key: HKEY_LOCAL_MACHINE\SYSTEM\CurrentControlSet\Services\Tcpip\Parameters
- In the right pane, double-check the “DisableTaskOffload” value.
- In the “Edit DWORD (32-bit) Value” dialog, change the value to “1” to disable task offload or “0” to enable task offload.
- Click “OK” to save changes.
- fQueryUserConfigFromLocalMachine
The “fQueryUserConfigFromLocalMachine” registry value is a DWORD value that determines whether user configurations are queried from the local machine or a remote server when a user logs into Remote Desktop Services.
If you are experiencing issues with the RDS and think this value might be causing the problem, you can try modifying the value to see if it makes a difference. To do this, follow these steps:
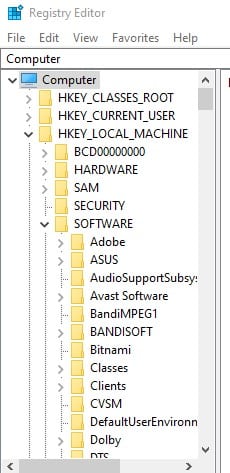
- In the Registry Editor, navigate to the following key: HKEY_LOCAL_MACHINE\SOFTWARE\Microsoft\Windows NT\CurrentVersion\Terminal Server\TSAppAllowList
- In the right pane, double-click on the “fQueryUserConfigFromLocalMachine” value.
- In the “Edit DWORD (32-bit) Value” dialog, change the value to “1” to query user configurations from the local machine or “0” to query user configurations from a remote server.
- Click “OK” to save the changes.
- Smart Card Device Enumeration
The “Smart Card Device Enumeration” registry value is a DWORD value that determines whether the smart card device enumeration service is enabled or disabled on a Windows server. The smart card enumeration service is used to enumerate (i.e. list) the smart card devices connected to the server.
Disabling the smart card enumeration service could potentially help to resolve issues with smart card authentication on RDS connections, as it might prevent the server from trying to enumerate and use smart card devices that are not functioning correctly. You can modify this value using the following steps:
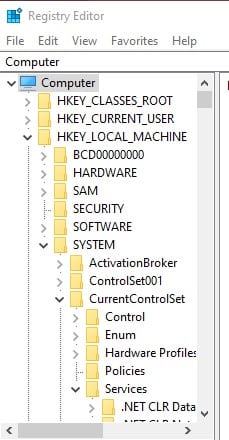
- In the Registry Editor, navigate to the following key: HKEY_LOCAL_MACHINE\SYSTEM\CurrentControlSet\Services\SCardSvr
- In the right pane, double-click on the “Start” value.
- In the “Edit DWORD (32-bit) Value” dialog, change the value to “4” to disable the smart card device enumeration service or “3” to enable the service.
- Click “OK” to save the changes.
Note: Remember that modifying the registry can be risky, as incorrect changes can cause serious problems with the operating system. It is always a good idea to back up the registry before making any changes.
Conclusion
We hope that the troubleshooting steps provided in this article have been helpful. If you can still not resolve the issue, you may need additional assistance from a technical support representative.
Don’t let this error stand in your way of accessing the resources you need – with the right approach, you can get past it and get back to work.