
DISCLOSURE: This post may contain affiliate links, meaning when you click the links and make a purchase, we receive a commission.
Have you just launched a website?
If that’s the case then you have a lot of works to do. And, one of them is to increase the search visibility of your website on the search engines. There are myriad of search engines out there. But ‘Google’ is the boss of all. We all know that.
You can place other search engines like ‘Yahoo, Bing, Baidu etc.’ after Google. To make your website visible to search engines, you need to allow the search engine bots or crawlers to your website first. Although most of the big search engines crawl websites independently and index whatever they can.
But it is a good idea to allow the search engine bots or crawlers manually to your site. So that you don’t need to worry about that. One of the best ways to allow or disallow a search engine to crawl your website is to create a ‘robots.txt’ file.
If you don’t have any idea what a ‘robots.txt’ file is or how does that work. Don’t be troubled. Because in this article, we will walk you through all of the ins and outs of ‘robots.txt’ files. And, by the time you are done reading this article, you will be able to allow or even disallow search engine bots like the ‘Googlebot, Bingbot, and Yahoo! Slurp’ to crawl your website.
Believe it or not, the whole process is too easy. Even if you are a beginner you can follow our step by step tutorial with ease. As well as, we will add screenshots to each step to make it easier.
So, don’t waste more time. Let’s jump in.
How to allow Googlebot, Bingbot and Yahoo! Slurp Bot on SiteGround
How to allow search engine bots?
In a nutshell, you will need a text file on the root directory of your website. And, the file will be a normal text file which will bear a few lines of specific codes. The name of the file must be ‘robots.txt’.
When a search engine visits your site to index the updated pages or posts from your website. Frist, it will directly go to check the ‘robots.txt’ file on your website. From there, you will be able to instruct it to crawl your site or not using some specific line of codes which will be inside the ‘robots.txt’ file.
Then the search engine bot will follow the instructions. However, if you don’t have any ‘robots.txt’ files on your website then the search engine will index things randomly.
So, it is a great idea to use a ‘robots.txt’ file on your website. If you don’t have one on your site then you need to create one now.
How to check the ‘robots.txt’ file on your website?
So, before you begin, you need to check if there’s a ‘robots.txt’ file on your website or not. There are various ways to check the existence of the ‘robots.txt’ file. But here, we will share one simple but effective way. So, let’s go.
Steps to follow:
- On the address bar of your browser, Type on the URL of your site but add the extension ‘robots.txt’ at the end of the URL. And visit that URL. It will be like ‘yoursite.com/robots.txt’ (replace ‘yoursite’ with the actual domain of yours). You can take a look at the screenshot below to get an idea

That’s it. Now, after visiting the ‘yoursite.com/’robots.txt’ URL, you will see one of the three cases described below.
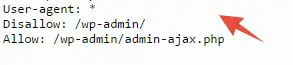
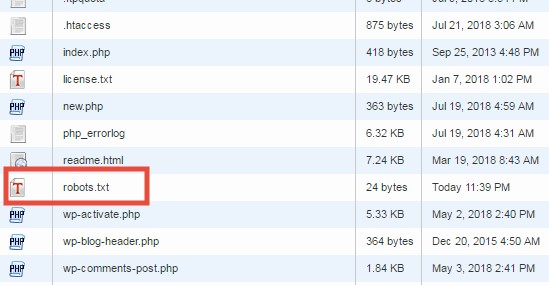
- If you find something like the image below then your site has a ‘robots.txt’ in place
- If you find an empty page then your site might not have a ‘robots.txt’ file. Or it is possible that the ‘robots.txt’ file is being created by WordPress dynamically (for WordPress users only)

- Lastly, you might see an error code. Most probably, it will be a 404 error code. If this happens you need to solve that
Now, you have checked whether you have a ‘robots.txt’ file or not on your website. If your site has a ‘robots.txt’ file then you are good to go.
When should you create a new ‘robots.txt’ file?
But, if you see an error code or blank page then you need to add a ‘robots.txt’ file. That means if you find out that you are facing the case 2 or 3 which were described above; you need to create a ‘robots.txt’ file.
So, how do you create a ‘robots.txt’ file? You will find the detailed answer below.
To create a ‘robots.txt’ file:
You can create a ‘robots.txt’ file in two ways. One is different than the other but the result will be similar. So, we will show you both of the ways. But, you can choose any one of them.
First, we will show you how to create one on your PC. And then secondly, we will show you how to create one in the cPanel of your web host account.
Method 1. How to create ‘robots.txt’ file on your PC:
In this way, you can create the ‘robots.txt’ file very easily. You can use the ‘Notepad’ program on your Windows PC to create a text file. You need to use any plain text editor. Do not use MS Word or Google Docs. These will add additional codes to the text. So, let’s see how to create a ‘robots.txt’ file.
Note: In this way, you need to upload the ‘robots.txt’ file manually to your web host root directory later. But if you want to directly create the ‘robots.txt’ file on the root directory of the website, then follow the second method and skip this first method. If you use the second method, you don’t need to upload the file as it will be created where it needs to be uploaded
Steps to follow:
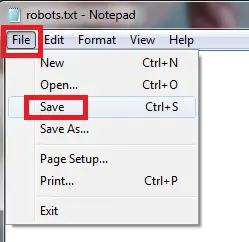
- Right-click on a blank place on the desktop of your PC. Hover your mouse pointer over the ‘New’ option. It will show some new options. Then, click on the ‘Text Document’ option from there
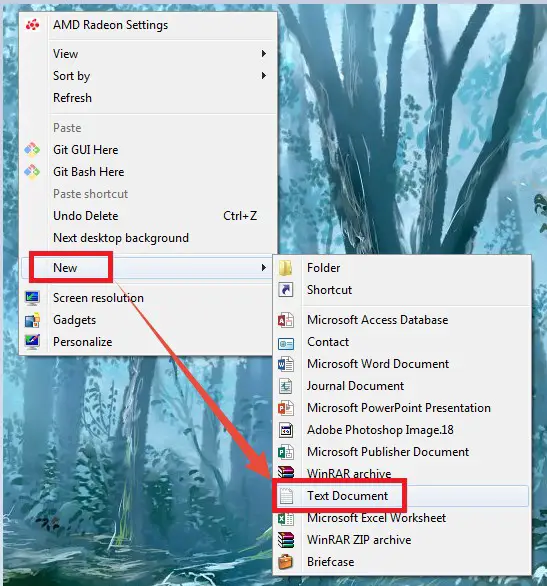
- A new text document will be created

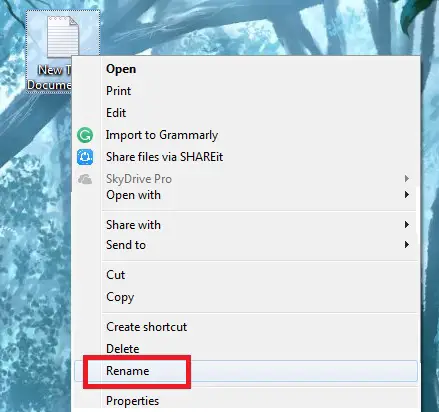
- Now, rename the text file to ‘robots.txt’ (case-sensitive and all the letters should be lower case)
- After that, open the ‘robots.txt’ file and you need to type some specific lines of codes which you will find on the next section

- Lastly, you need to save the file to save the changes and upload it (we will talk about it next)
Now, if you don’t know what to type in inside the ‘robots.txt’ file. Then you can follow along to learn all of the variations of codes which can be used in a ‘robots.txt’ file. Let’s see.
What codes to use on the ‘robots.txt’ file?
Note: Do not directly copy and paste the codes from below. It would be better if you could type the codes yourself
The best syntax (code) to be used in a ‘robots.txt’ file:
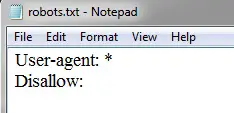
- You can use the code below to allow all of the search engines to crawl your website:
User-agent: *

Disallow:
If you want to allow Google bot:
If you have used the code above, you don’t need to actually use any other codes. Because you have already allowed all of the search engines. So, you don’t need to allow one by one. However, for the purpose of this article, we will show you all of the variations.
How to allow Google bot:
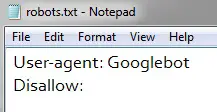
- You should use the code below to allow Googlebot:
User-agent: Googlebot

Disallow:
How to allow Bingbot:
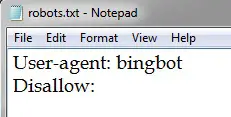
- You should use the code below to allow Bingbot:
User-agent: bingbot

Disallow:
How to allow Yahoo! Slurp:
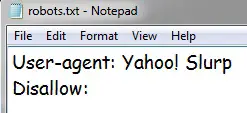
- You should use the code below to allow Yahoo! Slurp bot:
User-agent: Yahoo! Slurp

Disallow:
How to disallow all of the search engines:
It is not recommended. We are just showing it as an example.
- You should use the code below to disallow all bots:
User-agent: *

Disallow: /
How to allow certain bots but block all others:
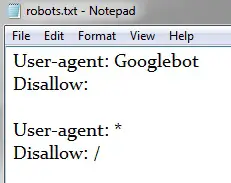
Let’s say, you want to allow only Googlebot. But you don’t want to allow any other search engines.
- In that case, the code will be:
User-agent: Googlebot

Disallow:
User-agent: *

Disallow: /
How to disallow certain bots:
It is not recommended. But for instance, we need to show it. If you want to disallow Bingbot then,
- The code would be:User-agent:
bingbot

Disallow: /
You can disallow any other bots just replace the name of the bot with ‘bingbot’.
Now, you know what codes to use in a ‘robots.txt’ file. We will tell you where to put the ‘robots.txt’ file on your website and how to do that in the next section.
Where to upload the ‘robots.txt’ file?
After you have typed all the preferred codes on your ‘robots.txt’ file, you need to save it. Then you need to upload the file to the root of your web server. That will be on the ‘public_html’ folder on your web host.
How to upload the ‘robots.txt’ file to the root of your website?
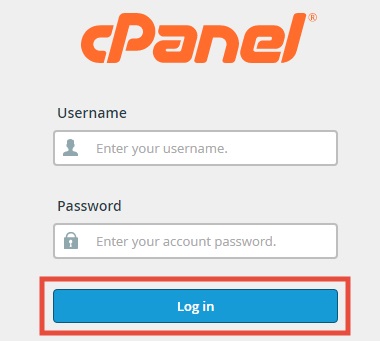
- Log in to the cPanel of your SiteGround web host
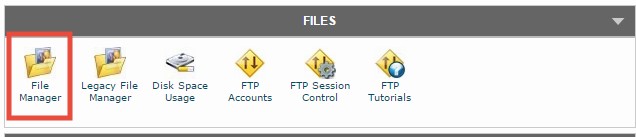
- Now, click on the ‘File Manager’ button which will be under the ‘Files’ section
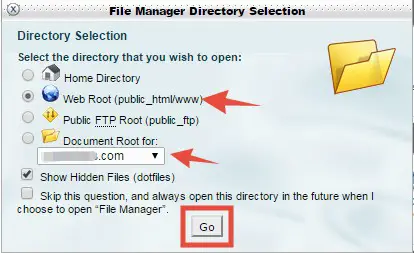
- A new popup will appear. You have to make sure that the ‘Web Root (public_html/www)’ is selected. Then check if the appropriate domain name is selected. Normally, if you have only one domain name connected your website then it will be automatically selected. But, if you have more than one then select the desired one from the drop-down menu. Lastly, click on the ‘Go’ button
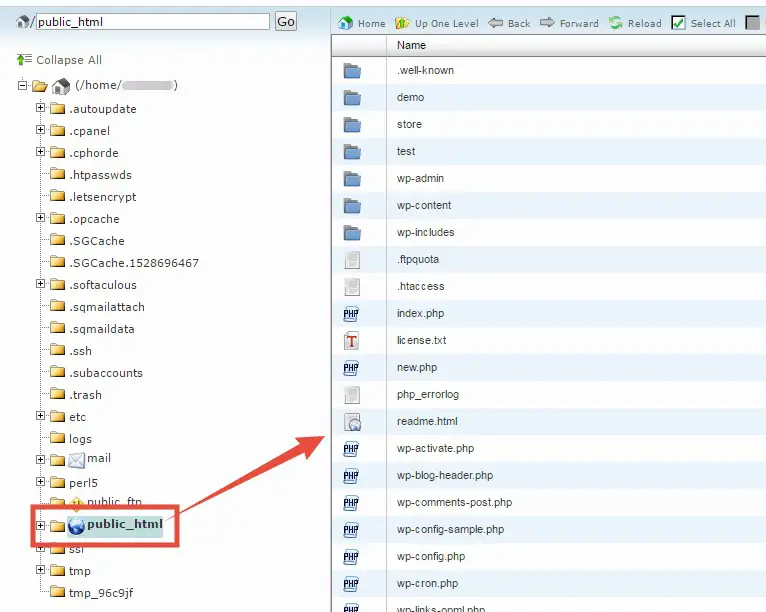
- Instantly, a new tab will be opened on your browser. It will open the ‘public_html’ folder of your website. We have to upload the ‘robots.txt’ file here
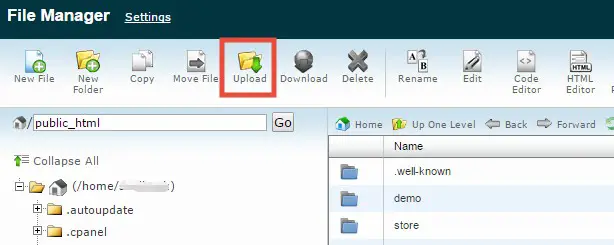
- So, click on the ‘Upload’ button from the top menu
- It will take you to another new tab
- From there, click on the ‘Choose File’ button
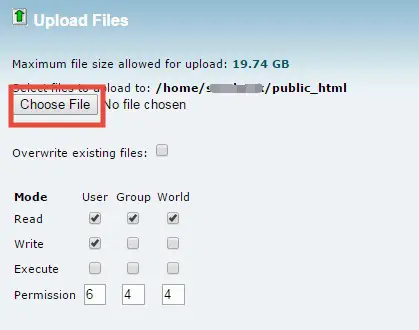
- And upload the ‘robots.txt’ file here from your computer

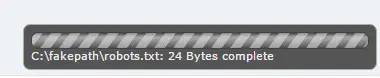
- It will be uploaded. You will see the progress of the upload in the bottom-right corner of the screen
- After the upload is completed, click on the ‘Go Back to…public_html’ button
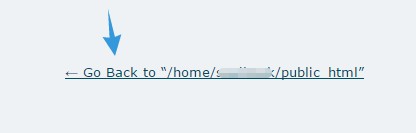
- It will take you to the previous page and you will find the ‘robots.txt’ file in there
That is all for the first method. You have created and also uploaded the ‘robots.txt’ file successfully.
Method 2. How to create a ‘robots.txt’ file on the root directory of your website?
- Log in to the cPanel of your web host
- Click on the ‘File Manager’ button which will be on the ‘Files’ section
- A popup will appear. Make sure that you have selected the ‘Web Root (public_html/www)’ option and then click on the ‘Go’ button
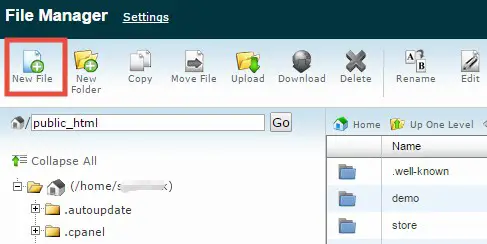
- A new tab will be opened on your browser which will be the ‘public_html’ folder. On that page, you will need to create the ‘robots.txt’ file as this is the root directory of your site
- Now, click on the ‘New File’ button from the top-left corner of the screen
- Another popup will appear. You need to enter a name of the file. Remember to type ‘robots.txt’ (case-sensitive) under the ‘New File Name’ option. Then click on the ‘Create New File’ button
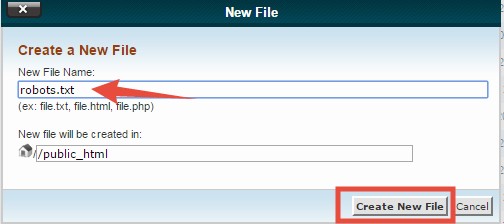
- The file will be created instantly
- Next, you need to edit the file
So you need to edit the newly created file now. We will show you how to edit the ‘robots.txt’ file below.
Fortunately, if your site already has a ‘robots.txt’ file and want to edit it then you can use the same method which will be described below to do that. Let’s see how to do that.
How to edit ‘robots.txt’ file from your cPanel?
To edit the file you need to be on the ‘public_html’ folder of your web server. You can follow the method described above to access the ‘public_html’ folder of your site. We assume that you are now on the ‘public_html’ folder of your web host. So, let’s move on to the next step.
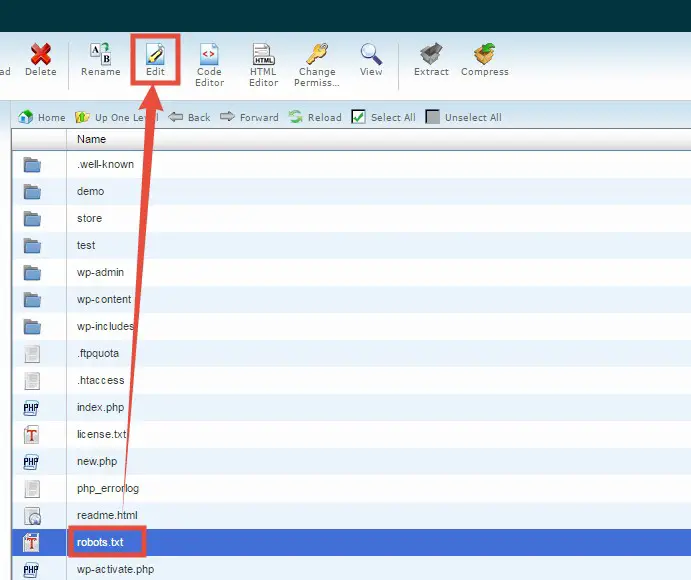
- You will find the ‘robots.txt’ file inside the ‘public_html’ folder
- Click on the ‘robots.txt’ file and then click on the ‘Edit’ button from the top menu
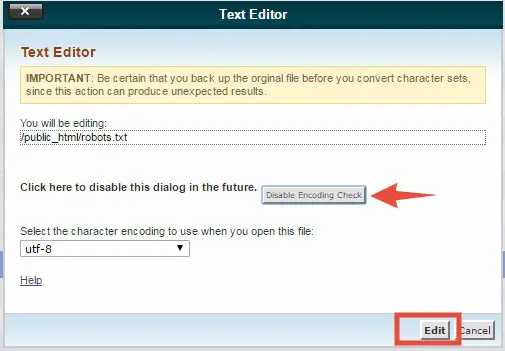
- A new popup will appear. If you don’t want to see this pop up in the future then you can click on the ‘Disable Encoding Check’ button. Later, click on the ‘Edit’ button to advance
- After that, a new tab will open on your browser where you will find the current codes of your ‘robots.txt’ files

- So, edit the code the way you want to or add new codes if that page was empty. For instance, we have added the sitemap URL to the code

- After you are done editing, click on the ‘Save’ button from the top-right corner of this screen
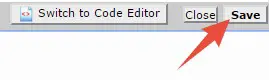
- You will see the ‘Success’ notification on the bottom-right corner of the page which indicates the changes were saved

Well done. You have just edited the ‘robots.txt’ file. Or, you might have just added new lines of codes to your newly created ‘robots.txt’ file.
Explanation of the code:
At this point, you know what to write in the ‘robots.txt’ file to get a specific result. Now, we will explain the syntax (code) format.
- ‘User-agent:’ is used to denote the search engines. Let’s say you need to allow Googlebot then you have to type ‘Googlebot’ after the ‘User-agent:’
- ‘*’ means all of the search engines. So, if you want to allow all of the search engines then you should use the * after the ‘User-agent:’
- If the ‘/’ or slash is used after the ‘Disallow:’, it means that the search engine is not allowed to crawl
- If you want to allow the crawlers, then do not use the ‘/’ after the ‘Disallow:’
Some important rules to remember to create ‘robots.txt’ file:
- The name of the ‘robots.txt’ file should be in all lowercase. It is case-sensitive. So, if you use the file name as ‘robots.txt’’/’robots.txt’/’robots.txt’ or anything like that then it will not work. So, always use lowercase and the name should be ‘robots.txt’
- A blank line on the code will tell the search engines that a new instruction needs to be followed. So, if you want to use multiple rules then use blank lines. For example, the code below has a blank line. First, it tells that ‘Googlebot-news’ is allowed to crawl your site but all of the other crawlers are not allowed in the second part.
User-agent: Googlebot-news

Allow: /
User-agent: *

Disallow: /
- You can add the URL of the sitemap of your website on the ‘robots.txt’ file. To do that just add the URL of the sitemap at the end of the code after the ‘Sitemap:’ part. Plus, add a blank line between the ‘Sitemap:’ and the previous codes. For example, the first part of the code below says that all of the crawlers are allowed and the last part says the URL of your sitemap.
User-agent: *

Disallow:
Sitemap: http://www.example.com/sitemap.xml
- All of the codes are case-sensitive too
- ‘robots.txt’ rules are just guidelines. Sometimes, a bot might not follow the rules. And if your site has already been indexed by the search engines, then it will not erase that. In case of that if you need to erase any URL form the search engines then you have to contact the search engine to erase the indexed URLs
- The ‘robots.txt’ file should be uploaded to the root directory of your website which means the ‘public_html’ folder of your web host account. Otherwise, the search engines will not find it
Wrapping it up:
If you have followed the guide above then it will not be a problem to add a ‘robots.txt’ file to your website. By doing this, you can easily allow or disallow search engine bots like ‘Googlebot, Bingbot, Yahoo! Slurp’ etc.
So, if you haven’t added a ‘robots.txt’ file yet on your site. It’s high time you do that. Trust us, it will increase your search visibility. Consequently, it will be very helpful for your web site’s SEO.