DISCLOSURE: This post may contain affiliate links, meaning when you click the links and make a purchase, we receive a commission.
There are many situations where you should block visitors from a particular country. That may be because you have a website with your native language. So, you don’t need visitors from other countries.
Again, your website might be attacked by bad bots from a particular country. From which you don’t receive a significant amount of visitors anyway, then you should block that country.
Another reason might be you want to secure your website from brute force hacks, DDoS attacks originating from a specific country. So, whatever the reason that you want to block visitors from a certain country/ies, you can do that with ease. You just need to follow this guide to know more.
In this guide, we will show you 3 different methods of blocking visitors from certain countries on your website in a step by step manner. As always, you will find screenshots attached to the guide for making it easier for you.
So, let’s get to the good part.
How to block Certain Country Visitor on SiteGround
First of all, we will show you how to block visitors from certain countries on websites hosted on a SiteGround web host. Then we will talk about other methods. In this method, you can use the awesome tool named as ‘IP Address Deny Manager’ from the cPanel of your SiteGround web host to block visitors easily. So, lets’ start.
Method 1. Block by ‘IP Address Deny Manager’:
If you want to use this method then you have to know the IP blocks/range of the country which you want to block. There’s an easy way out there to know that. So, let’s see how to do that.
How to find IP addresses for a particular country?
- Go this link from your computer browser. You will find a list of almost all of the countries here
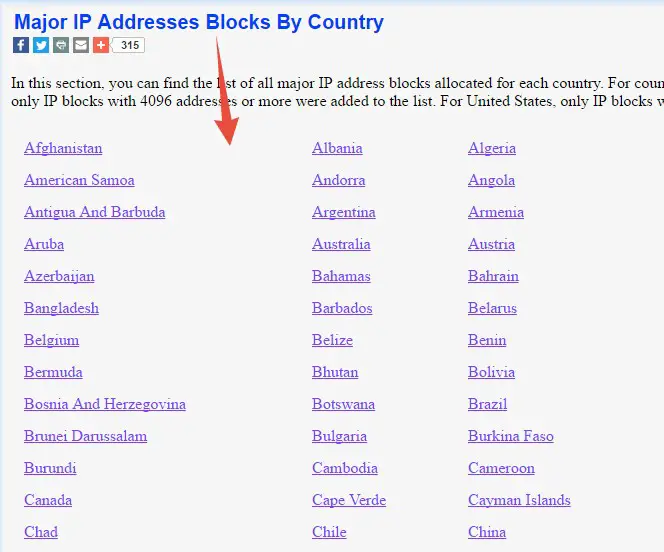
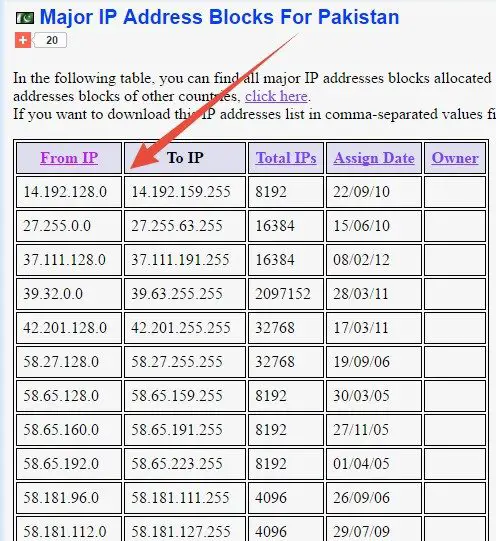
- Click on the name of the country which you are going to block. On the next age, you will find the list of the IPs
Now, you can proceed to block the IPs you found here via the ‘IP Address Deny Manager’ tool of your SiteGround web host.
Steps to follow:
- Log in to the cPanel dashboard of your web host
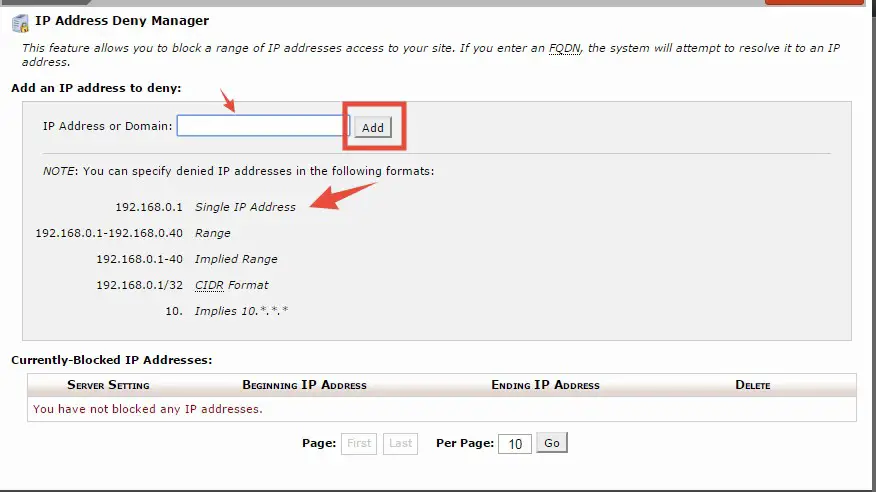
- Now, scroll down to the ‘Security’ tab. From there, click on the ‘IP Address Deny Manager’ button

- On the next page, you will be able to block all the IP addresses you want to. You will find a blank box where you would be able to enter the IP addresses which you want to block. You can follow the formats which are right below the blank box to enter the IP addresses
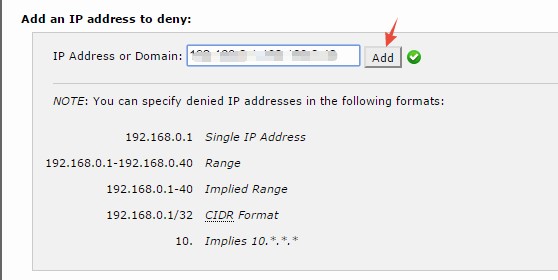
- So, enter an IP address and click on the ‘Add’ button. You can use the IP addresses which you collected in the previous section
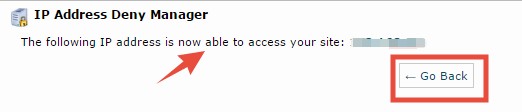
- In doing so, you will be taken to a page where you will find the confirmation that the IP addresses are successfully blocked. Click on the ‘Go Back’ button to proceed

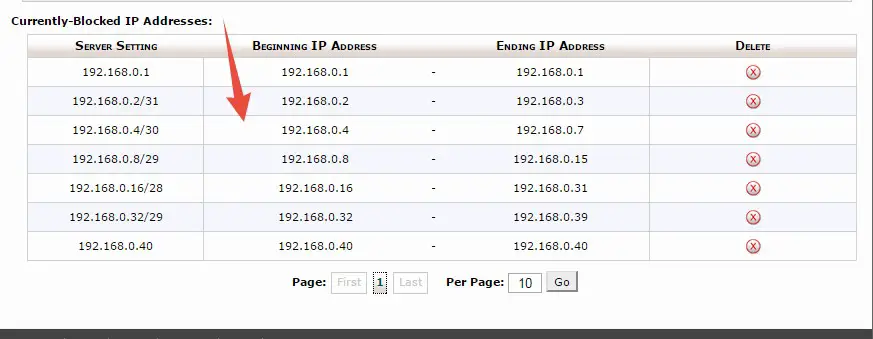
- You can add as many IP addresses as you can. After adding the IP addresses you will find all of the added IP addresses on the ‘Currently-Blocked IP Addresses’ section
- If you want to allow any of the blocked IP addresses then you can click on the ‘Delete/❌’ button from next to the IP you want to unblock

- On the next page, click on the ‘Remove IP’ button to finalize the settings
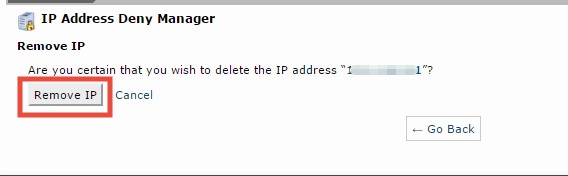
- Then on the next page, you will see the confirmation that the IP is now unblocked. Click on the ‘Go Back’ button to return to the previous page
If you want to follow this method, you can do that. But, the problem is you have to enter a lot of IP addresses to block an entire country. So, it is time-consuming and also puts huge pressure on your web server. So, we don’t recommend it. Instead of that, you can follow the methods below.
Method 2. Block by editing the ‘.htaccess’ file:
The second method is to block IP addresses using the ‘.htaccess’ file. In this case, you have to add the IP addresses which you want to block on your ‘.htaccess’ file. And, you know that an entire country has a lot of IP addresses. Additionally, the IP range changes a lot from time to time.
So, if you use this method, you might see that some of the users still can visit your site from the blocked countries. However, this method can still block most of the visitors from a certain country. So we want you to follow this method if you are OK with it.
This method can be divided into two parts. First, you have to acquire all of the IP Addresses of the country you want to block. Then you can add a specific rule/code to your ‘.htaccess’ file including those IPs. So, let’s see how to do that.
Part 1. Collecting the IP Addresses:
- Visit this link from your web browser
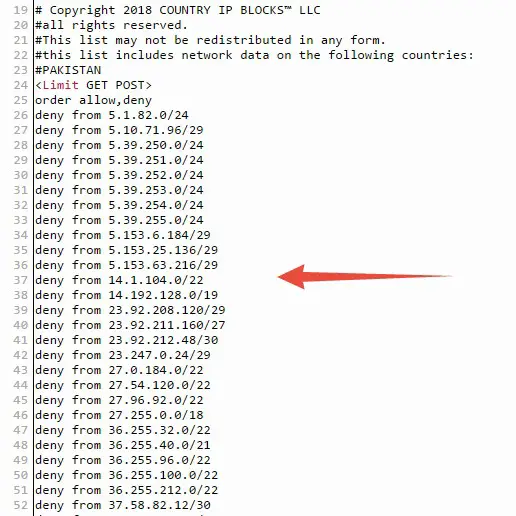
- Now, you will see find something like the image below on that page. Here, you can create a ‘.htaccess’ rule by including all of the IP Addresses available from any country/ies. That way, you don’t have to enter each IP addresses one by one
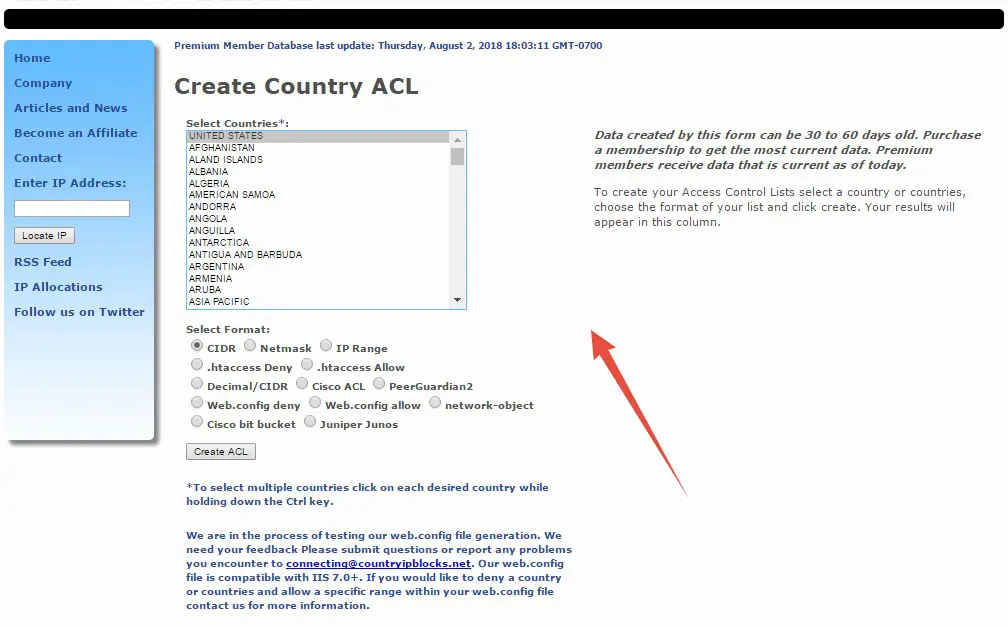
- So, first of all, select the country/ies from the ‘Select Countries’ box. Then select the ‘.htaccess Deny’ option from the ‘Select Format’ section. And, finally, click on the ‘Create ACL’ button and wait till it is being created
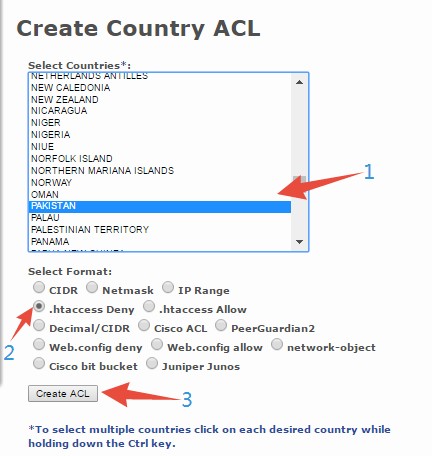
- When the file is created, you will find that on the right-hand side of the screen
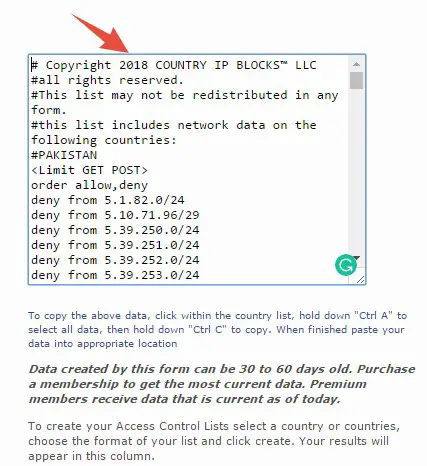
- You have to copy the entire data from the box. To do that, click on the data and press the ‘CTRL+A’ keys on your keyboard to select all. Then you can either use the ‘CTRL+C’ shortcut on your keyboard or just use ‘right-click’ and ‘Copy’ combination
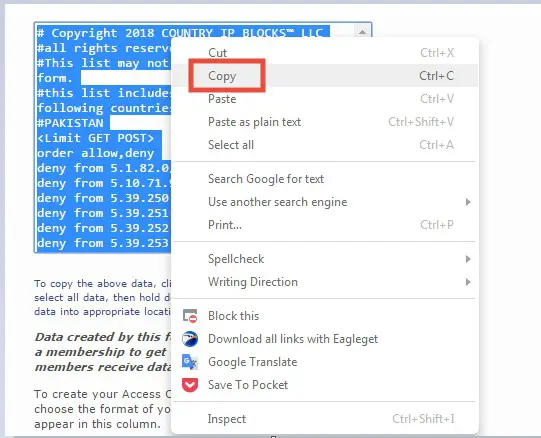
- Now, you have to paste this code on your ‘.htaccess’ file. So, we recommend you don’t copy anything else in the meantime or just keep a backup of the data or you can keep the tab open on your browser
Part 2. Adding the rule/code in the ‘htaccess’ file:
In this part, you will have to access the ‘.htaccess’ file via Cpanel. After that, you will be able to enter the codes successfully.
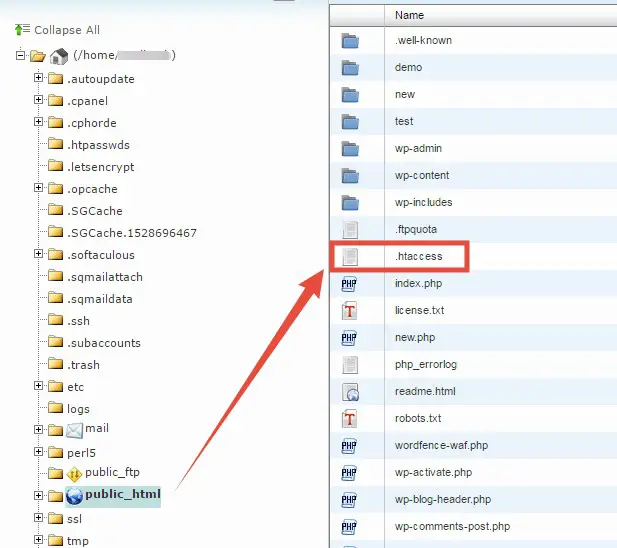
- After you are in the ‘public_html’ folder, you will find the ‘.htaccess’ file
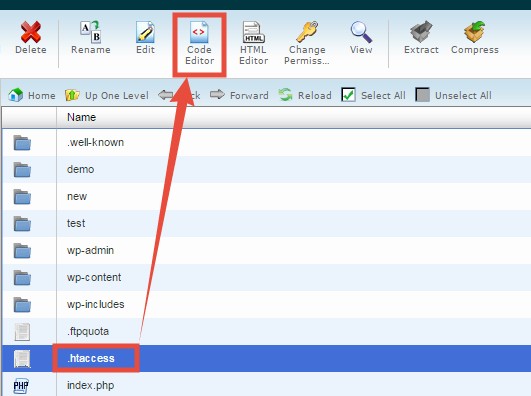
- Now, click on the ‘.htaccess’ file and click on the ‘Code Editor’ button from the top menu
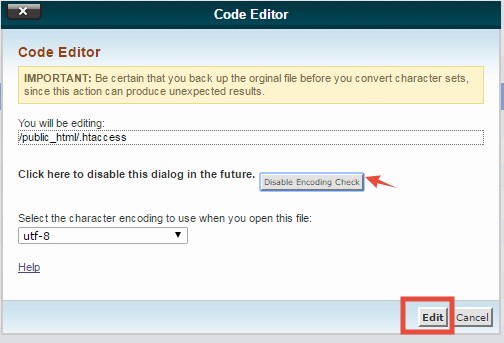
- A new popup will appear. If you don’t want to see this pop up in the future, simple, click on the ‘Disable Encoding Check’ button. And then, click on the ‘Edit’ button to proceed
- The next page will look similar to the image below
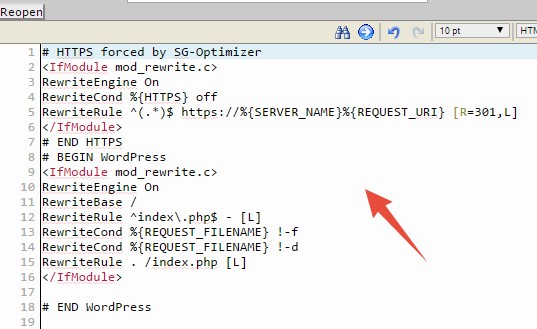
- You have to paste the new code below the current codes
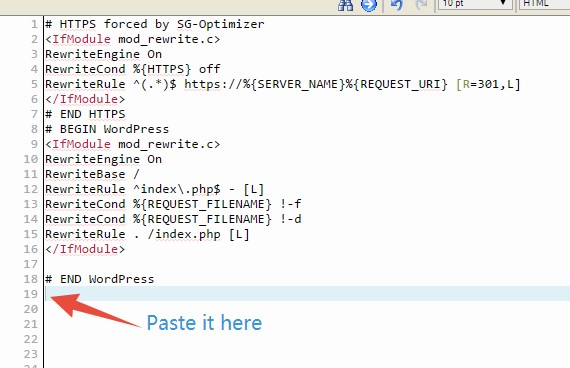
- So, paste the code there. It will look like the image below
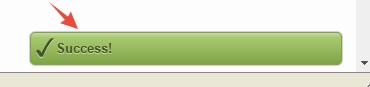
- After that, click on the ‘Save’ button from the top right corner
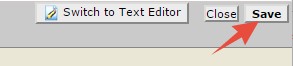
- Lastly, you will see a ‘Success’ notification on the bottom of the screen
- Now, you can check by using a VPN if you can access your website using the IP address of the blocked country/ies
Well done. Now, you know how to block visitors from certain countries using the ‘.htaccess’ file. Next, we will show you how to use a plugin to block visitors from certain countries.
Method 3. How to use plugins to block countries (For WordPress only):
If you are a WordPress user and want to block any country with ease then you should use plugins. There are a lot of plugins which can be used to block particular IP addresses. But, we will show you only one example here. Yet, you can use any other plugins of your choice.
The name of the plugin we are talking about is ‘iQ Block Country’. So, you need to install and activate the plugin first. Then we can proceed to the customization. This method is also a lengthy one. So, we will split it into several parts to make it easier to follow. So, let’s begin the process.
Steps to follow:
Part 1. Install the plugin and download the required database:
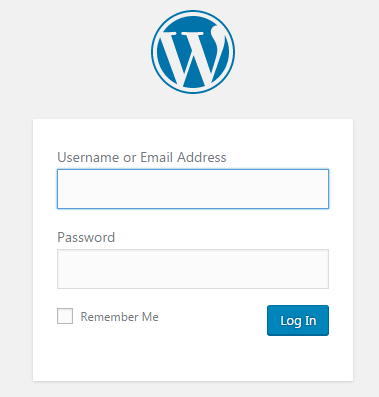
- Log in to the WordPress dashboard of your website
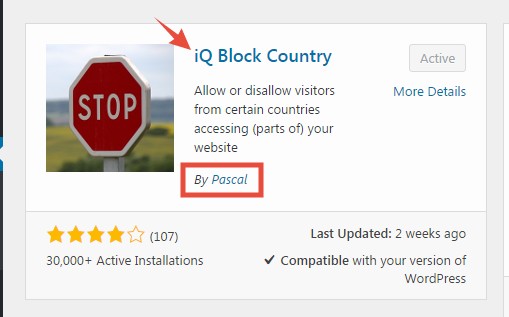
- Install and activate the plugin (‘iQ Block Country’), developed by ‘Pascal’ on the back-end of your WordPress website
- After that, you will see a notification from the ‘iQ Block Country’ plugin on top of the screen. It basically says that the plugin needs a database to run successfully. So, you have to download that database and upload it to a particular place (we will show you exactly where to)

- First, download the database by clicking on the link next to the ‘please download the database from:’ section. Or you can also click here to download the file

- This database will be a compressed file. So, you have to unzip it
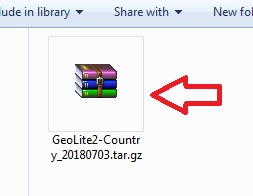
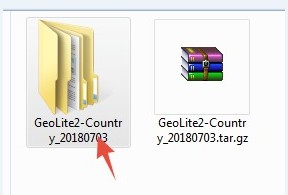
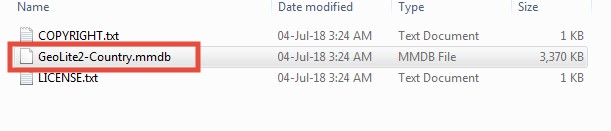
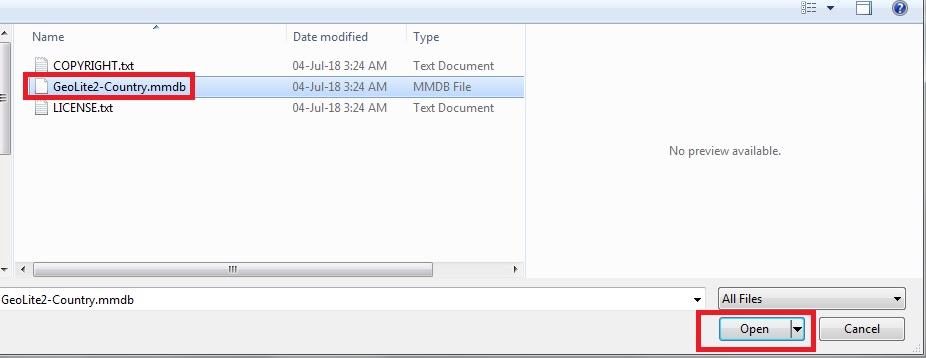
- Now, open the folder which you just unzipped. You will find a file called ‘GeoLite2-Country.mmdb’ there. This is the file you need to upload next on the following location of your web host: /home/yourdomain/public_html/wp-content/uploads/GeoLite2-Country.mmdb
Part 2. Uploading the ‘GeoLite2-Country.mmdb’ file:
To make the upload process easy, we will walk you through the whole process. So, let’s go.
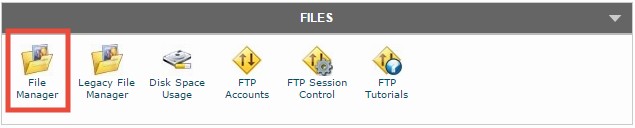
- Log in to your cPanel dashboard
- Then click on the ‘File Manager’ button from the ‘Files’ section
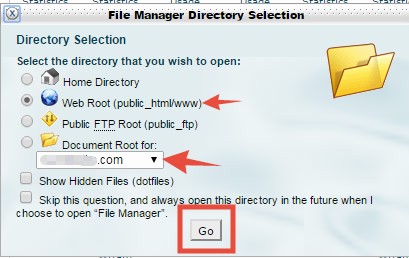
- Click on the ‘Go’ button from the Popup
- In the next page, you will have to open the ‘Wp-content’ folder by double clicking on it
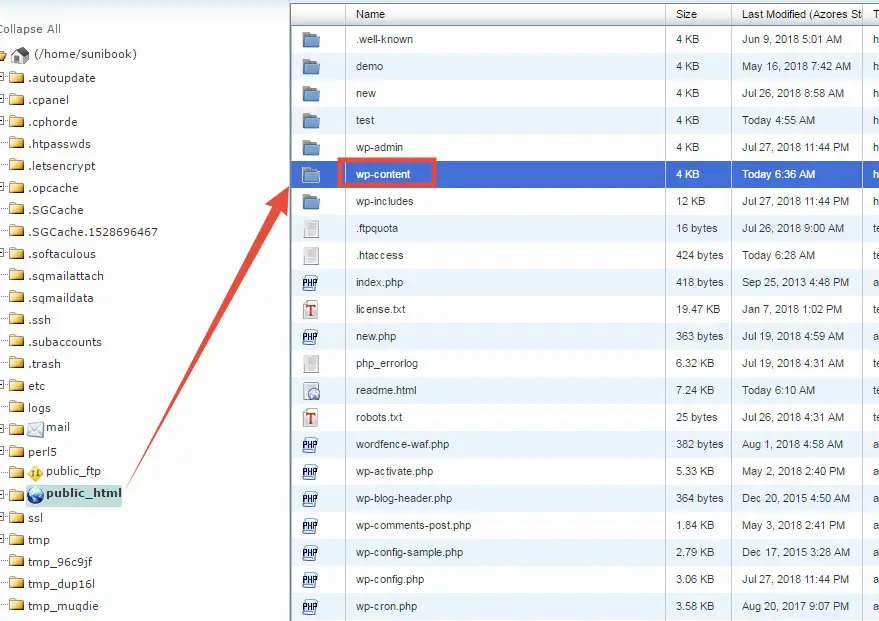
- Then open the ‘Uploads’ folder from the next page
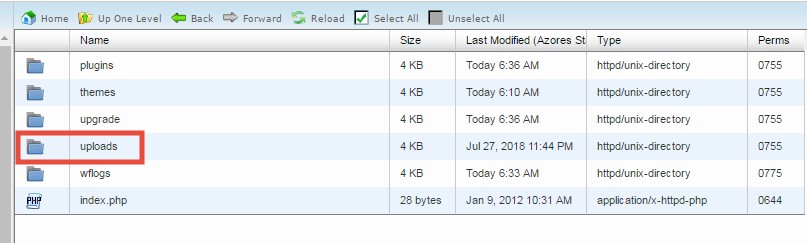
- And, it is the folder where you are going to upload the ‘GeoLite2-Country.mmdb’ file. So, click on the ‘Upload’ button from the top menu
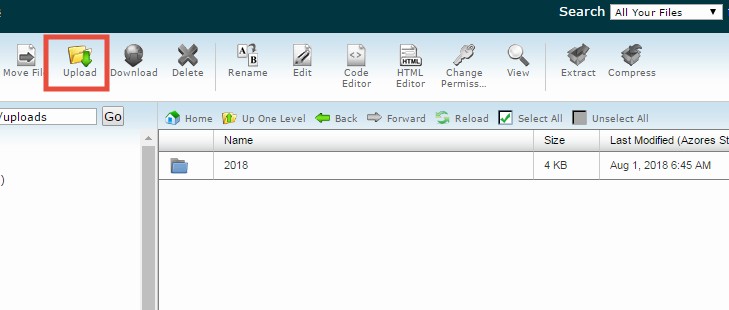
- In doing so, you will see a new tab will be opened on your browser. From that tab, click on the ‘Choose File’ button
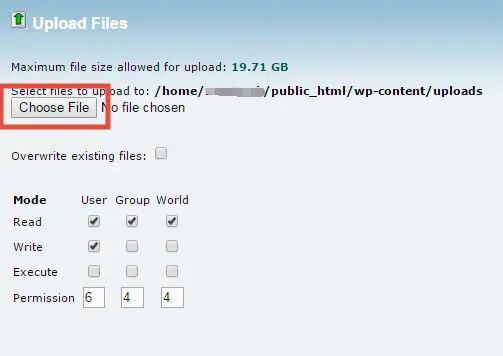
- And, locate the ‘GeoLite2-Country.mmdb’ file and upload it from your PC
- You will see the progress of upload in the bottom-right corner of the screen

- When the upload is completed, click on the ‘Go Back to…’ button and return to the previous folder and you will find that the file was uploaded successfully

Now that you have uploaded the file, we can start to configure the plugin. So, go back to your WordPress dashboard.
Part 3. Configure the ‘Settings’ to block certain countries:
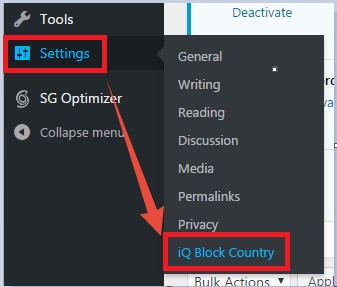
- Now, from the left sidebar of the WordPress dashboard, hover your mouse pointer over the ‘Settings’ option. From the sub-menu, click on the ‘iQ Block Country’ option
- From the next page, click on the ‘Frontend’ button
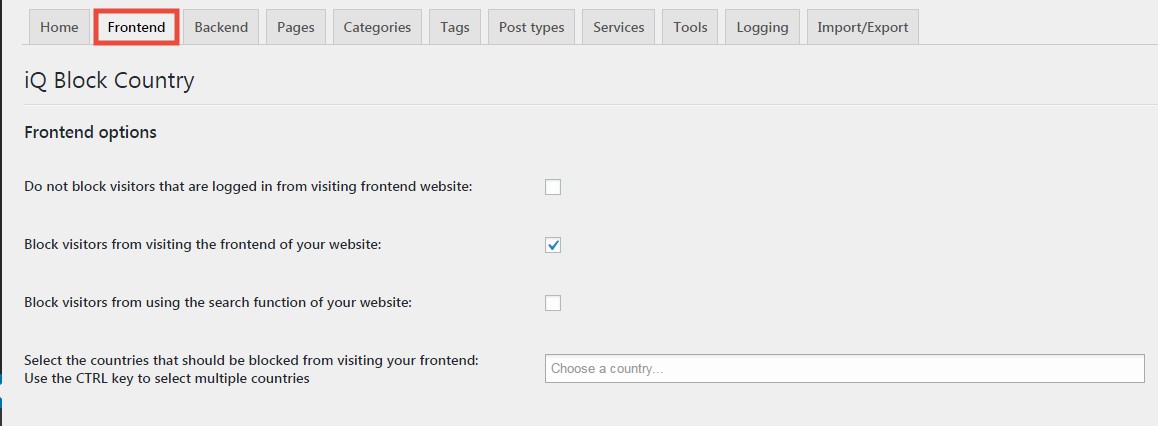
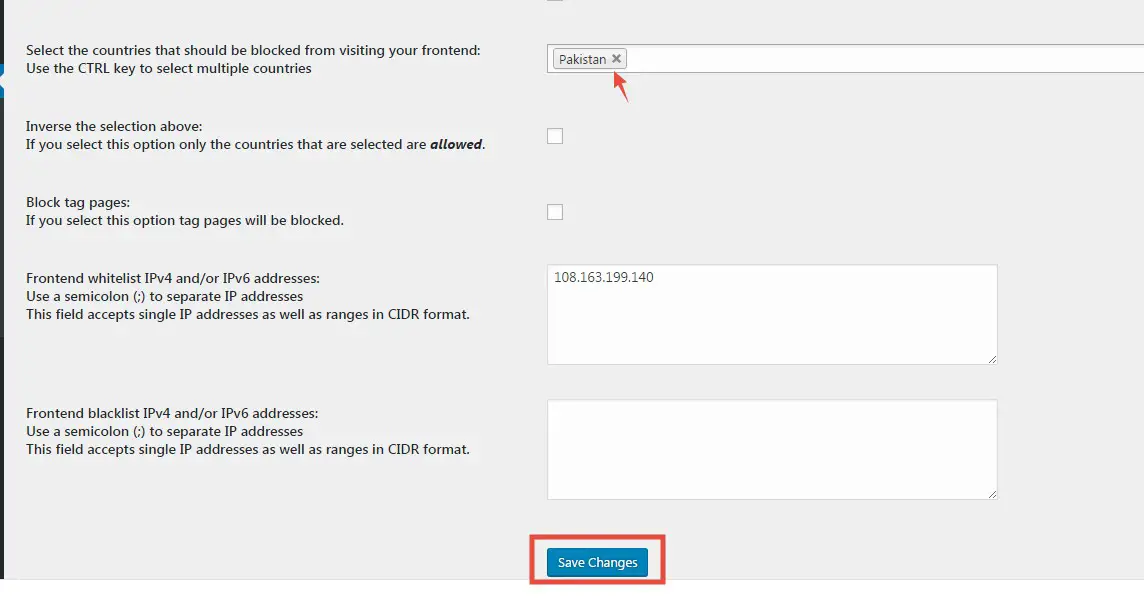
- That will take you to the ‘Frontend’ options. You have to select the countries you want to block on the ‘Choose a country…’ box

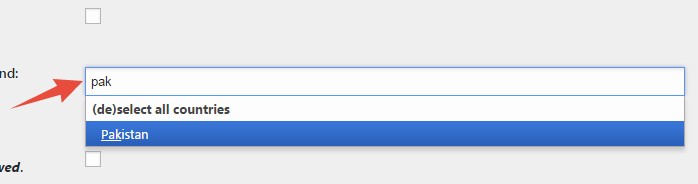
- You can select any of the countries from the drop-down menu. You can also just type to filter the names out. If you want to block more than one countries then keep holding the ‘CTRL’ key on your keyboard and select all of the countries one by one
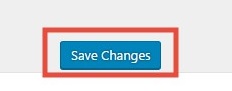
- After you have selected the country, don’t forget to save the changes by clicking on the ‘Save Changes’ button from the bottom of the page
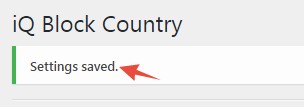
- You will see a ‘Settings saved’ notification on top of the page
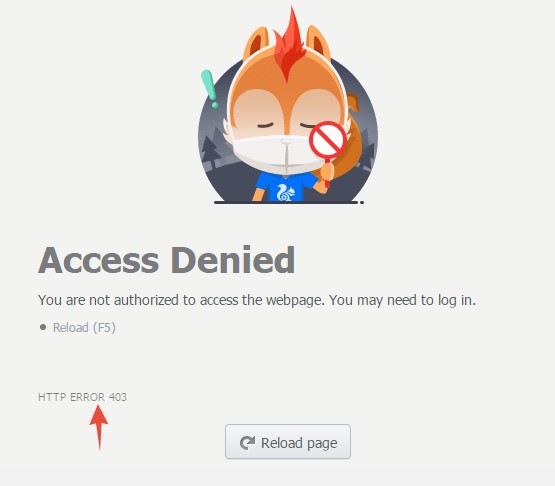
- Now, you can try accessing your website using VPN with a blocked IP. Then you will see that your access is denied and a 403 Error code will be shown
- If you want to unblock the country. Simply, click on the ‘❌’/’cross’ button next to the name of the country
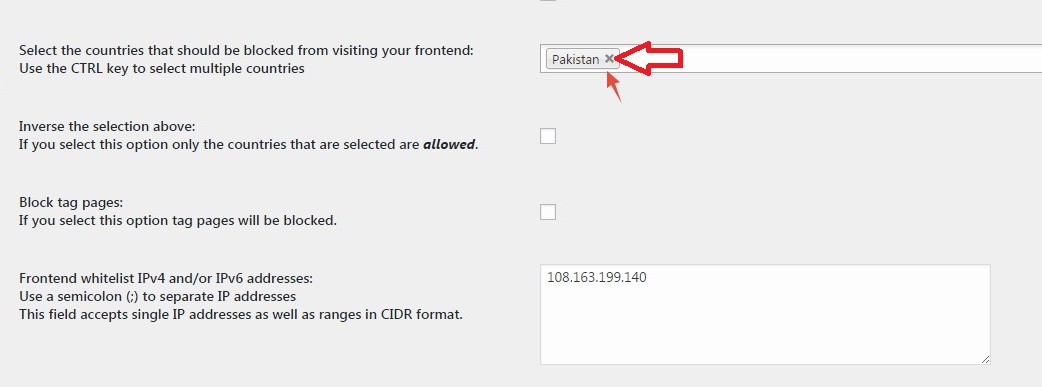
- And then save the changes again
Last words:
So, you have just learned various methods on how to block visitors from certain countries to access a website. We hope this will help you if you want to block any particular countries from your website.
There are few other methods to do this such as using a reverse proxy like ‘Cloudflare’. But, we think the methods we have described here will be enough for you.
You can use whichever you like. However, you have to consider that all of these methods come with a few pros and cons. So, not all of them will suit you. That is why we have given you enough options to choose from. Now, it is up to you which you are going to use.