DISCLOSURE: This post may contain affiliate links, meaning when you click the links and make a purchase, we receive a commission.
It is no secret that online shopping is getting popular day by day.
So, if you want to expand your business. You should open an online store. You may have already thought about this & gone to make a new website which would work as an online store.
But, it is possible that you have been bamboozled by the enormous amount of settings and technicalities. By that time, you might have already assumed that it is not possible to set it up by yourself.
But the truth?
It is actually very easy to set up an online store. You just need to buy a domain name and hosting account at first. Then install a CMS (Content Management System). For an online store, it is better to install an e-commerce based CMS. And, ‘OpenCart’ is one of the most popular e-commerce software out there.
Today, we will be sharing the process of installing ‘OpenCart’ on a SiteGround web host. So, if you are searching for this tutorial. You can start to follow along. We will describe all of the steps with screenshots. So, it will be pretty easy to understand.
So let’s get busy.
Read also: Top OpenCart Hosting
Feel free to Subscribe to Our YouTube Channel if you like this video!
How to install ‘OpenCart’ using ‘Softaculous’ on SiteGround
Here, we will share the easiest method to install ‘OpenCart’ on ‘SiteGround’ hosting. There are also other methods available. But, we recommend this method. Because it is very much straightforward and also saves a lot of time. So, let’s go.
Step 1:
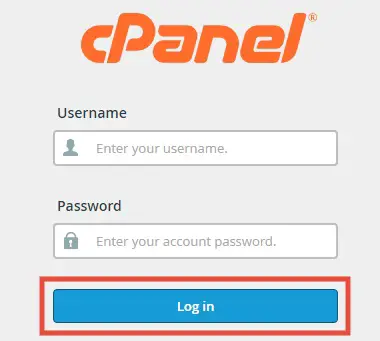
- Login to your SiteGround cPanel account
- Under the ‘Auto installers’ tab, you will find the ‘Softaculouls’ button. Click on the ‘Softaculous’ button

It will get you to the ‘Softaculous’ Script installer page. From this page, you have to locate the ‘OpenCart’ button. You can actually find it in 3 ways. And, you can follow any one of these, it is up to you. So, let us show you how…
Step 2:
#1:
- If you look at the top-right corner of the screen, you will find a ‘Search’ box

- Start typing ‘OpenCart’ (case doesn’t matter) on the search box. Under the search box, some auto-suggestions will start to appear. Now, when you will see the ‘OpenCart’ button on the auto-suggestion box. Click on it
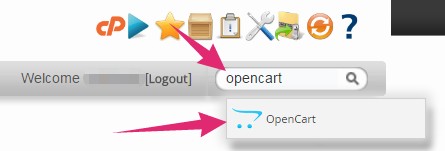
- Or if you don’t find ‘OpenCart’ on auto-suggestion box. Just type ‘OpenCart’’ and click on ‘Enter’ on your keyboard to continue
Or #2:
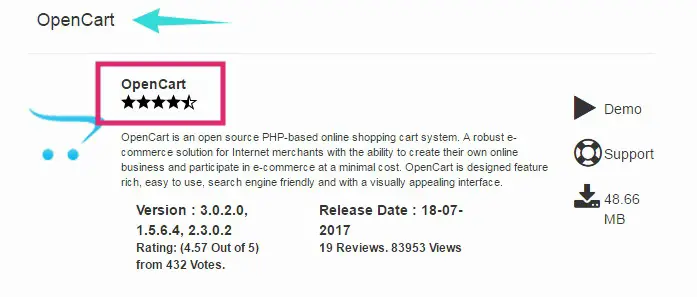
- Look at the left side of the page. You will find a category named ‘E-Commerce’. Click on the ‘E-Commerce’ button. Then, on the right side of the page, you will see a lot of software’s names are appearing.
- If you scroll down a bit, you will see the ‘OpenCart’ button there. Now, you just have to click on the big ‘OpenCart’ button to proceed
Or #3:
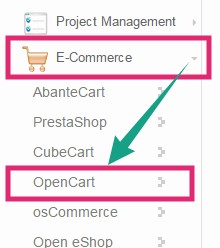
- Alternatively, you can just click on the little arrow in front of the ‘E-Commerce’ category. Then a new sub-category will appear. There, you will find the ‘OpenCart’ button to click on it
Step 3:
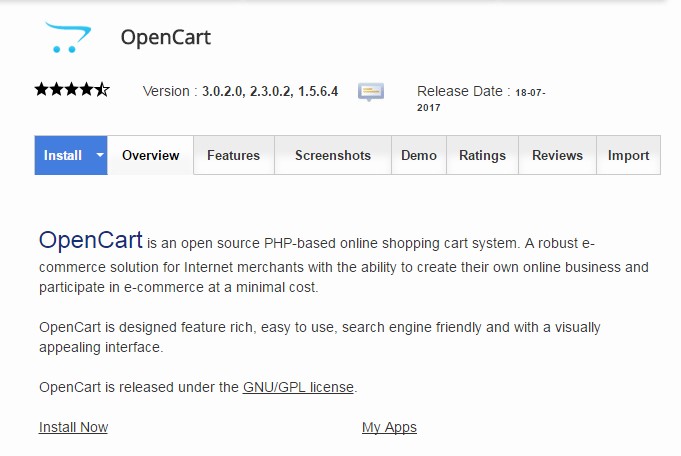
At this point, you will be at the ‘OpenCart Overview Page’. On this page, we will start the installation process. So, without further ado. Let’s start the installation.
Getting Started:
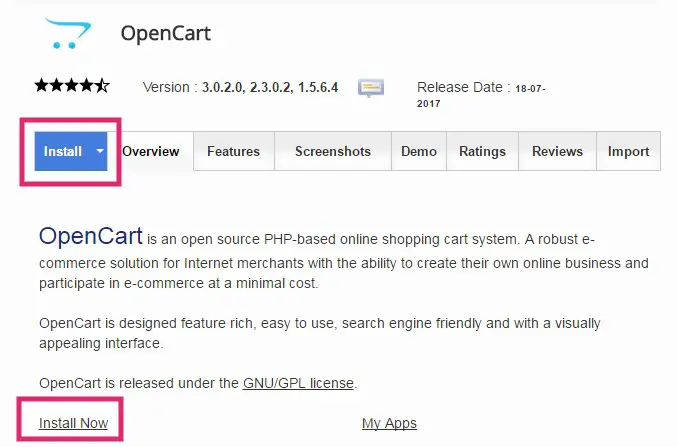
- Click on the blue colored ‘Install’ button or the ‘Install Now’ on the bottom of the page. It will open the installation page
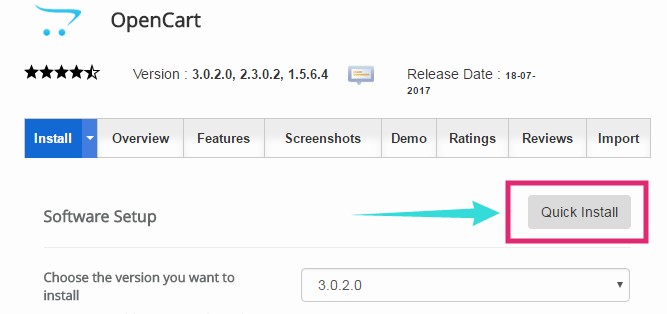
- In the installation page, you will see that there are two different methods to follow. By default, it will take you to the ‘Custom Install’ procedure. And, another option is the ‘Quick Install’ method.
In this guide, we will walk you through the ‘Custom Install’ method. Because it has some extra options as well as all the options which you will find in the ‘Quick Install’ method. Undoubtedly, it is the best option to follow. As a result, we will also cover the ‘Custom install’ on this article. Let’s get down to the business.
- If you want to use the ‘Quick Install’ method, just click on the ‘Quick Install’ button from the top
Custom Install:
The ‘Custom Install’ method comes with 4 different sections to configure. All of the sections are easy to set up. These are just some forms to fill up. So, we will feature all of these 4 sections one by one in this next part of the article.
Software Setup:
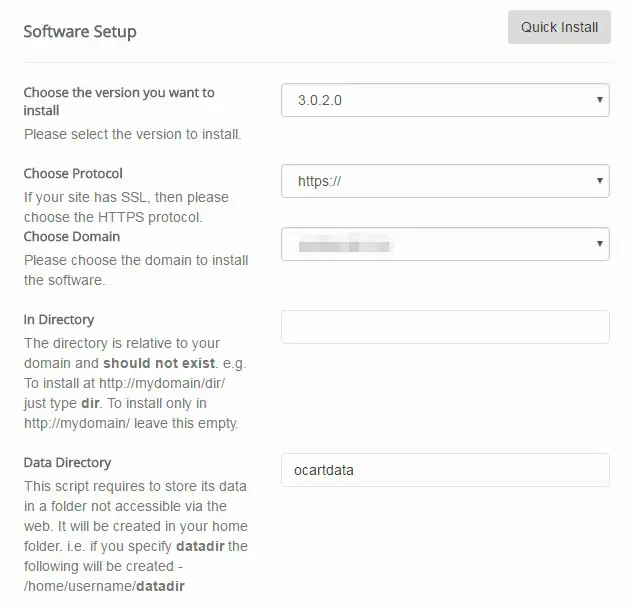
- Choose the version: Here, you always choose the latest version of the software from the drop-down menu. In our case, it is the 3.0.2.0 version

- Choose Protocol: You have to choose the protocol of your site in this section. Remember, if your site has SSL protection, then choose the ‘https://’ option. Otherwise, just select the ‘http://’ option. The other two options i.e. ‘https:/www/’ & ‘http://www’ are not recommended by us. But, you can use them if you want to

- In Directory: Generally, you can skip it. The rule is, if you want to install ‘OpenCart’ directly into your main domain then keep this box empty. So, if visitors use the address ‘yoursite.com’, then they will arrive at your ‘OpenCart’ site. However, if you want to install it other than your main domain. Then you can type the directory name on the box. So, if you type ‘store’ then visitors will find your ‘OpenCart’ site on the address ‘yoursite.com/store’. We think you get the idea

- Data Directory: There will be an auto-generated value on this box. You don’t need to change anything

Store Settings:
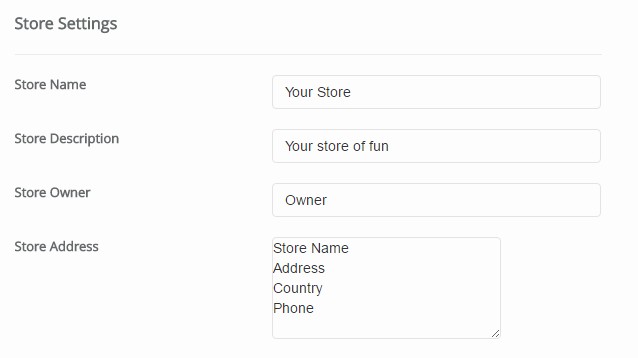
This section is about your online store. The information you provide on this action will be used on the front-end of the store. So, try to give the appropriate information on each of the boxes. You can also change this information later.
Admin account:
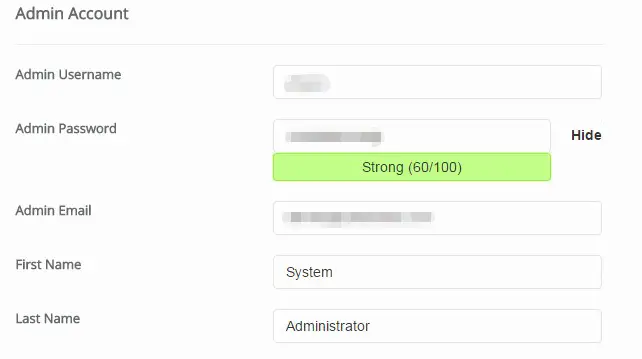
This is a very important section. Save or note down all of the information from this section.
- Admin Username: There will be a username in the box already. You can keep that or you can change to any other names. But, make sure that you don’t use any general names like Admin, User etc. Because these names are easy to guess for the hackers. So, it will be very harmful to your account
- Admin Password: It is same as the above. If you like the default password. You can keep it. Or just replace it with a new one. Remember to save the password somewhere safe
- Admin Email: Use a valid email address. Your login credentials will be sent to this email address. Also, if you need to reset your password, then it will be needed

- Use anything as the ‘First Name & ‘Last Name’. As always, you can keep the default names too
Advanced Options:
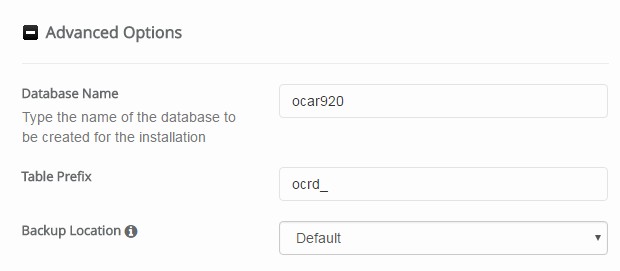
If you click on the little ‘+’ icon, the ‘Advanced Options’ will become visible. If you don’t have any clue about this section. You don’t have to change anything here. Just, save the ‘Database Name’ and ‘Table Prefix’. Sometimes this information can come in handy.
Install:
- When you are pleased with all of the information you provided in the above sections. You can click on the ‘Install’ button. It will momentarily begin the installation process

- You can see the progression of the installation in the progress bar. Do not close that page until the progress bar reaches 100%

- When the installation is finished, you will see a ‘Congratulations’ message on the page
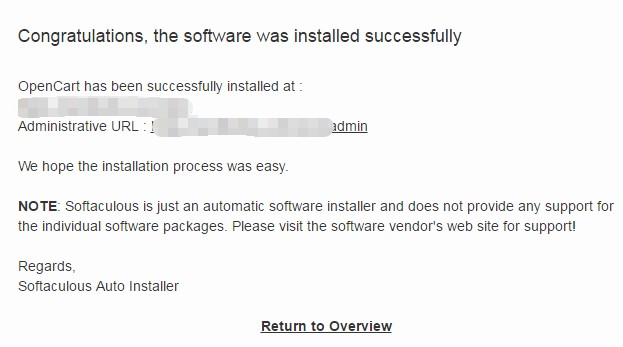
- You will also find the ‘Administrative URL’ of your ‘OpenCart’ website’s admin panel. It’s better if you save it or at least bookmark it
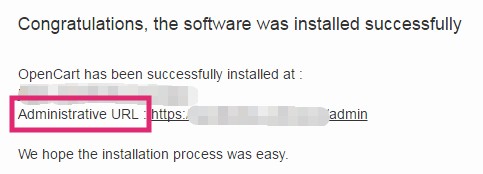
Pro Tip: The default ‘OpenCart’ admin panel login URL structure is like ‘yoursite.com/admin’. You need to just replace ‘yoursite’ with your actual domain name
Log in to your site’s Admin Panel:
- Go to the administrative URL of your new ‘OpenCart’ site
- Now, enter the username and password (which you used in the ‘Admin Account’ section earlier) in their respective places
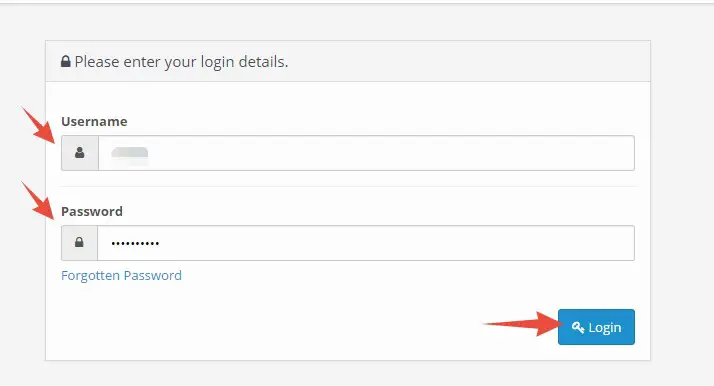
- And click on ‘Login’ to enter into the backend of your site
And, just like that, you have learned the process of installing ‘OpenCart’ on a ‘SiteGround’ web host account.
Last but not Least:
We are at the end of this article. As always, we have tried our best to share the method of installing a CMS on a SiteGround web host by making it as easy as possible.
Today, it was about ‘OpenCart’. As you have learned the process. It’s time to implement it on your own. So, go & build your online store using the ‘OpenCart’ CMS. And, start selling right away.

