DISCLOSURE: This post may contain affiliate links, meaning when you click the links and make a purchase, we receive a commission.
Are you sick and tired of hiring a person every time you want to install a CMS on your hosting account?
Wouldn’t it be great if you could install any CMS (Content Management System) on your web host all by yourself?
We know everyone wants that. But chances are, you’re wondering what to do or where to go first.
What if I told you that today is your lucky day? Especially if you are a Siteground web host user who wants to install ‘TYPO3’ on your site. Because in this article, we are going to tell you how to install ‘TYPO3’ on a Siteground web host step by step.
But there’s more.
Not only we will share the entire process but also we will attach screenshots to each step. So, if you follow this guide, you will be able to install ‘TYPO3’ without facing any issues at all.
Feels risky, right?
It doesn’t have to be. It’s easier than you think. Just follow along.
So here we go.
Read also: Top TYPO3 Hosting
Feel free to Subscribe to Our YouTube Channel if you like this video!
How to install TYPO3 on Siteground via Softaculous
You may already know that there are a number of ways to install ‘TYPO3’on your SiteGround web host. But, we will just share the best and easiest method of them all.
To tell you the truth, the easiest method of installing ‘TYPO3’ is to use the Softaculous auto script installer. So, below you will find the step by step by guide to install ‘TYPO3’ using the Softaculous auto installer.
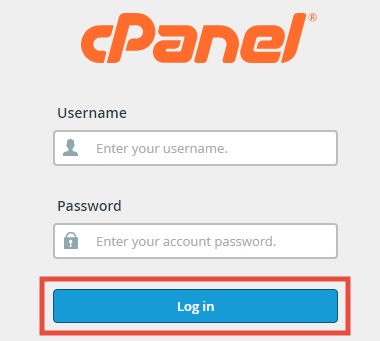
- Log in to your SiteGround cPanel
- Find and click on the ‘Softaculous’ icon from the cPanel dashboard
- It will open the Softaculous script installation page
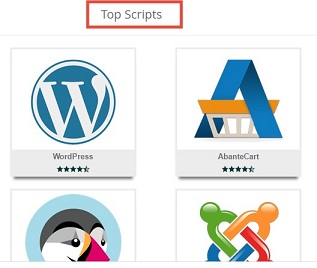
You will see all of the popular scripts on this page. But, you won’t find the ‘TYPO3’ on the list. There are a number of ways to find the ‘TYPO3’ icon. For you, we will share every way available in the next section. You can follow the method which you find the easiest for you.
#1:
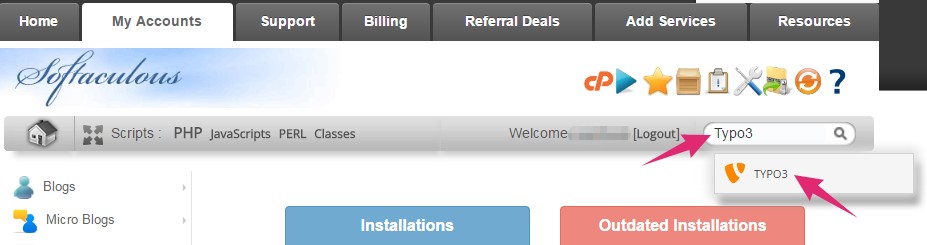
- Navigate to the ‘Search’ box on the top-right corner of the Softaculous script installation page
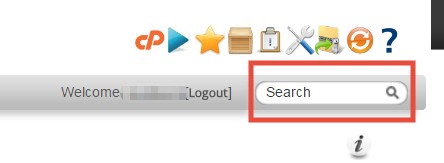
- Now, start typing ‘Typo3’ on the search box and auto-suggestion will appear. You will find ‘TYPO3’ icon has appeared on the auto-suggestion tab under the search box. Click on the ‘TYPO3’ button and you will be taken to the ‘TYPO3’ installation page

Type on the search box
#2:
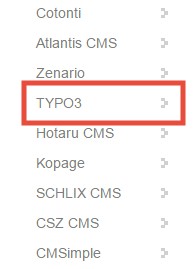
- From the left side of the Softaculous script installation page, click on the category called ‘Portal/CMS’. And, you will see that a lot CMS name will appear on the right side of the page
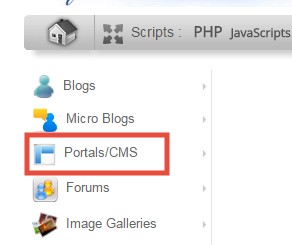
- ‘TYPO3’ will be on that list. But, you have to scroll down to find ‘TYPO3’ icon. After finding, click on the ‘TYPO3’ button and you will be redirected to the next installation page
#3:
- Another way is to click on the little arrow right next to the category ‘Portal/CMS’. That will open a drop-down menu
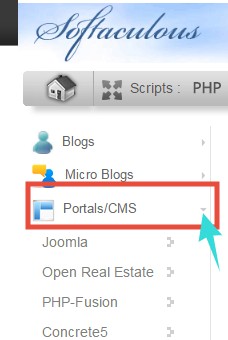
- If you start scrolling down, you will find the ‘TYPO3’ icon. Click on the ‘TYPO3’ icon and you will go to the ‘TYPO3’ overview page
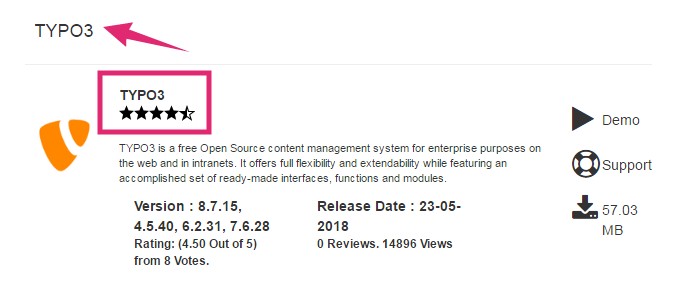
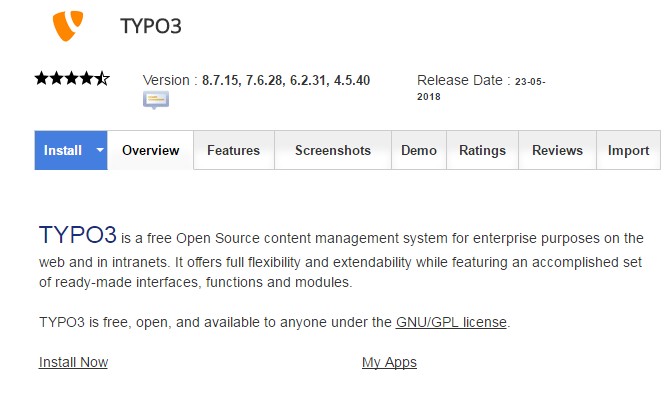
As you have found the ‘TYPO3’ icon & are on the ‘TYPO3’ overview page, you can start the installation process. So, let’s step forward.
Start Installation:
- Click on the ‘Install Now’ or ‘Install’ button (blue button) on the overview page to open the installation tab
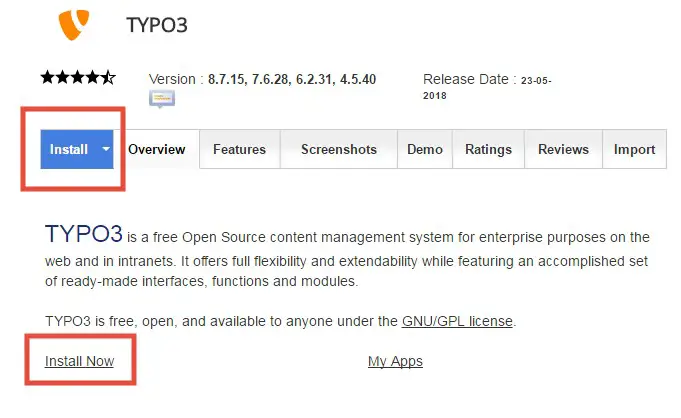
- By default, it will open the ‘Custom Install’ method
Actually, this is the best option. As a result, we will also cover the ‘Custom Install’ method in this post. If you want to use the ‘Quick Install’ method. You can click on the ‘Quick Install’ button from the top-right corner. It depends on your reference.

Using the ‘Custom install’ method, you will see multiple forms to fill up under the install tab. We are going to walk you through the whole process section by section down below. Let’s start with the first section named ‘Software Setup’.
Software Setup:
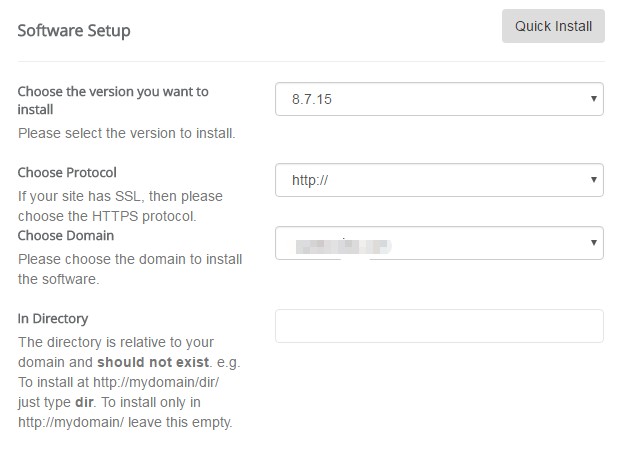
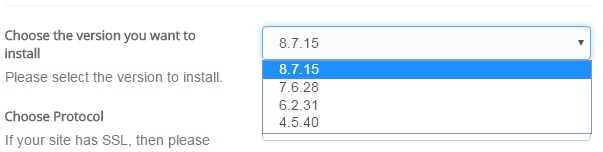
- On the first option, you can select the version of ‘TYPO3’ you want to install on your site. Always, choose the latest version from the list
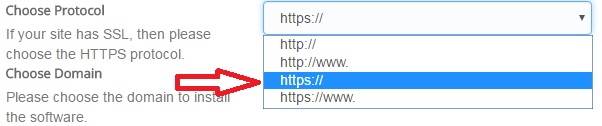
- Then, you can choose the protocol of your website. It is pretty easy to decide. If you have SSL protection with your domain, you can select the ‘https://’ If your domain name doesn’t come with SSL protection, choose the ‘http://’ option. The other two option is not popular. So, we don’t recommend to use either of them i.e. ‘https://www’ & ‘http://www’
- On the ‘Choose Domain’ box, select your preferred domain on which you want to install the ‘TYPO3’ CMS. if you have added only one domain name to your hosting account. Eventually, it will be automatically selected
- You can skip the ‘In Directory’ box
Site Settings:

- Type your site name on the only box this section has
Admin Account:
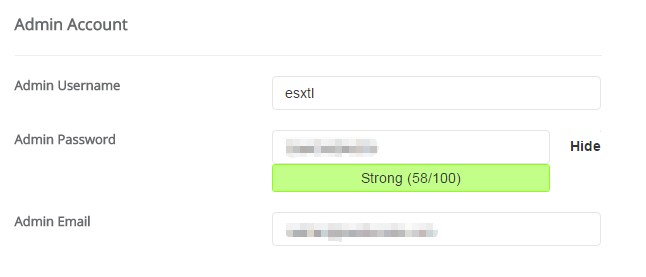
Note: Save/note the information of this section. It will be needed later when you are going to log in to your ‘TYPO3’ admin panel
- There will be an auto-generated admin username. If you like it. You can keep it. You can also provide your preferred username. It’s up to you. However, do not use any common username like ‘admin, user, test, demo’ etc.
- On the ‘Admin Password’ box, use a strong password. Otherwise, you can keep the auto-generated one
- On the ‘Admin Email’ option, use a valid email It will be used to reset your password. And any account related mail will be sent to this email

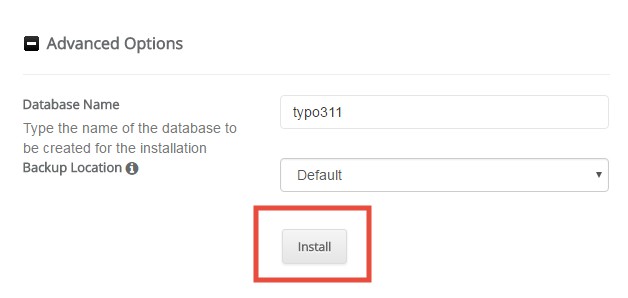
Advanced Options:
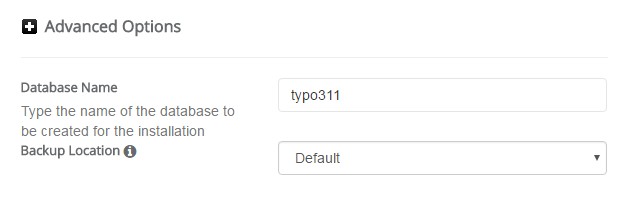
- You don’t have to change anything from this section. But, you can save the database name. It may come in handy later
Finalizing the installation:
- If you have followed all the previous instructions. By now, you have filled up all the required information. So, double-check the information you provided. If you are content with all of the settings and configuration, it’s time to start the installation process.
- Click on the ‘Install’ button from the bottom of the page
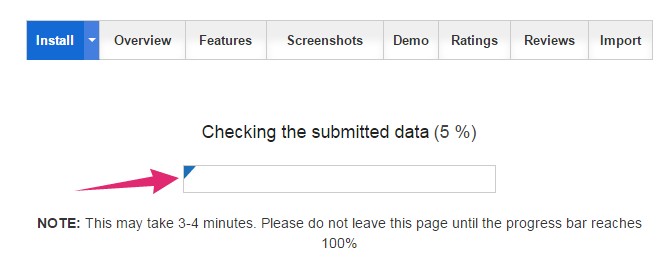
- The installation will begin instantly. Wait for the process to be finished. There will be a progress bar to indicate the installation progress. At this point, do not close this page until it ends
- As the installation comes to an end, you will be taken to the next page. You will see a new ‘Congratulations’ And, you will find the ‘Administrative URL’ on that page too. You should bookmark this URL
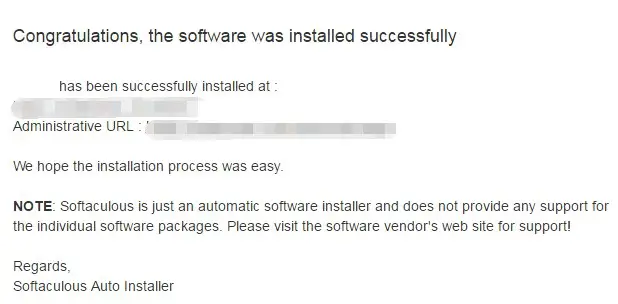
Tip: The default structure of the ‘Admin URL’ of ‘TYPO3’ admin panel is ‘yoursite.com/typo3’. You just need to change the part ‘yoursite’ with your site’s domain name
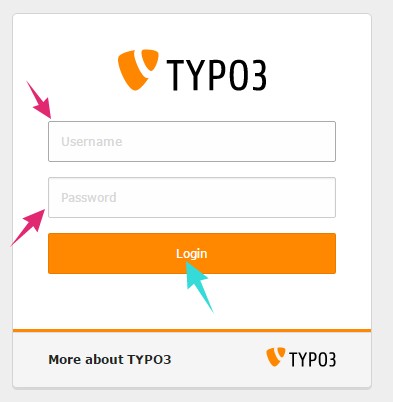
Log in to your new ‘TYPO3’ admin panel:
- Just click on the ‘Administrative URL’ and you will be on the ‘TYPO3’ login page
- Enter your username, password and click on ‘Login‘ to enter into the backend/admin panel of your ‘TYPO3’ site. The username and password will be the ones you provided in the ‘Admin Account’ section. As we have told you to save it, you can use that to log in anytime. The login credentials will also be sent to the ‘Admin Email’ address
So what does all this mean?
It implies that you have just learned the easiest way to install ‘TYPO3’ on your Siteground account.
The bottom-line:
So there you have it. The secret to installing ‘TYPO3’ on a Siteground web host. We hope that it was easy to follow. Now, it’s your turn to take the wheel.
Go out there, show the world your new ‘TYPO3’ website. We hope this guide will help you one way or another. And, that’s all that really matters.