
DISCLOSURE: This post may contain affiliate links, meaning when you click the links and make a purchase, we receive a commission.
Does your website load so slowly?
If that’s the case, then you need to take it seriously. Because ‘Google’ & other search engines take page speed as a factor for ranking websites. If your site has slow load speed, it won’t rank higher.
On the other hand, if the website loads faster it will rank higher. And visitors love faster websites too. It’s like killing two birds with one stone.
One way to increase the page speed of your website is to use cache plugins. There are a lot of cache plugins out there. But, not all of them works like they should. ‘W3 Total Cache’ is a popular one and luckily it works like a charm.
However, it’s only compatible with ‘WordPress’. So, if you want to use it, you need to install WordPress in the first place. If you need help, you can follow our in-depth tutorial on installing WordPress on a SiteGround web host. Otherwise, if ‘WordPress’ is already installed on your site, you are good to go.
In this article, we will reveal the process of installing & configuring the ‘W3 Total Cache’ plugin. To make it easier, there will be screenshots added to each step.
So let’s get to it.
How to Install and Setup W3 Total Cache on SiteGround
Steps to follow:
Note: You can use only one cache plugin at a time. So, if you have installed any other similar plugin. Uninstall those plugins first
- Log in to your WordPress dashboard first
From the Dashboard, we have to go to the plugin installation page to install any plugin. There are 3 methods which can be used to go to the plugin installation page. In the next part, we will explain all of them. You can use any one of them. So, let’s see.
#1:
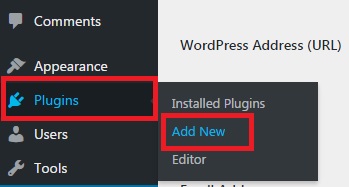
- Hover your mouse pointer over the ‘Plugins’ button from the left sidebar. A new sub-menu will be visible shortly. Click on the ‘Add New’ button from the sub-menu to proceed
#2:
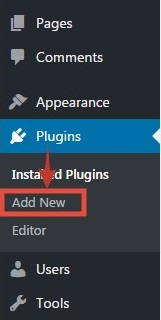
- Or, you can click on the ‘Plugins’ button which will be on the left sidebar. And, then click on the ‘Add New’ button under the ‘Plugins’ button itself
#3:
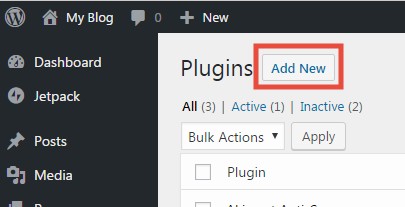
- Another way is to click on the ‘Plugins’ button and then you will see ‘Add New’ button on the top of the screen. Click on that button to continue to the plugin installation page
As you are on the plugin installation page right now. You can start to install the ‘W3 Total Cache’ plugin. But there’s one small catch. You won’t find the ‘W3 Total Cache’ plugin on that page. To find the plugin, we have to dig a little deeper. So, let’s see how to accomplish that.
- On the plugin installation page, you will notice a ‘Search’ box on the top-right corner
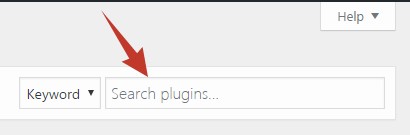
- On that search box, start to type ‘W3 Total Cache’ (not case sensitive). As you type, you will notice that the list of the plugins on that page is changing. After typing the name of the plugin, press the ‘Enter’ key on your keyboard

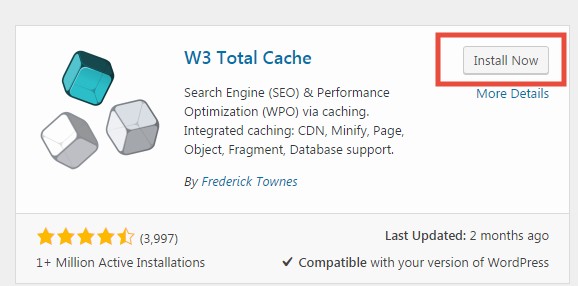
- Then you will find the ‘W3 Total Cache’ plugin in the search results. It will be the first one and it was developed by ‘Frederick Townes’
Now that you have found the plugin. You can start to install that on your WordPress site. We will show you how to do that.
How to install the ‘W3 Total Cache’ plugin in WordPress:
- First, click on the ‘Install Now’ button and the installation will be completed as soon as possible
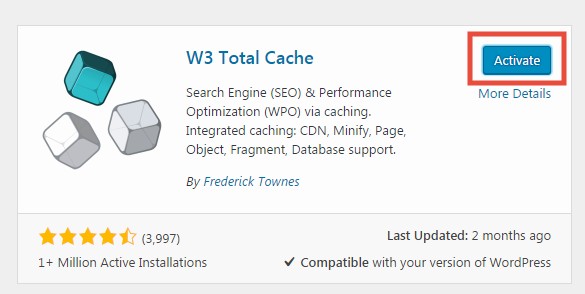
- Then you have to activate the plugin. So, click on the ‘Activate’ button to proceed
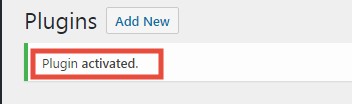
- This will redirect you to the ‘installed plugins’ page of your WordPress dashboard. You will see a notification saying ‘Plugin activated’
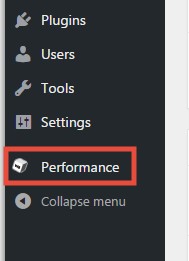
- And, if you look on the left-sidebar, you will notice that a new button named ‘Performance’ has appeared under the ‘Settings’ button. It is because the ‘W3 Total Cache’ has been activated successfully
As you have installed and activated the plugin. You need to configure the plugin in order to get the best out of it. So, let’s show you the whole process step by step.
How to configure ‘W3 Total Cache’ plugin for the best results:
To configure the plugin, we need to use the ‘Performance’ settings. If you hover your mouse pointer over the ‘Performance’ button, you will see a sub-menu will appear with about 18 options. All of these options can be configured individually.
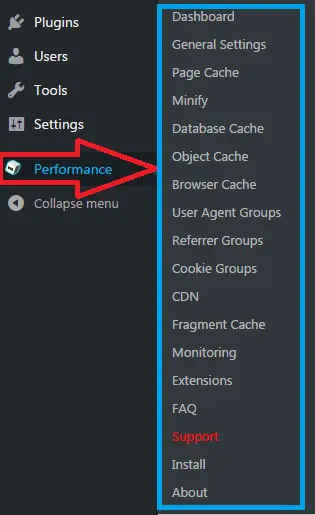
But, it is not compulsory to customize them one by one. Because by default, most of the options are configured with the best settings. Yet, for your convenience, we will explain the uses of all of the options. And we will also tell you what to do with them. So, let’s start.
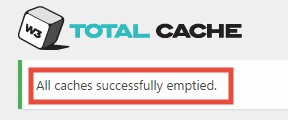
Empty the cache:
- Before doing anything, click on the ‘Performance’ button from the left sidebar. It will open the ‘Dashboard’ section of the W3 Total Cache plugin
- Then, click on the ‘empty all caches’ button from the top of the page

- You will see a message saying ‘All caches successfully emptied’
Entering into the ‘General Settings’:
- Now, click on the ‘General Settings’ under the ‘Performance’ button from the left sidebar
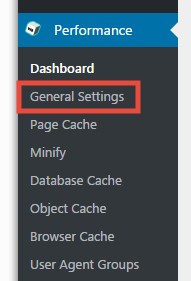
- Using the ‘General Settings’ we can configure all of the options one by one
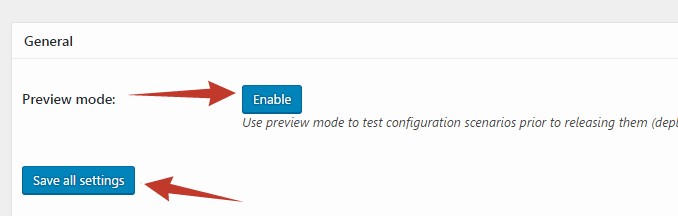
Preview Mode:
- We recommend enabling this option. If you enable it then you can preview all of the settings, even before applying them on your site. Sometimes, some settings of the ‘W3 Total Cache’ plugin might conflict with your site. Thus the site might crash.If this setting is enabled and something goes wrong. You will notice it by previewing your site. As a result, you will be able to reset any particular setting to fix the issues. You will learn more about this setting later in this article
- For now, click on the ‘Enable’ button and then click on ‘Save all settings’
Page Cache:
- If the ‘Page Cache’ setting is enabled then the response time of your site will be reduced. It is up to you whether you enable it or not
- But, we recommend to enable it. So, check–mark the ‘Enable’ box
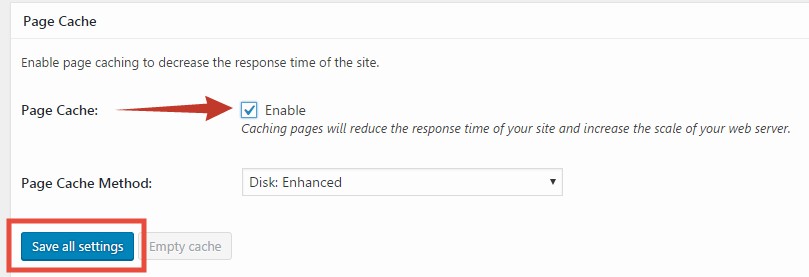
- You don’t need to change the ‘Page Cache method’
Minify Settings:
- This setting is used to reduce the file size of CSS, HTML, and JS respectively. So, it can easily speed up your site. However, not all of the sites are created equal. And, not all of them also have similar CSS, HTML, JS files. So, enabling this function, can be problematic.Again, some ‘WordPress’ themes also come with this option enabled. If that’s the case for your theme. Then enabling this option will be an issue for your site. Thus, if you don’t know what you are doing, then we don’t recommend to enable this option
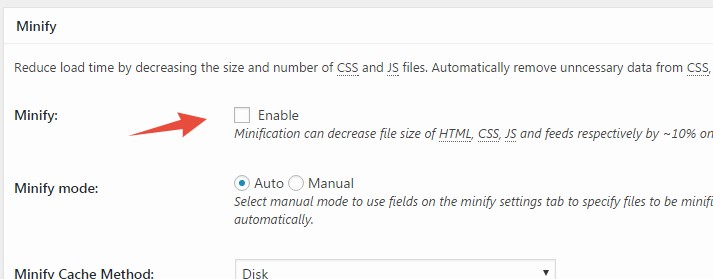
- However, as the decision is totally up to you. You can choose to enable the option

- When you will check–mark the ‘Enable’ button, a popup will appear with some warnings. So, click on the ‘I Understand the risks’. Or if you don’t know what you are doing, you can click on the ‘Do It for Me’ button. But, this option will only work if you are using the premium version of the ‘W3 Total Cache’ plugin
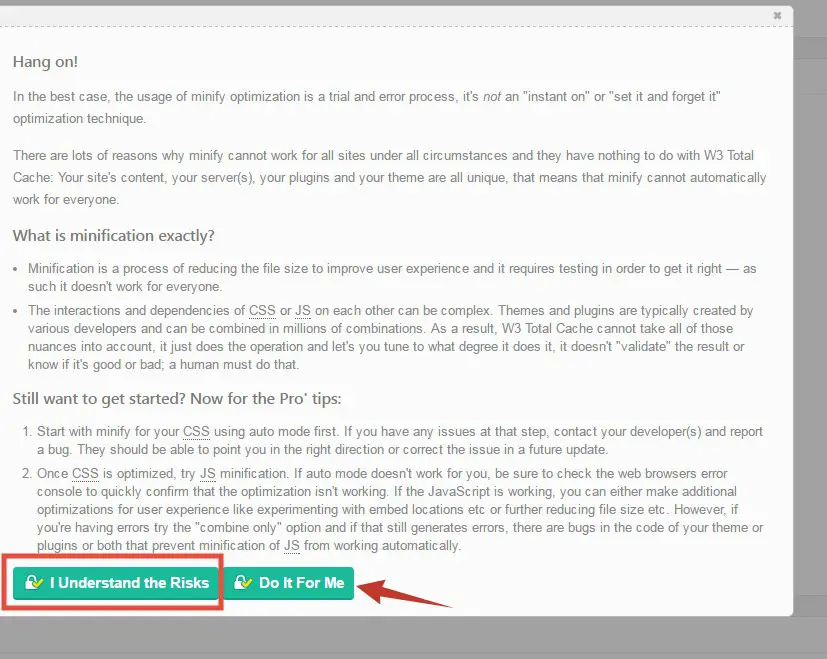
- So, if you are a beginner at this, then do not enable this option. Chances are, your site might stop working. But, remember that, it is not a problem of ‘W3 Total Cache plugin’. The whole situation depends on a lot of different things like your site’s server, installed plugins, installed themes etc.
Opcode Cache:
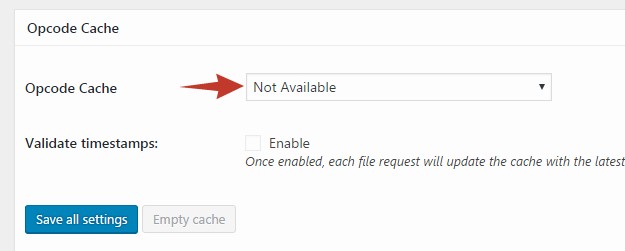
- Usually, this option won’t be available for free users
Database Cache:
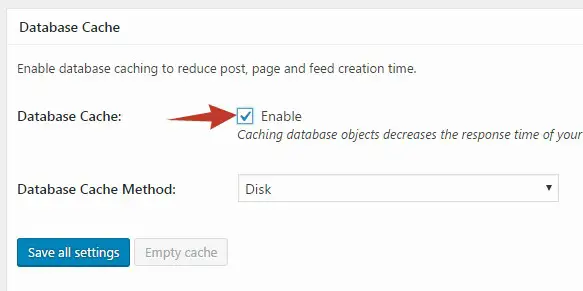
- We recommend enabling this option. Click on the box next to the ‘Enable’ button to activate this option
- ‘Disk’ should be selected as the ‘Database cache method’
Object Cache:
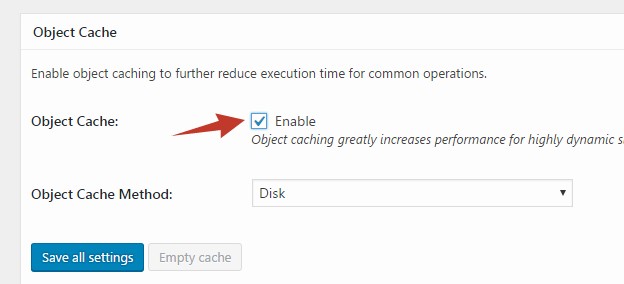
- This option is best for using on a dynamic website. As nowadays everybody creates dynamic websites, we think you are not an exception
- So, you should enable this setting by check-marking on the box next to the ‘Enable’ button
- As usual, ‘Disk’ should be the ‘Object Cache Method’ on the second setting
Browser Cache:
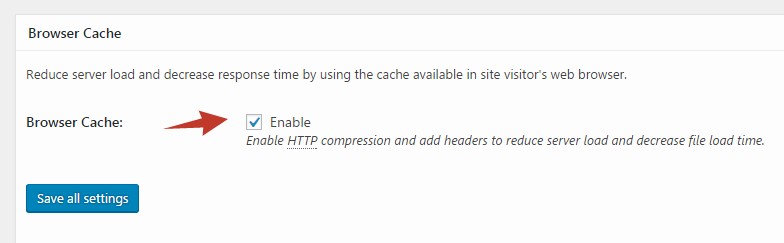
- It is a very important setting. And, it will be enabled by default. So, you don’t need to change anything
- In case, if it’s not enabled then enable the settings
- If this setting is enabled and a visitor visits your site. Then the web pages they visit will be stored in their browser. So, if they visit your site in future, the site elements will be loaded from within the stored data of their browser. This method increases the website speed dramatically
CDN:
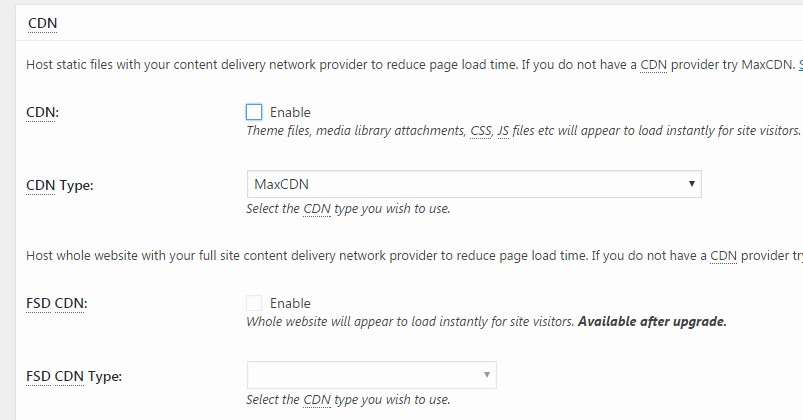
- CDN stands for ‘Content Delivery Network’. You can use CDN to host any media files of your website. Normally, all of the files are hosted on your web host. But, most of the popular website hosting providers are based in Europe and America. So, their servers are also situated there. On the contrary, the visitors of a site can come from all over the world.If the server is far from a visitor, it will load slowly and vice-versa. So, it is better to use a CDN to serve the visitors from all over the world. As most of the CDN providers have serves all over the world
- So, if you use a CDN, you can enable this option
- Then you can choose the ‘CDN Type’ you are using from the drop-down menu

Reverse Proxy:
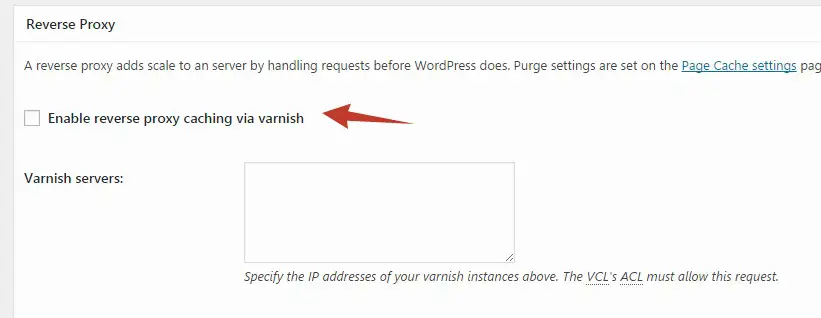
- You don’t need to change anything here
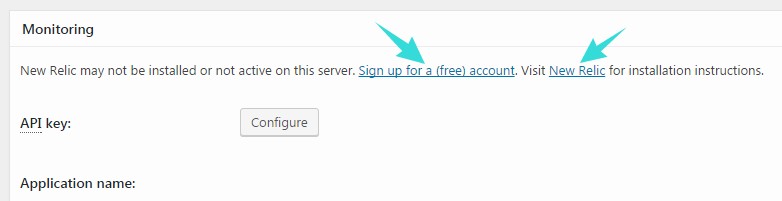
Monitoring:
- This is optional. Normally you don’t need to enable this option
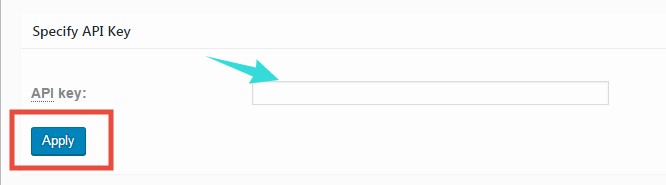
- If you enable this option, you would be able to monitor the usage of ‘W3 Total Cache’. To do that, you need to install ‘New Relic’ on your website server. If you don’t know how to do that. Visit the links shown in the image below to know more
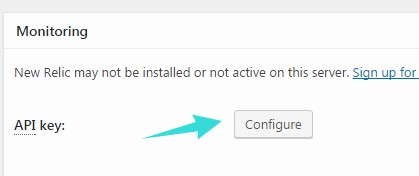
- You will receive an API key after installing ‘New Relic’, then you can apply the new API by clicking on the ‘Configure’ option
Fragment Cache:
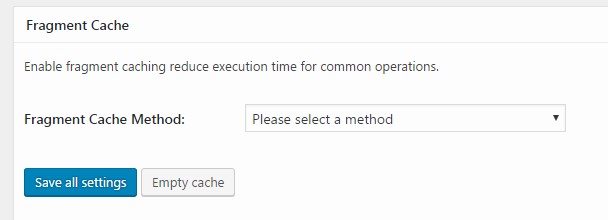
- You can skip this setting
- However, if you want to customize this option, we recommend selecting the ‘Disk’ option from the drop-down list

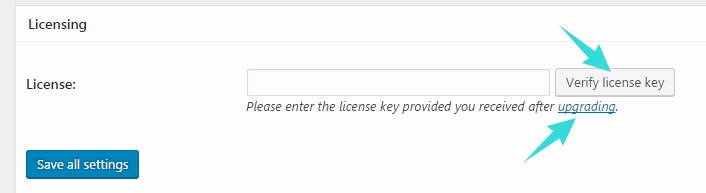
Licensing:
- If you use the premium version of ‘W3 Total Cache’ plugin. Then you need to put the license key on the empty box. Then click on ‘Verify License Key’ button. It’s not applicable for free users
Miscellaneous:
All of the settings in this section are optional. So, you can skip them if you want to. But, if you want to use them, you can follow the suggestions below.
- You can enable the first option which will show a ‘Google Page Speed’ widget on the WordPress dashboard

- You can enable the ‘Verify rewrite rules’ by check–marking the box next to it

- If you use ‘Network File Systems’, you should not use the ‘Enable File Locking’ option

- You should only use this option (Optimize disk enhanced page and minify disk caching for NFS), if you use ‘Network File Systems’ on your hosting

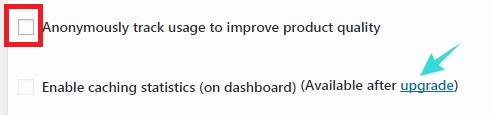
- If you want to track usage anonymously, then check–mark the next option. The other option (enabling caching statistics) is applicable for only the premium users
Debug:
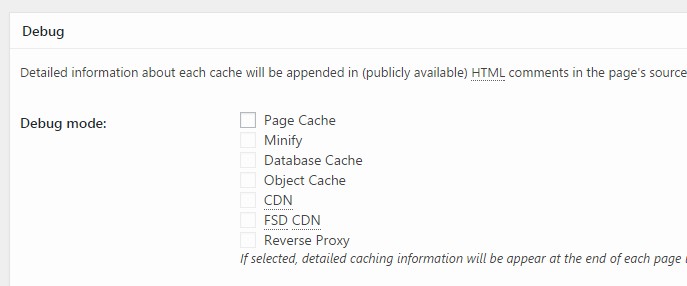
- If you want to get information about each cache, you can enable this setting. The information will be found on each page’s source code. To be honest, if you are not a developer, you don’t need this setting to be enabled
Import/Export Settings:
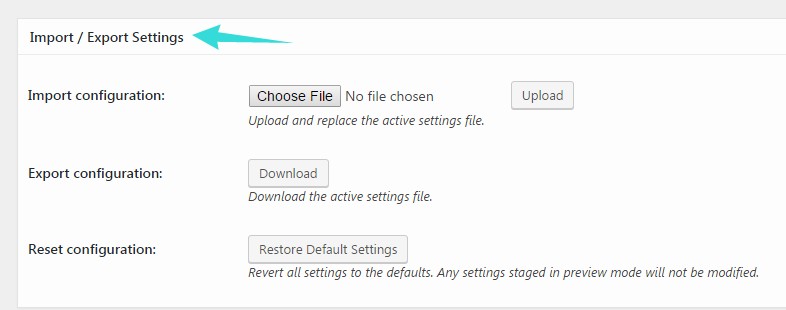
- If you already have a ‘W3 Total Cache’ configuration file. You can upload it via the ‘Import configuration’ option

- If you want to download the current ‘W3 Total Cache’ configuration, then use the ‘Export Configuration’ option

- If you face any difficulties, you can reset all of the settings to the defaults using the ‘Restore Default Settings’ option

Saving the configuration:
- As you have just configured all of the settings. You need to save them before you do anything. Or else, the new settings will not be activated
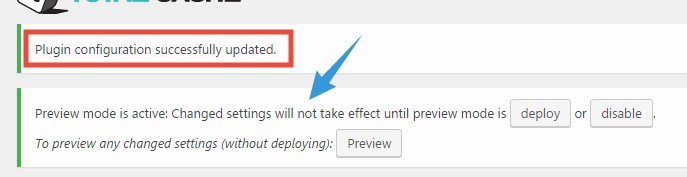
- So, click on any of the ‘Save all Settings’ button to save the configuration

- Now, you will see a notification on top of the page saying ‘Plugin configuration successfully updated’. Also, you will see another notification saying that the ‘Changed settings will not take effect until preview mode is deployed or disabled’.

Notifications It is because the ‘Preview’ mode is enabled. So what can you do next?
Test & Deploy the settings:
- First, click on the ‘Preview’ button from the notification. This will open your website on a new tab. Check carefully, if everything (contents, images, links, themes, plugins etc.) is working fine

- If all good. Click on the ‘Deploy’ button from that notification on the plugin page. Then the new settings will be finally activated

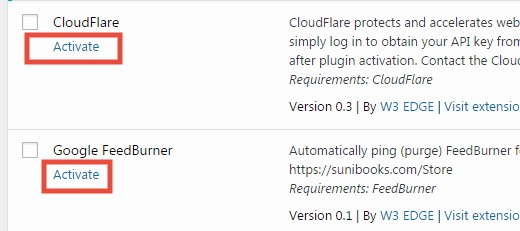
Extensions:
- ‘W3 Total Cache’ plugin comes with extensions for some of other popular themes and plugins
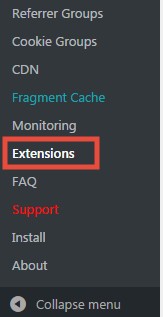
- If you want to use the extensions, click on the ‘Extensions’ button from the left sidebar. It will open a list of all of the eligible ones
- Then you can select them individually or collectively. So, select the ones you want to use by check marking them
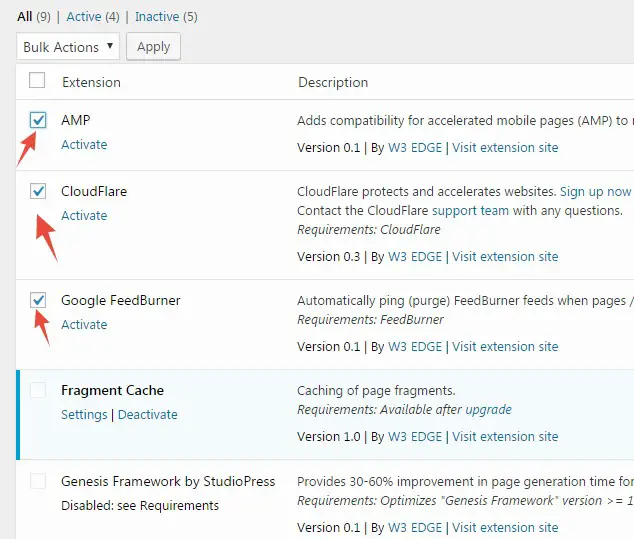
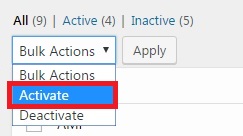
- Then click on the ‘Bulk Actions’ button from the top
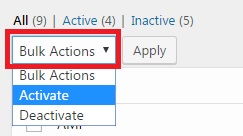
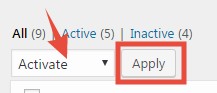
- And, select the ‘Activate’ option from the drop-down menu
- After that, click on the ‘Apply’ button to start the activation of the extensions
- You can also activate them one by one by clicking on the ‘Activate’ button from under each of the extensions
- And, remember, you have to click on the ‘Deploy’ button to activate the new settings every time
Troubleshooting:
If you notice any issues after setting up the plugin on your site. You can reset all of the settings to default. Then try to enable/disable the options one by one and check if the problems still persist or not. This way, you will be able to pick out the option which is creating the problem. Then disable the particular option/s. And, if everything is OK, click on the ‘Deploy‘ button to activate new configurations.
Splendid Work!
If you are still with us. Then you have learned the way to install and configure ‘W3 Total Cache’ plugin on your SiteGround account. You should install the plugin and configure it on your site. We can assure you that your site will be faster than ever.