DISCLOSURE: This post may contain affiliate links, meaning when you click the links and make a purchase, we receive a commission.
Are you are a website owner? Then it is a common occurrence for you to upload files and folders to your web host(s).
There are a lot of ways to upload folders to any web host account. But, we hate to break it to you that not all of them are effective. So, you should know all of the better ways to upload a folder(s) in the first place. If you are searching to know how to upload entire folder to your web host. Then this article is for you.
In this article, we will show you two useful methods of uploading folders to any web host. But, if you have a SiteGround hosting account then the first method will be applicable for you. However, if you don’t have SiteGround web host account. Then you don’t need to worry at all. Because the methods we will describe here will be somewhat identical for any web host accounts.
Additionally, we will attach screenshots to each step. Thus it will be very easy to follow this guide for you even if you are new to this.
So, are you ready to learn? Then let’s jump in.
How to Upload Folder to SiteGround
Method 1:
Tip: If your web host account doesn’t come with a cPanel. Then you can’t follow this method below. So in that case, skip this method and follow the 2nd method described in this article.
In this first method, we will tell you how to use the built-in file manager of SiteGround cPanel. It is very easy to use this method. However, this method comes with a drawback. You cannot upload more than one file at a time using this method. So, if you want to upload a folder which consists of multiple files then you have to upload the files inside that folder one by one at a time. So, this will cost you a lot of your precious time.
If you still want to use this method, there’s a good news. By doing an extra step before using this method, you can bypass the hurdle. So, don’t worry. We will let you know the entire method in a step by step manner.
The whole method will go like this— first, you will have to compress all of the files inside of that folder into a ZIP file. Then you need to upload that ZIP file. After that, you will have to extract the ZIP file. So, we will explain all of this part by part. So, let’s go.
Part 1. Compressing the files into a ZIP file:
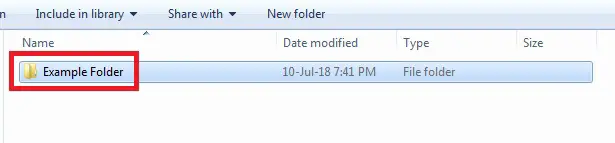
- For example, we will upload the ‘Example Folder’
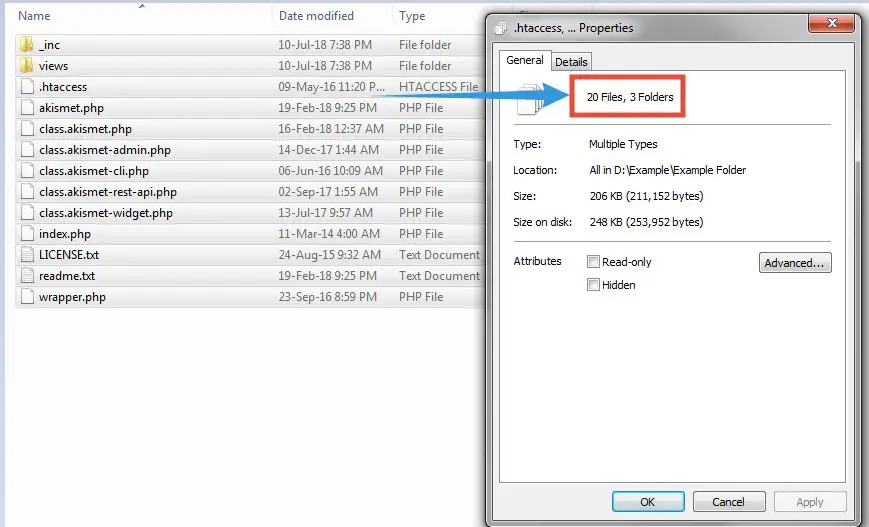
- After opening the folder, we have found out that there are 20 files in it. As we know, if we want to upload this folder then we have to upload each of the 20 files one by one. In your case, the amount of the files might be more than that. So, we have to compress these files first then we can upload
Tip: If you know how to compress files then you can skip this part. First, compress all of the files into a ZIP file then follow the Part 2
To compress files, you need to have an archiver software on your PC like WinZip, 7-ZIP or WinRAR. You can use any one of them. But, in this article, we will use WinRAR. So if you don’t have any other archiver software on your PC, download WinRAR(depends on your operating system) and install it on your PC.
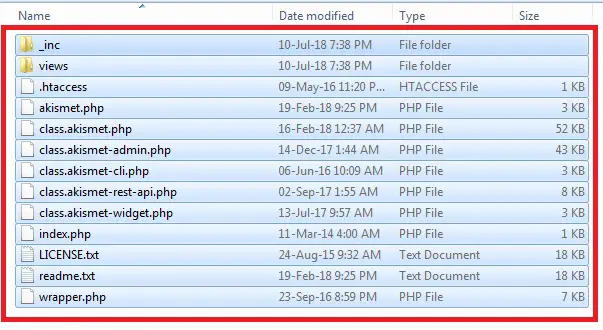
- On your computer, navigate to the folder which you want to upload and double-click to open it. On the next window, you will find all of the files

- Now, select all of the files by pressing the ‘CTRL+A (for Windows)’ or ‘COMMAND+A (for MAC)’ keys on the keyboard. Or you can click and drag your mouse pointer over all of the files to select all of them. You can also select individual files if you want to. However, we will select all of the files for the purpose of this tutorial
- Then while the files are selected, right-click and click on the ‘Add to archive’ button from the options

- Next, a new window will popup. First, select the ‘ZIP’ option from the ‘Archive Format’ section. You don’t need to change anything from here
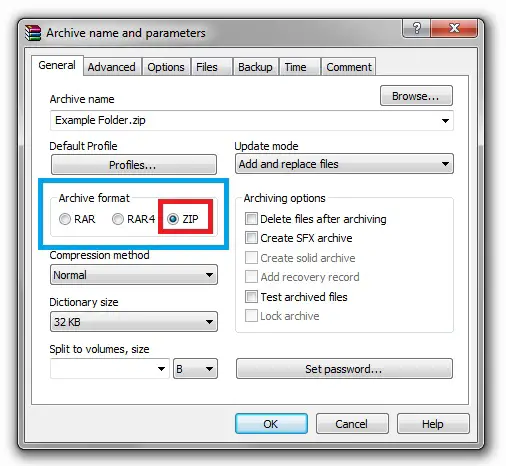
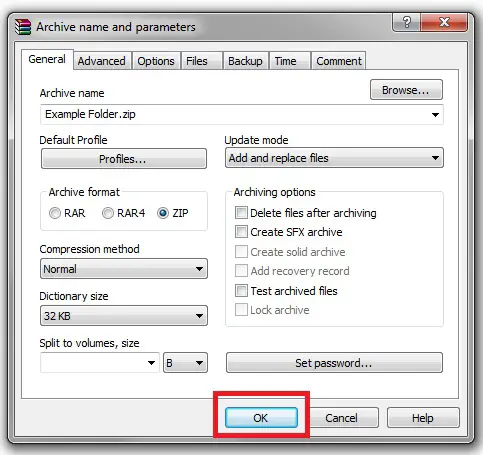
- Then click on the ‘OK’ button to proceed
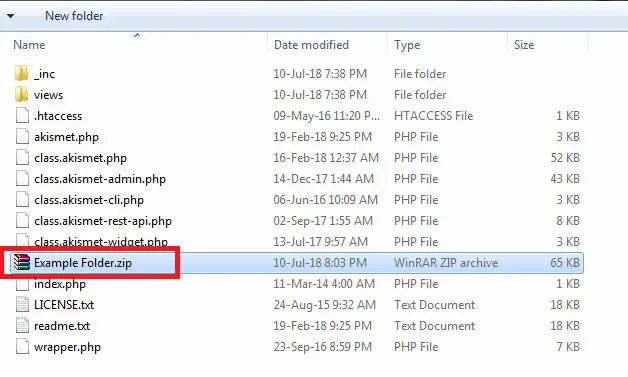
- Instantly, a new ZIP file will be created on that folder. Remember the location of that file as you will have to upload this file later
So, you have compressed all of the files of that particular folder into a new ZIP file. Now, it’s time to upload the file to your SiteGround web host.
Part 2. Uploading the folder to SiteGround web host:
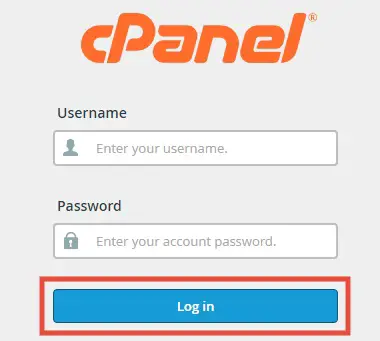
- Log in to the cPanel dashboard of your SiteGround web hosting account
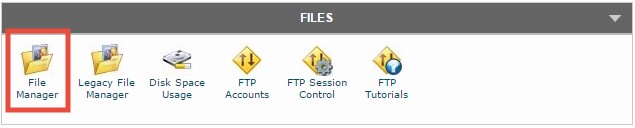
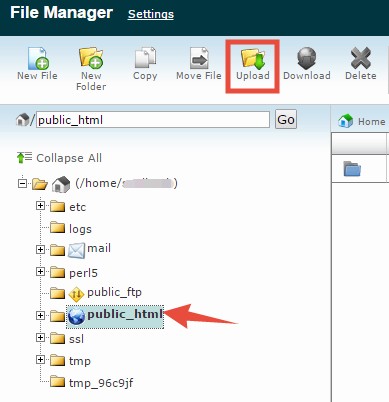
- Now, click on the ‘File Manager’ button. It will be under the ‘Files’ section
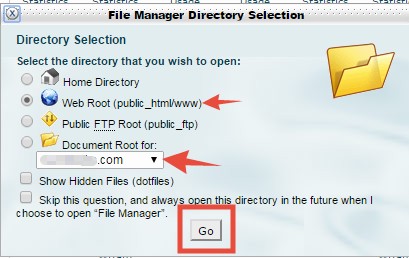
- A popup window will appear. You need to select the appropriate domain name from the drop-down menu. If you have only one domain name connected to your hosting account then it will be automatically selected. But, in case, if you have multiple domain names connected to the hosting account then you need to select the one to which you want to upload the folders. Also, you have to select the ‘Web Root (public_html/www)’ folder as it is the default directory for any website to host its files and folders. After doing that click on the ‘Go’ button from the bottom to proceed
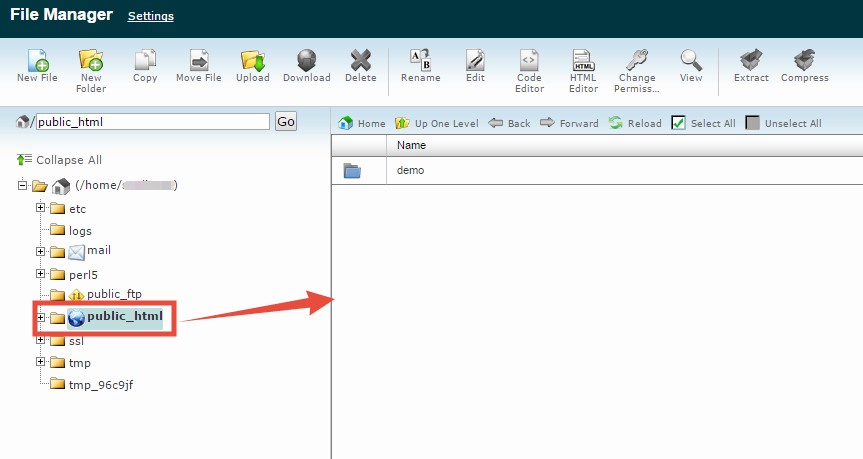
- In doing that, a new tab will be opened. You will see that the ‘public_html’ folder will be opened there. On the left sidebar, you will find all of the main folders/directories which are related to the website. And on the right side of the screen, you will find the files which will be inside of those folders. In this case, you will see the ‘public_html’ folder is opened and on the right side of the screen, the files & folders which belong to that folder will be visible
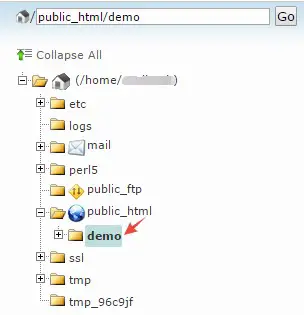
- Optional: If you want to upload files to other folders than the ‘public_html’ folder then you have to click to select that folder and then double-click to open that folder. Then you can upload files to that particular folder
- However, we will upload the folders to the ‘public_html’ directory. And, it will be opened by default. So, after opening the folder click on the ‘Upload’ button from the top menu
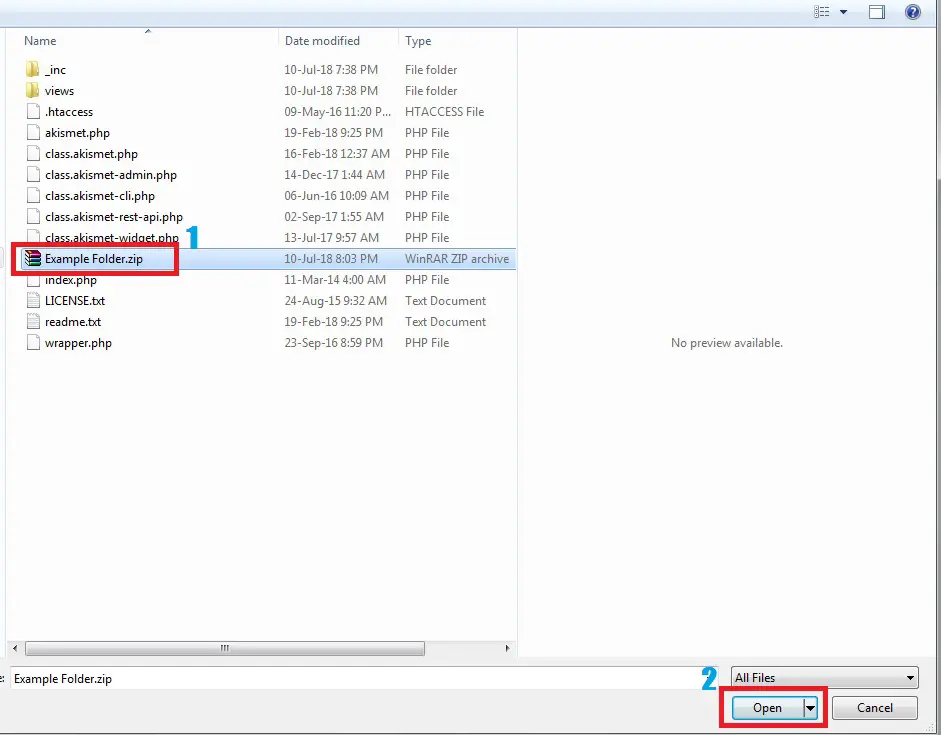
- Immediately, a new tab will open. You will be able to upload files and folders from that tab. So, click on the ‘Choose File’ button on that page. If you want to overwrite files then you can add a check-mark before the ‘Overwrite existing files’ button. However, this is not recommended if you don’t know what you are doing

- After that, you will see a new window will appear on your screen (using that you can upload the files and folders). You have to find the ZIP file on your PC which you want to upload by browsing through that window. Then select the ZIP file and click on the ‘Open’ from the bottom of the window
- Instantly, the upload will be started. You can see the status of the upload on the bottom right corner of the screen

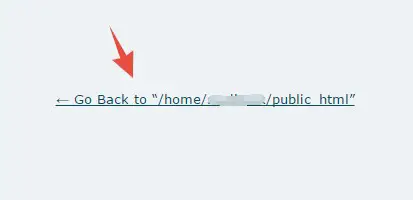
- When the upload is completed you have to click on the ‘Go back to…’ button which will take you to the previous page
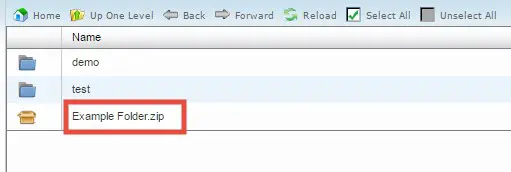
- On that page, you will find the newly uploaded file (in our case the ‘Example Folder.zip’), which means the upload was successful
As you have successfully uploaded the file. Now, it’s your turn to extract that ZIP file. Let’s see how to do that.
Part 3. Extracting/Unzipping the uploaded file:
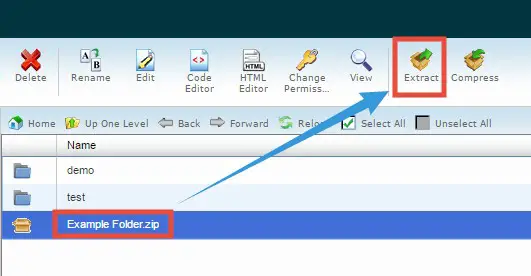
- From the cPanel file manager, click on the ZIP file which you want to unzip (in our case, ‘Example Folder.zip’). The file will be highlighted in blue color which means it is selected. Then click on the ‘Extract’ button from the top menu bar
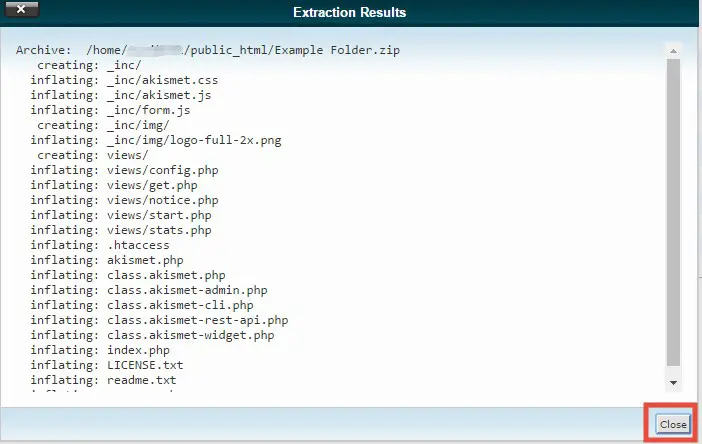
- In doing so, a new popup window will appear, click on the ‘Extract File(s)’ button to skip this

- Within a minute the extraction will be completed. Along with that, another window will pop-up. Just click on the ‘Close’ button to make the window disappear
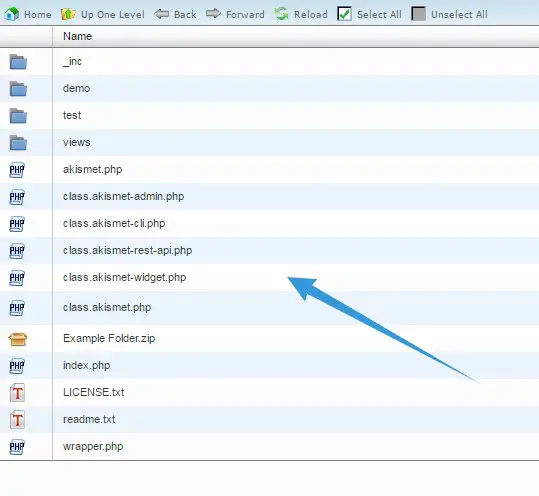
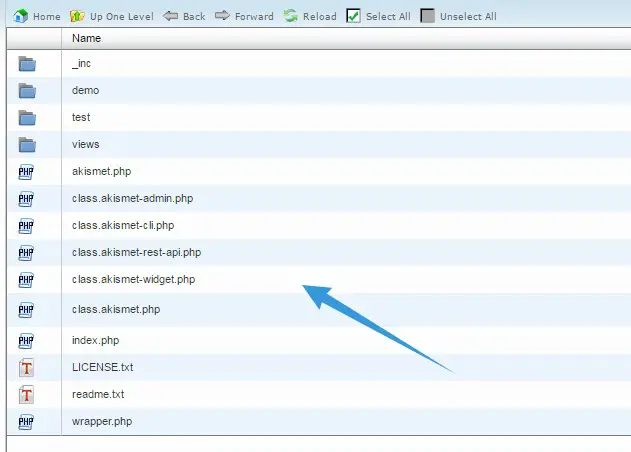
- Now, you will find all of the unzipped files inside your ‘public_html’ folder
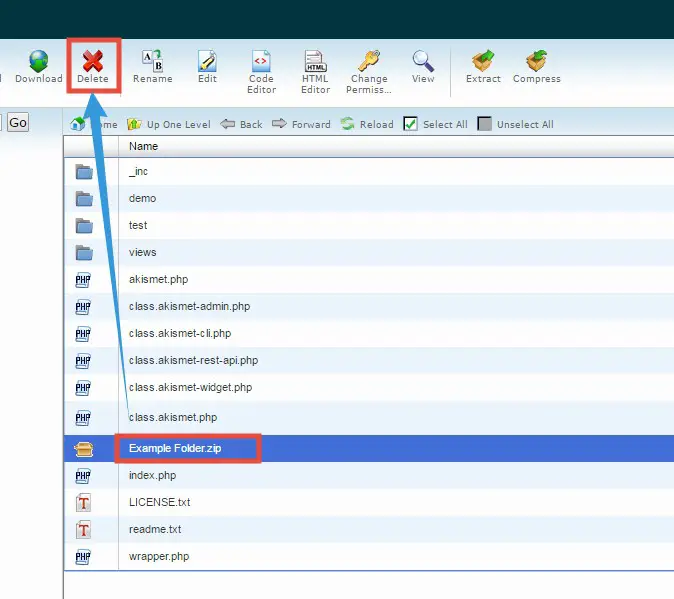
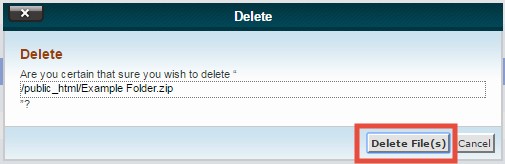
- But, you will notice that the original ZIP file is still there. As it will consume the storage space of your hosting account, you need to delete it (it is optional but we recommend it). So, click and select the file. Then click on the ‘Delete’ button from the top menu bar
- Another popup window will appear. Click on the ‘Delete File(s)’ button to continue
- On the next page, you will see that the file is not there anymore which means it was deleted successfully
Well done. You have learned how to upload folders to your SiteGround web host account using cPanel file manager. As you know, it is not possible to upload more than one files at a time using that method. Along with that, if you don’t have cPanel with your web hosting account. Then this might not be a viable option for you. So to tackle this issue, you can to follow this other method which we are going to share with you next.
In the next section of this article, we will show you how to upload more than one files at once. You don’t even need to ZIP/compress the files. On top of that, you don’t need to have cPanel on your web host account to follow this method.
Method 2:
To upload a whole folder or more than one files at a time, you need to use FTP clients. There are a lot of FTP client softwares out there. But, among them ‘FileZilla’ is the most popular. Additionally, it is fully free to use. It also supports all types of operating system. So, we will use ‘FileZilla’ to upload folders to your SiteGround web host.
Now, if you don’t know anything about ‘FTP’ or ‘FileZilla’ then you should read our guide on FTP (File Transfer Protocol). After reading that you will have a clear idea about the next method which we are going to explain here. So, we highly recommend that you read that article.
But if you know about FTP clients then you are good to go. Now, let’s see how to upload folders using ‘FileZilla’.
Mandatory Part. Creating an FTP account:
Prior to doing anything, you need to create an FTP account at first. We have already written an article on how to create an FTP account. If you don’t know how to create an FTP on SiteGround then you should read the Part 1 of the section called ‘How to use FTP clients to upload files’ of this article to know about that. From now on we will assume that you know how to create an FTP account on a SiteGround web host. Thus, you already have created an FTP account.
Now, we will show you how to upload folders using ‘FileZilla’. To do that, first and foremost, you need to connect your PC to the web server using FileZilla. There are two ways to do that. To keep it simple, we will only explain one of the methods here. If you want to know the other method then please read the ‘Connect using Site Manager’ part of this article. As we are going to mention only one method, we will share the ‘Quickconnect’ method.
Part 1. How to use FileZilla to connect to your web server (Quickconnect):
- Download (according to your operating system) and install ‘FileZilla’ on your PC
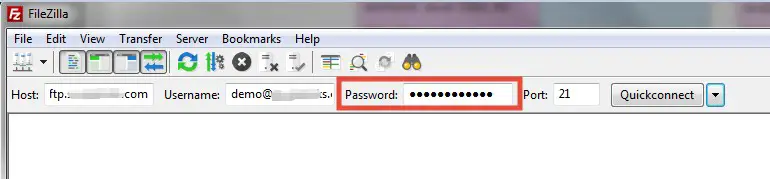
- Now, on top of the screen of that software, you will see the ‘Quickconnect’ box. You need to enter the required information on these boxes to establish the connection

- You will need to enter the data about the ‘Host, Username, Password and Port’ of your FTP account. So, if you haven’t created an FTP account yet. You need to create a new one now. We assume that you have created one
Now, if you don’t know this information about your FTP account. You can find them by following the method below.
Getting the FTP account information:
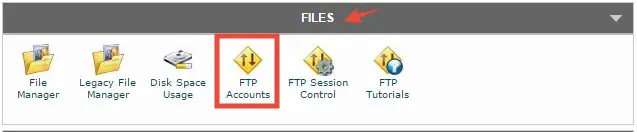
- Log in to the cPanel of your SiteGround account
- Then click on the ‘FTP Accounts’ button from under the ‘Files’ section
- Now, under the ‘FTP Accounts’ tab, you will find the newly created account there

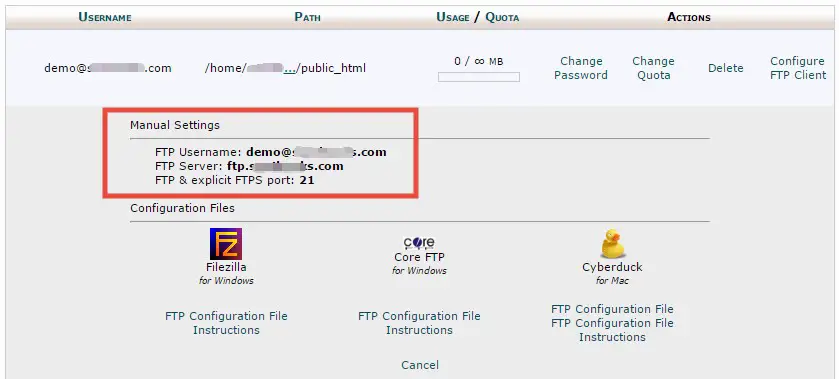
- So, click on the ‘Configure FTP Client’ button next to the FTP account you want to know about

- Then below the account name, you will find all of the information regarding this particular account which will be labeled as ‘Manual Settings’
Establishing the connection:
- Now, head back to the ‘FileZilla’ software. At first, the ‘Host’ will be similar to the ‘FTP server’ name

- Then the ‘Username’ would be similar to the ‘FTP Username’. You can just copy and then paste it

- The ‘Password’ is the one you set when you created the account. This will not be mentioned your cPanel
- And the ‘Port’ will be 21

- Finally, click on the ‘Quickconnect’ button and the connection will start to establish

- At this point, a pop-up window will be asking to save the password for future use. Click on ‘OK’ to advance

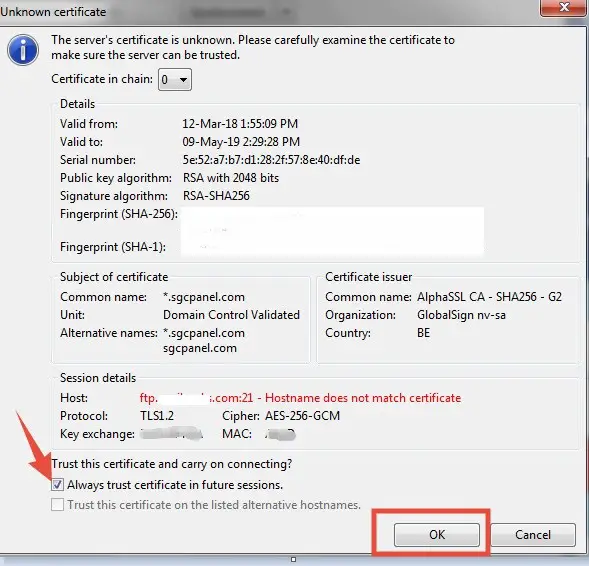
- Next, another window will pop-up. Add a check-mark on the option ‘Always trust certificate in future sessions’. Then click on the ‘OK’ button to proceed
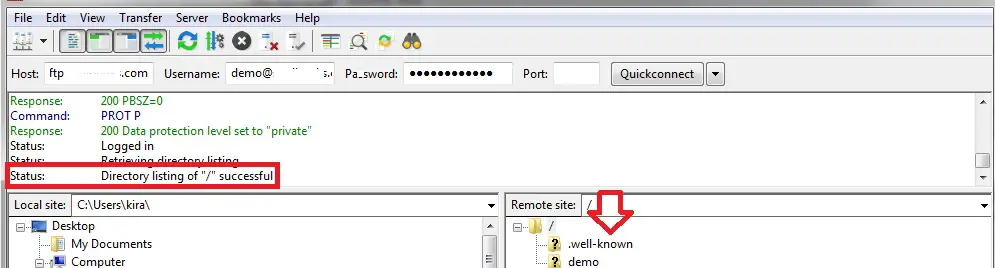
- When the connection is established you will see a ‘successful’ notification. Also, you will notice some folders are visible under the ‘Remote Site’ section
As you have established the connection, you can upload the folder now. We will let you know how to do that in the following section.
Part 2. How to upload folder(s) using FileZilla:
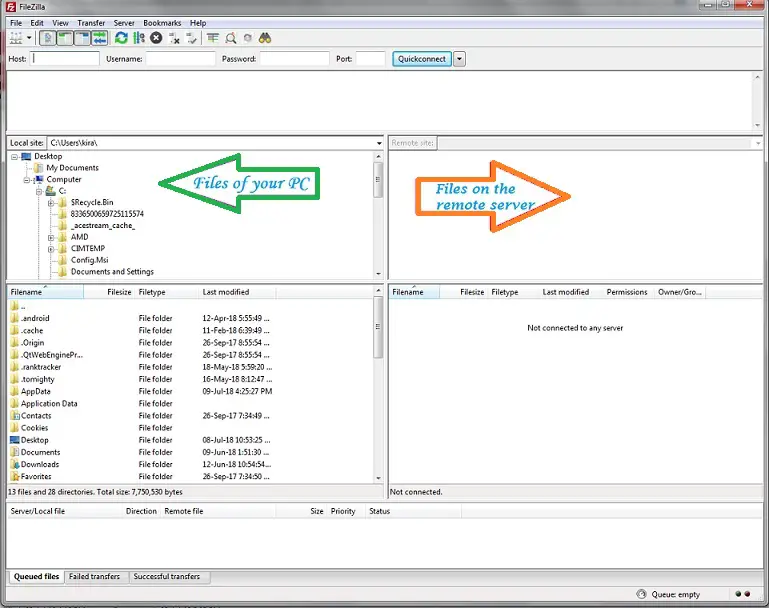
- If you look at the ‘FileZilla’ interface, you will notice that the whole interface is divided into two sections. The left-hand side of the screen is labeled as the ‘Local site’ which means you can manage all of the files of your computer from this side. And the right-hand side of the screen is the ‘Remote site’, which means you can manage the files and folders of the web server from this side
- Now, from the left-hand side of the screen, browse to the folder which you want to upload from your computer (in our case, it is the ‘Example Folder’)

- Now, right–click on that folder and click on the ‘Upload’ button. That will trigger the upload process
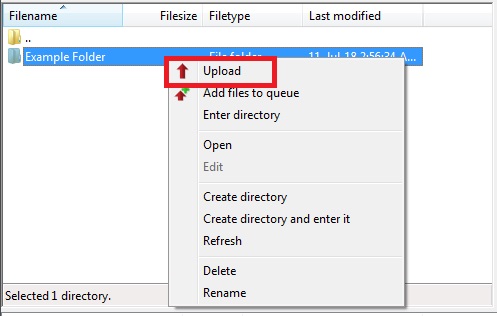
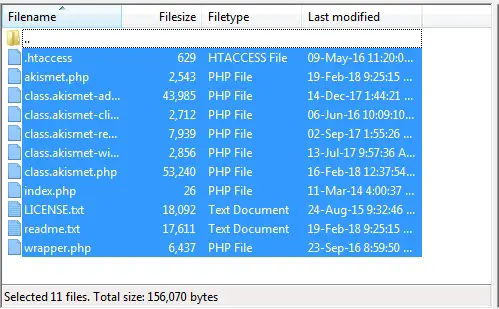
- Alternatively, you can also open the folder and then upload all of the files one by one. Or else, you can select all of the files inside of that folder by pressing the ‘CTRL+A (for windows)’ or ‘COMMNAD+A (for Mac OS)’ keys on your keyboard. Then right-click and click on the ‘Upload’ button to start the upload. Also, you can upload by using drag and drop function
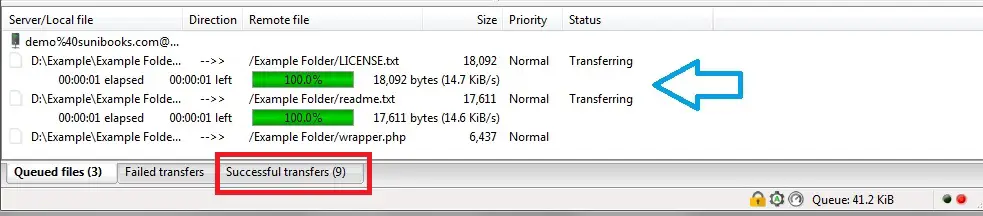
- On the bottom section of the software, you will see the upload is in progress. When the upload is done, you will find them under the ‘Successful transfers’ tab. Also, the folder(s) will be available on the right-hand side of the screen under the ‘Remote Site’ section; which means the folder was uploaded successfully
Congratulations. You have learned how to upload folders using ‘FileZilla’.
Last but not the least:
If you were struggling to upload folders to your web server, we hope this guide will help you. All of the methods described in this article can be helpful for you one way or another. So, if you were not successful by following other similar tutorial articles, you should give this a try.