
DISCLOSURE: This post may contain affiliate links, meaning when you click the links and make a purchase, we receive a commission.
If you have already set up an email account on SiteGround. Then you need to access the webmail.
Accessing the webmail of a SiteGround web host account is very easy. If you want to know how to do that. Then you can follow this article. We will walk you through all of the steps one by one and we will add screenshots to each of them. As a result, anyone can follow this process with ease.
Tips: You can use Google Gmail with SiteGround Email
So, without keeping you waiting any longer, let’s begin.
How to Access Webmail on SiteGround
Steps to follow:
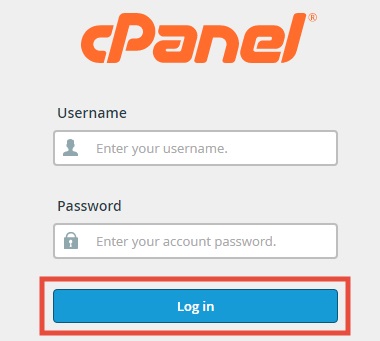
- Login to the cPanel dashboard of your SiteGround account
- Then scroll down to find the ‘Email Accounts’ option which will be under the ‘Mail’ tab. Click on the ‘Email Accounts’ button

- Now, we assume that you have already created an email account. If not then you can visit our detailed guide on how to setup email account on SiteGround
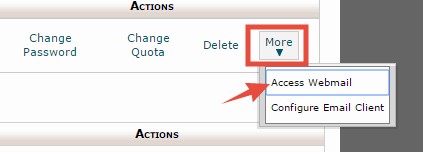
- As you have created an email account. Click on the ‘More’ button next to the email account you want to access

- Then click on ‘Access Webmail’ button from the drop-down menu. Monetarily, you will be logged in to your webmail account
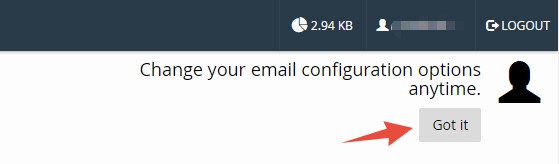
- On the next page, you will see a popup. Click on the ‘Got it’ button to close it. It will be there for the first time only
- After closing the popup, you will see 3 different webmail applications on that page. You can choose any one of them, it’s your choice. For your information, all of them are pretty similar
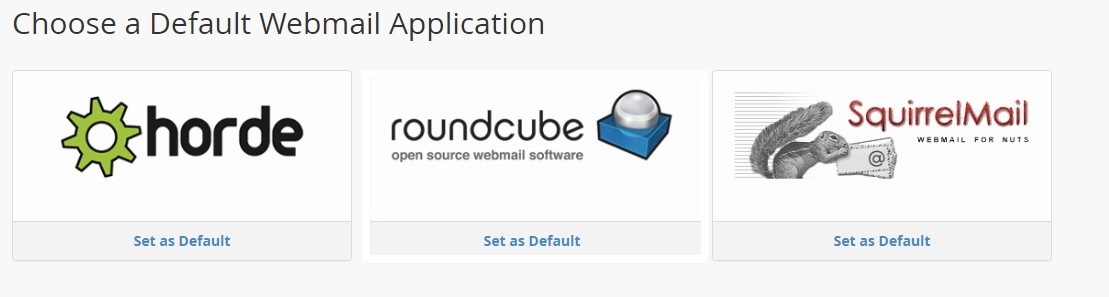
- But, we recommend using ‘roundcube’ as the interface of this application is very clean and user-friendly
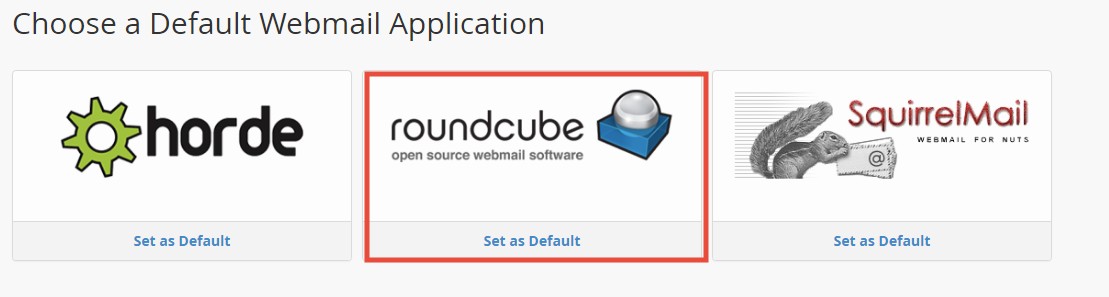
- You can click on the ‘Set as Default’ button to make it the default webmail application of your account
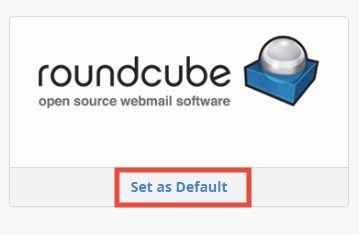
- So, click on the ‘roundcube’ icon on that page to get access to your webmail
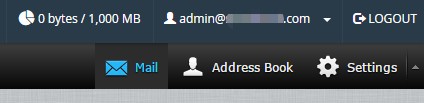
- You will see this interface on the next page which means you have accessed to your webmail

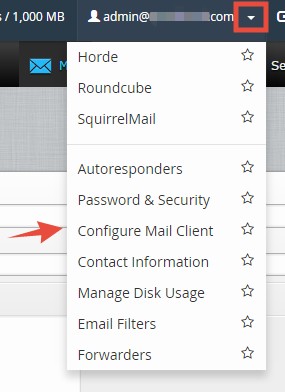
- You can change settings of your webmail using the options from the top right corner of the screen
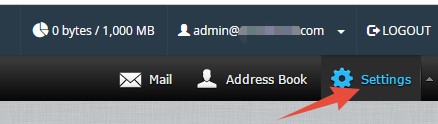
- Click on the ‘Settings’ button from the right-hand side of the screen to bring out the main settings of the ‘roundcube’ webmail application
- You can customize all of the settings your way from there

- You can send, compose, reply, forward, delete etc. from the options at the top left corner of the screen

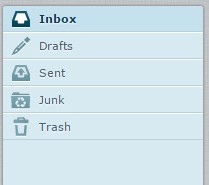
- And, you can check/manage all of your emails using the left sidebar menu
- If you click on the arrow button next to your account name from the top-right corner of the screen. You will find a lot of advanced options related to your webmail application there. But if you are not familiar with them then change anything from there
It is very easy to access webmail using this method. If you find it useful, you can share this article with others.