
Have you ever added or utilized decals in SOLIDWORKS? When it comes to your models, decals are everything. Most models wouldn’t be complete without them since they are the tiny touches that really take your design from excellent to spectacular.
However, after adding a decal to a SOLIDWORKS component, customers frequently discover that the decal disappears or missing. There are a number of circumstances in which this occurs; we’ll examine the most prevalent ones and offer remedies for each.
How to Fix Solidworks Decal Not Showing
- Enable the Decals
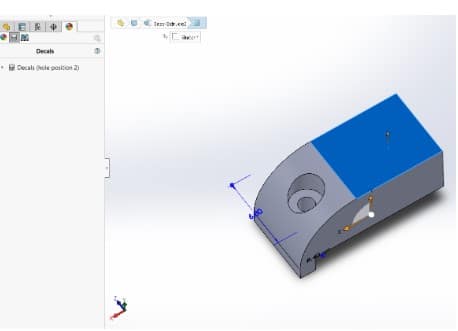
We’ll start by examining the simulated portion of the below image. In the Decal Property Manager, it is obvious that a decal has been put to the highlighted face, but the decal is not displayed.
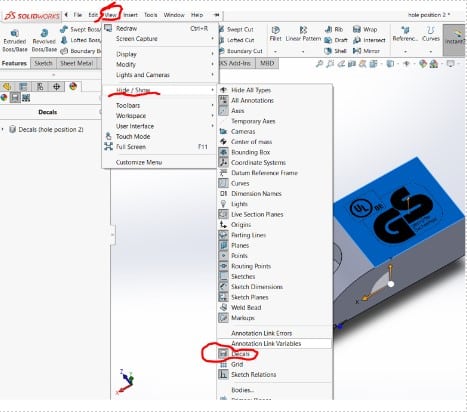
To fix this problem, go to View and enable Decals. Click the view tab, then select “Hide/Show” from the cascading menu. Then, left-click the Decals icon inside the Hide/Show menu. The decal may be visible as soon as you click it.
- Embed decals into your model
Usually, when you add decals to your model, a reference is created. If that decal file is accidentally moved or destroyed, the decal won’t be visible the next time you access the model. A broken reference would result from this. A decal can be added to a model by being embedded into it, ensuring that it is constantly visible.
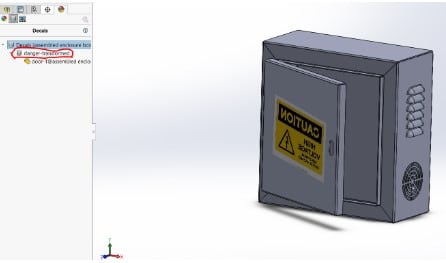
To better understand what I mean, let’s go through an example. We’ll put an electrocution warning sign on an electrical enclosure. The process is to navigate to display manager and select decal icon. I’m going to right-click and choose “Add decal” since I’m adding a customized decal.
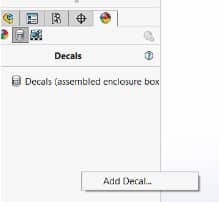
A new tab will open after choosing “Add Decal”.
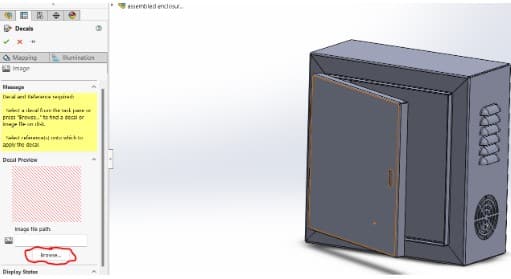
Choose explore to find your customized decal. Find your customized decal by selecting browse. For my decal, I’m choosing the front face.
Save the model right away. The decal we added is visible under Decals in Display Manager.
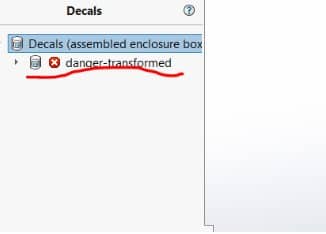
So, if I quit the model and then move or delete the decal picture, the decal won’t show up when the model is opened again. There will be a small red “x” if I try to locate the decal on the display manager. This indicates that the reference is broken.
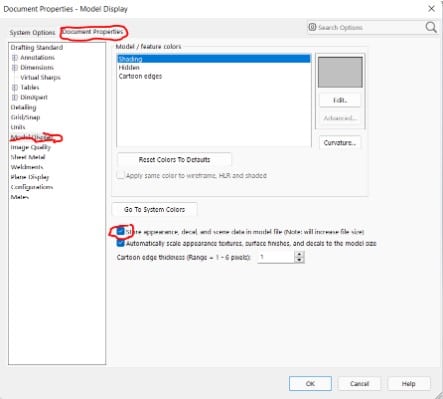
So, to avoid this, we go to Document Properties select model display. Under model display, we check the box “Store appearance, decal and scene data in model file (Note: will increase file size)” as indicated below.
By doing this, the file will be embedded into the model and always move along with it. To prevent broken references, always check that option before you add your decals. Even if the decal file is accidentally relocated or removed, your model will still show it.
- Uncheck Enhanced Graphics Performance option
There are several circumstances where the graphics performance option can obstruct the graphics display of an existing installation. The option ought to be unchecked in these circumstances. This is turned on by default in the SOLIDWORKS 2021 version. SOLIDWORKS must restart after changing the setting.
Although not all visual problems in an installation can be linked to this option, utilizing the approved graphics card driver is crucial to the functionality of this upgrade. This is particularly relevant for users who are updating to SOLIDWORKS 2021 from earlier versions from a few years ago.
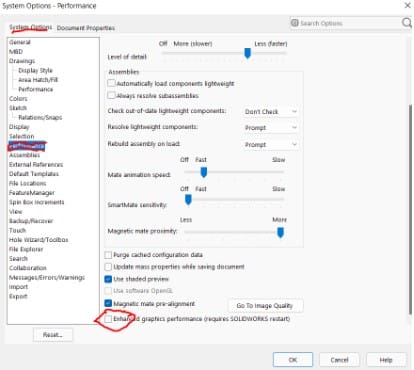
By going to “Tools>Options>System Options>Performance” and scrolling to the final selection at the bottom of the window, you may get Enhanced Graphics Performance.
The missing decals or graphical colors may appear as anticipated if this option is deselected. A restart of SOLIDWORKS is necessary each time this option is turned on or off.
Some Useful Information
- When a decal is saved, it becomes accessible from the Task Pane > Decals folder.
- Only the display modes Shaded and Shaded with Edges make decals visible. Drawings also adhere to this.
- To modify a decal, open the Decals folder in the Display Manager > Decal, right-click on the decal, and then choose Edit decal. In order to make any alterations, this leads you back to the property manager.