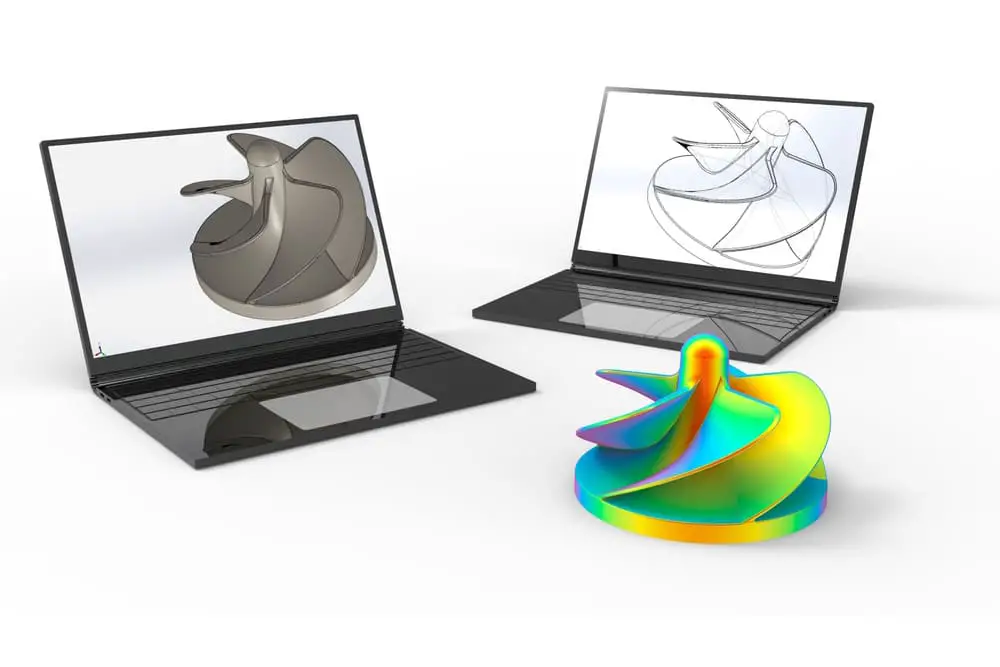
SOLIDWORKS’ transparency settings are excellent for illuminating a design’s inner details and providing access to parts or assemblies that are hidden from view. Transparency, though, can occasionally be challenging to control.
Since face transparency is not recorded in the FeatureManager Design Tree like features and bodies, it is especially true in this case. In extreme circumstances, removing the transparency from a face might become all but impossible. Transparency must be disabled by selecting each transparent face with the right click.
This article will cover every possible reason why elements in SOLIDWORKS could get transparent as well as the best solution to restore their visibility.
Tips on to Resolve Solidworks Transparency Not Working
Utilizing the Display Pane to Adjust Transparency
Make sure that no feature, body, or top-level transparency is in control of the faces you are attempting to remove transparent before utilizing this technique. Open the Display Pane and look at the Transparency column for the simplest approach to validate this.
The top-right arrow of the FeatureManager must be clicked in order to display the Display Pane. The last column in this pane will display an icon for every feature or body whose display has been set to translucent. To remove whatever much transparency you want, toggle them off as necessary.
The screenshot that follows shows how to access SOLIDWORKS’ transparency, color, hiding, and show controls by expanding the display panel.
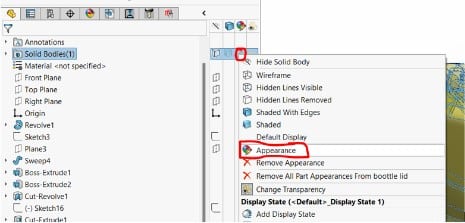
You can also choose appearance from the context menu when you right-click on the color region like in the following example.
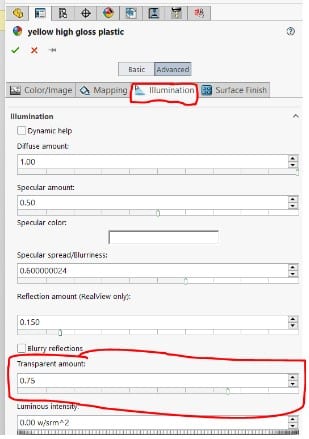
The color of a part model or any feature under it may often be assigned or modified using this feature. The transparency level may, however, be modified using its settings. As seen in the diagram given, there is a slider labeled “Transparent Amount” under the Illustration tab.
The slider moves from 0 to 1. One represents 100 percent transparency, with zero representing no transparency or opacity. The level of transparency may be altered by using the slider.
Your part’s individual faces may be set to transparent if the aforementioned tactics don’t work. When a face is separately made transparent, it is added to its parent appearance as a selection, with a default transparency value of 0.75.
The parent appearance’s face selection may be deleted to eliminate the transparency, however, if you utilize a lot of appearances, it may be hard to spot this. However, if you simply need to get rid of transparency from a few hard-to-access faces, this could be the best course of action.
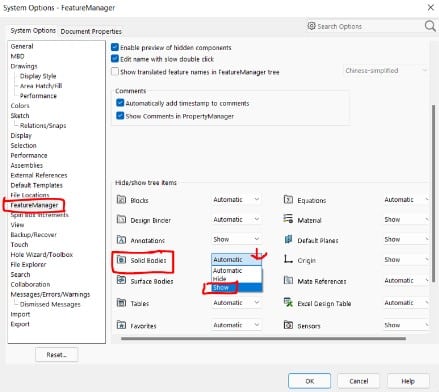
Adjusting appearances under system options
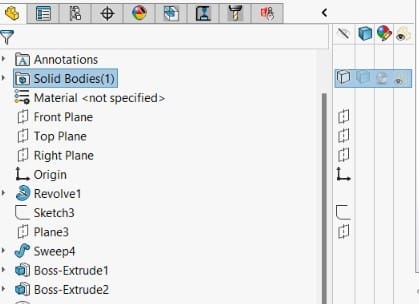
Those who are familiar with the multi-body design approach will notice that a component model can contain more than one solid body. When there are two or more solid bodies in a component model, the Solid Bodies folder appears in the feature tree.
However, you can have the solid bodies folder always appear, regardless of how many bodies you have. This is done by going to Tools > Options. The Solid Bodies may be located under FeatureManager, as illustrated in the accompanying screenshot.
When this option is set to Automatic, it is hidden when there is just one solid body and visible when there are two or more. We may override this default option and always display the Solid Bodies folder.
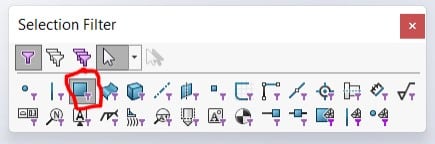
Changing transparency utilizing Selection Filters
First, you must choose all of the model’s faces. It would appear that using the Select All command would be effective, however, it chooses more than just faces. As a result, you can’t get rid of all the transparency at once. Selection filters have a role in this.
By selecting View > Toolbars > Selection Filter or by pressing F5 on the keyboard, you may display the Selection Filter toolbar. Select the Filter Faces icon when it appears. This makes it impossible to choose anything but faces.
Click on the graphics area once again, then use Ctrl + A on the keyboard to utilize Select All once more. Make sure to choose every face.
Right-click here and select Change Transparency.
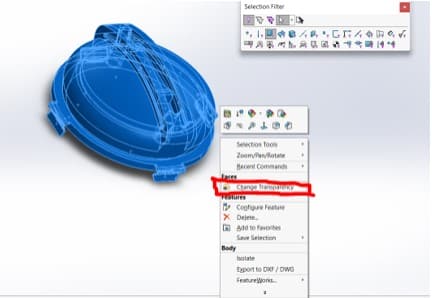
All of the model’s faces will probably turn transparent. If so, follow these instructions once more to reveal all the faces. If any transparency remains, it is probably connected to a particular feature or body. Be sure to look for any transparency settings in the Display Pane of the FeatureManager Design Tree.