
DISCLOSURE: This post may contain affiliate links, meaning when you click the links and make a purchase, we receive a commission.
Want to secure your online sessions and data? If you’ve done the research, you might have come across the ever-popular OpenVPN service. However, by setting it up yourself, you are also going to have to deal with the problems that might pop up along the way.
One of them is our topic for this article: ‘Tls Error: Tls Key Negotiation Failed To Occur Within 60 Seconds’. If you are bugged down with this error and are looking for a reliable solution, then look no further. In this article, we’ll be taking a look at what might be causing these issues and possible solutions. Keep reading to find out what they are.
Reasons For ‘Tls Error: Tls Key Negotiation Failed To Occur Within 60 Seconds’
If you take a look at the community forums on OpenVPN, you will notice that this error is one of the most common issues a lot of people face. To understand why it occurs, we need to take a look at the underlying process that runs the OpenVPN service.
On either end, yours and the OpenVPN server is a service daemon that establishes the connection and enables traffic to go through the internet. The most common issue with OpenVPN setup is that the OpenVPN daemons can’t establish a TCP/UDP connection. This often happens due to the following:
- The firewall on the server network blocks incoming OpenVPN packets (default port: 1194)
- The server’s software firewall blocks incoming connections on port 1194
- Lack of port forward rule on the server’s NAT gateway for TCP/UDP 1194 to the server machine
- Incorrect server address in OpenVPN client config
- Windows firewall blocking OpenVPN binary (need to add to “Exceptions” list)
Solutions for “Tls Error: Tls Key Negotiation Failed to Occur Within 60 Seconds”
With the causations in mind, we can identify that there are three (two if you do not use a NAT in your network) fail points where server communication fails that lead to the occurrence of this error.
It can be either the local NAT, the client’s firewall, or an incorrect configuration of OpenVPN on the client’s machine. Follow the below steps to remedy each of these fails.
Incorrect Server Adress In OpenVPN Client
Let’s start with the easiest solution. Perhaps the reason that you aren’t able to connect to the server is that you might have put in the wrong address in the OpenVPN client configuration.
Simply redo the initial OpenVPN configuration and make sure that you’re putting in the correct IP address for the server-side connection parameters. To rectify follow these steps:
- Log into the client machine.
- Open the OpenVPN client configuration file as such: $ sudo nano /etc/openvpn/server.conf
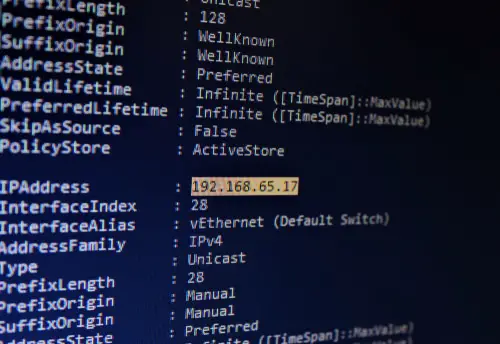
- Change the OpenVPN server IP by modifying the line that has the server parameter as such: server 192.55.67.0 255.255.255.0
Firewall
The local firewall on your client machine might be blocking outgoing OpenVPN traffic. To mitigate this problem, make sure you whitelist the port number on which OpenVPN is running.
If you have chosen a different one, then put that in the whitelist; otherwise, the default port number for OpenVPN connections is 1194. To make sure it is not blocking OpenVPN traffic, follow the steps below
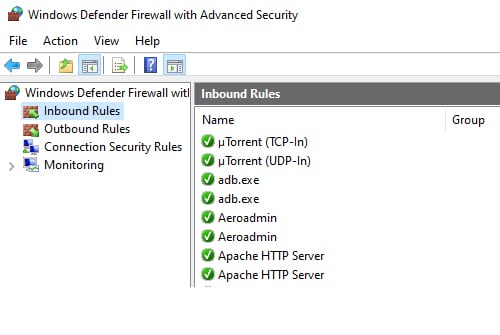
- Open the Start Menu and start typing Windows Firewall with Advanced Security.
- Click on the menu item with that name.
- Click Advanced Setting in the app.
- Click on the Inbound Rules option.
- In the Actions section, select the option to add a New Rule.
- Window’s Inbound Rule Wizard will pop up.
- Select the Custom option and then hit Next.
- Select the Scope option and add OpenVpn’s IP address you’ve been assigned.
- Click Finish to complete the process.
NAT
Finally, the problem might be caused by your local NAT. This is the most probable if your client machine is located within an organization’s local subnet. Home connections don’t generally use a NAT. An intermediary NAT device can change your port numbers in between sessions.
This can be problematic if it considers each UDP (the default OpenVPN protocol) packet as a self-contained connection. Therefore either switch the OpenVPN connection to TCP or reconfigure your local NAT to make it not treat UDP connections as ephemeral.
Configuring the NAT will depend on the hardware that you have, and as such is not possible for us to troubleshoot in this guide however, you can change the TCP/UDP protocol to circumnavigate having to mess around with the NAT. Follow the steps below to do so.

- Log into your server.
- Open up the terminal.
- Type this command to change OpenVPN to TCP rather than the default UDP: $ openvpn –proto tcp-client client.ovpn
Final Thoughts
While OpenVPN is free to use and open source, the caveat is that it is hard to set up if you don’t have good enough networking and Linux knowledge. The problem we have discussed at large is probably the most common one new users face. However, after reading this article, you should be well-equipped to solve it on your own.