DISCLOSURE: This post may contain affiliate links, meaning when you click the links and make a purchase, we receive a commission.
If you use WordPress on your site then you must be familiar with ‘Jetpack’. It’s an all-in-one plugin. It can be used to protect, backup and design your WordPress websites.
‘Jetpack’ has literally a ton of features. Not to mention, all of the individual features are customizable. Besides, the best thing about this plugin is that it is free. Although, not all of the features are free. If you want to use some of the advanced features then you have to upgrade your plans.
If you don’t want to upgrade your plans. Even then you will get a top-notch service from using the free version. So, in order to get the best out of your website you should start using the ‘Jetpack’ plugin.
If you don’t know how to install or configure it. For you, we have jot this article down explaining the ins and outs of installing and configuring ‘Jetpack’. Before we begin, you need to have a WordPress-powered site. So, you need to install WordPress on your web host account beforehand.
Now, if you are ready. Let’s get going.
How to Install and Setup JetPack on SiteGround
Steps to follow:
- Login to the ‘WordPress’ dashboard of your site
- Some hosting providers (in our case, it’s SiteGround) pre-install ‘Jetpack’ plugin during the ‘WordPress’ installation. On your ‘WordPress’ dashboard, you will see a notification saying ‘Welcome to Jetpack’ (like the image below)’, which means the plugin is installed and activated already
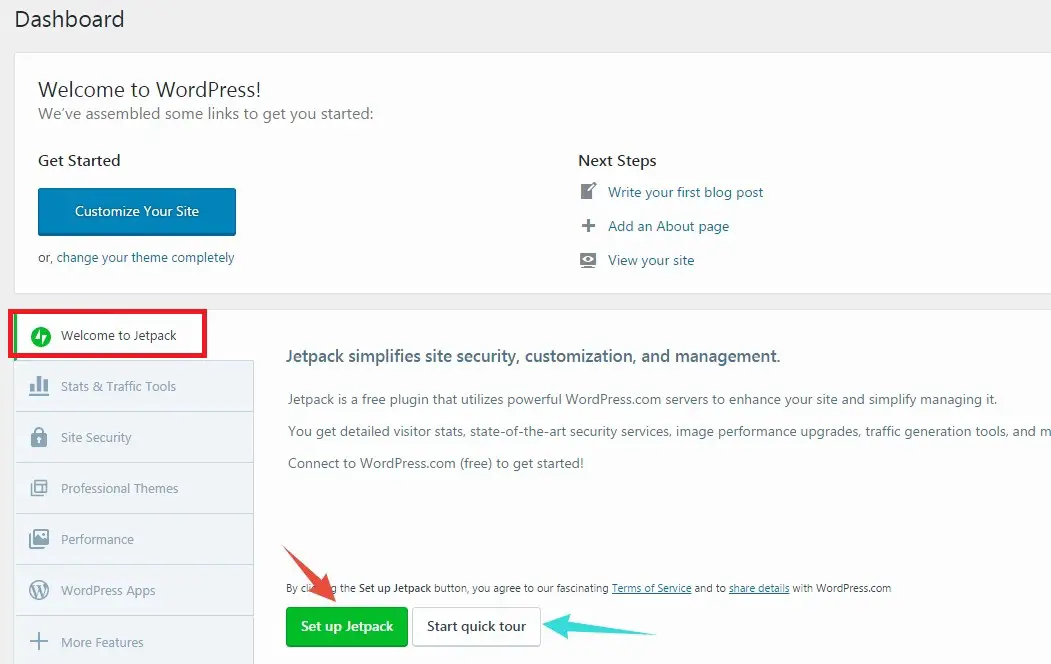
So, you can now start setting it up by clicking on the ‘Set up Jetpack’ button. If you want to start the setup, then you can skip the ‘Installation’ part of this article. And directly start reading from the ‘Set up’ part.
Unfortunately, not all of the hosting providers pre-install the ‘Jetpack’ plugin. If it is like that on your case. Then you need to install and activate the plugin first. After that, you will be able to start to configure it. That’s why we will share the process of installing ‘Jetpack’ on your WordPress site right now.
How to install and activate ‘Jetpack’ plugin on WordPress:
There are two ways you can install a plugin on ‘WordPress’. You can upload the plugin to WordPress and then install it. Or you can use the built-in plugin installer from within your ‘WordPress’ dashboard to install it. However, we will explain both of the ways for you. It’s on you to choose which one you want to follow.
Method 1. Manual:
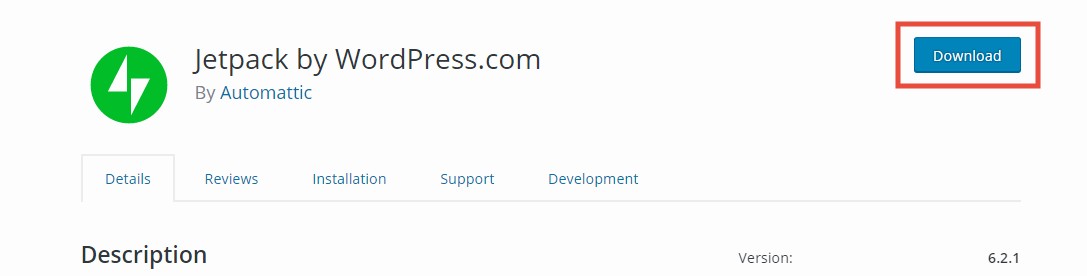
- Go to this page and download the file to your PC. It is the ‘Jetpack’ plugin which will be in a ZIP format
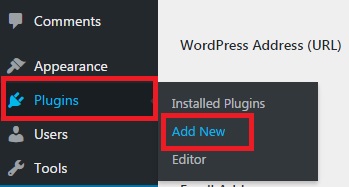
- After you have downloaded it, go to your ‘WordPress’ dashboard again. Navigate to the left sidebar and hover your mouse pointer over the option ‘Plugins’. Then a sub-menu will appear. Click on the ‘Add New’ button from that sub-menu. It will take you to the plugin installation page
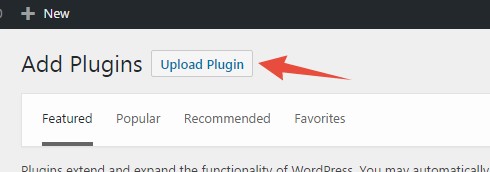
- Now click on the ‘Upload Plugin’ option from the top of the page
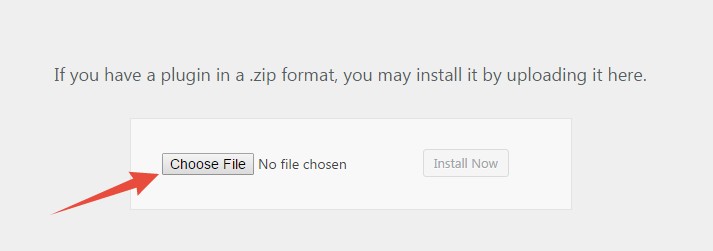
- A new page will appear. Click on the ‘Choose File’ button and upload the ZIP file from your PC which you have just downloaded
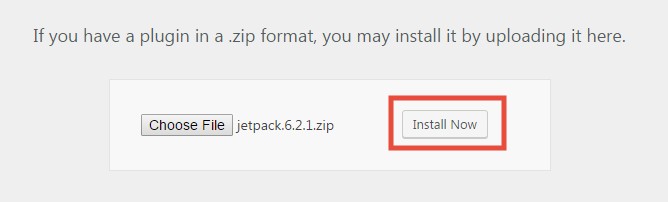
- Then click on the ‘Install Now’ button. It will take a couple of minutes to upload the plugin. So, wait a bit
- The plugin will be uploaded and installed automatically. After that, you have to just activate it by clicking on the ‘Activate Plugin’ button
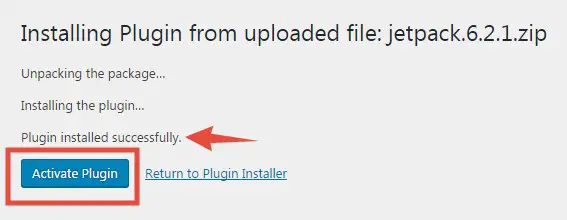
Then, you will be taken to a page from where you will be able to start the setup by clicking on the ‘Set up Jetpack’ button
Method 2. Auto:
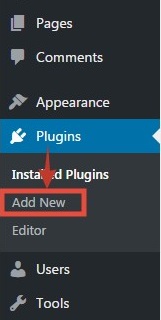
- On the left sidebar of the WordPress dashboard, click on the option named ‘Plugins’. Then click on the ‘Add new’ button from under the ‘Plugins’ option itself. Or you can also find another ‘Add new’ button on top of the page. You can click on that button too. It’s your choice
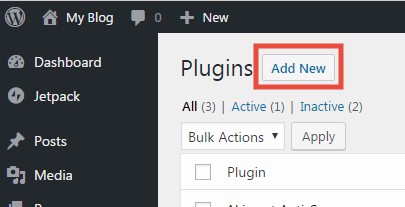
- As you are on the plugin installation page of the WordPress dashboard. Here, you will need to locate the ‘Jetpack’ plugin first. Then, we can proceed to install the plugin
However, typically, it won’t be available under the ‘Featured’ plugins tab. But you can easily find the plugin by following the steps below. So here we go.
- At the top-right corner of the screen, you will see a ‘Search’ box
- Type ‘Jetpack’ (case not sensitive) on the search box and press ‘Enter’ key on your keyboard
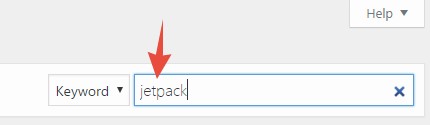
- You will find that a lot of plugins has appeared in the search result. The ‘Jetpack’ plugin will be the first one on the list. It is developed by ‘Automattic’
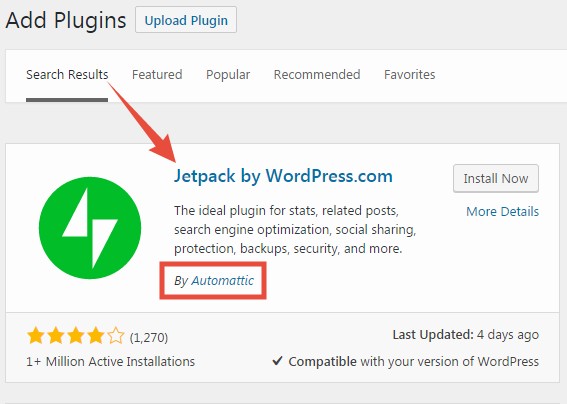
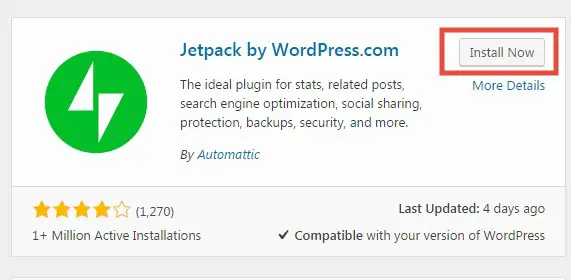
- Click on the ‘Install Now’ button to start the installation
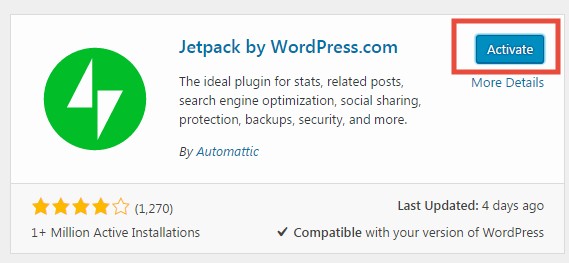
- Then click on the ‘Activate’ button to activate the plugin
- After the activation, you will be taken to a page from where you could start the setup process
Now, we will learn how to configure the Jetpack plugin to get the best out of it.
How to set up ‘Jetpack’ for the best results:
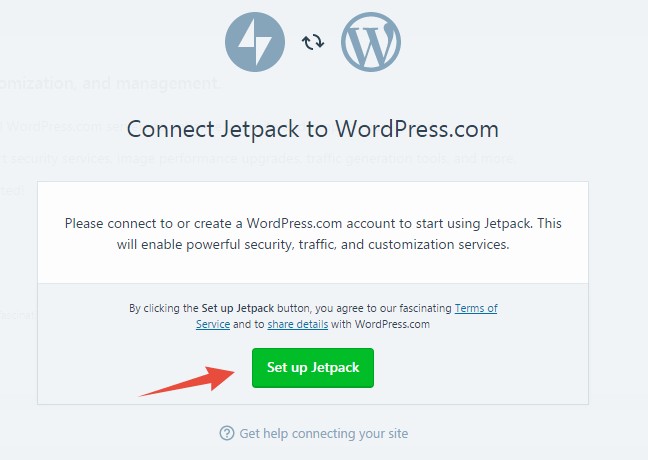
To start setting up, you need to click on any of the ‘Set up Jetpack’ button from the ‘WordPress’ dashboard. There could be more than one ‘Set up Jetpack’ buttons all over the WordPress dashboard.
- So, you can click on any one of them to continue
- It will take you to this page
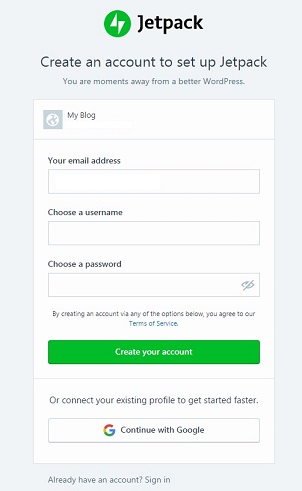
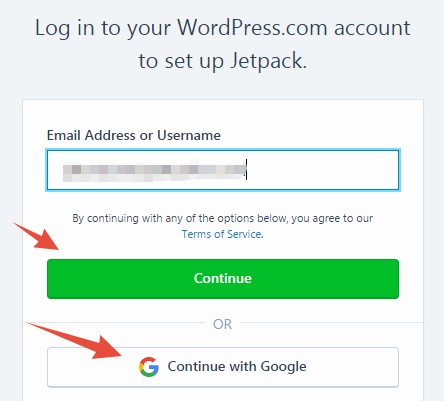
- To use Jetpack, you need to have a ‘Wordpress.com’ account
- If you have one then you can log in to the account using the ‘Sign in’ button from under the page, or the ‘Log In’ button from the top-right corner of the page


- But, if you don’t have one. Then you can create new one right there. So, enter your email address, username, and password on the blank boxes. Then click on the ‘Create your account’ button

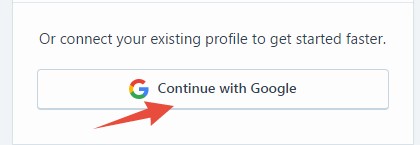
- Or you can also use any of your Gmail accounts to log in. To do this, you need to click on the ‘Continue with Google’ button
- It doesn’t matter how you do it. Just log in to your ‘WordPress.com’ account
- After you log in to your account, it will take a little time to authenticate your account
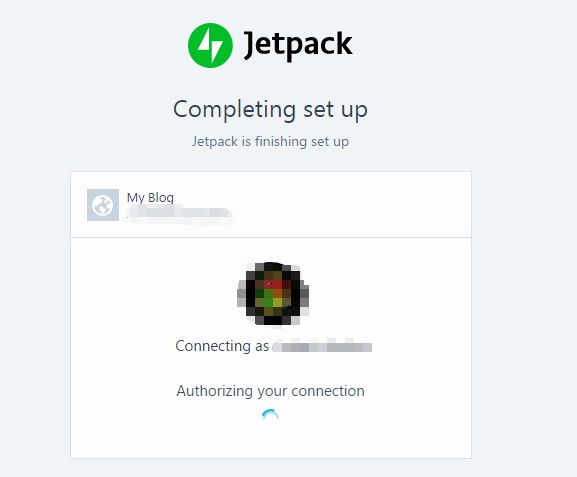
- From there, you will be taken to the ‘Jetpack’ dashboard
Now you can begin to configure ‘Jetpack’ step by step. We will explain all of the settings one by one. So, it will be easier to follow. Let’s start.
Site Stats:
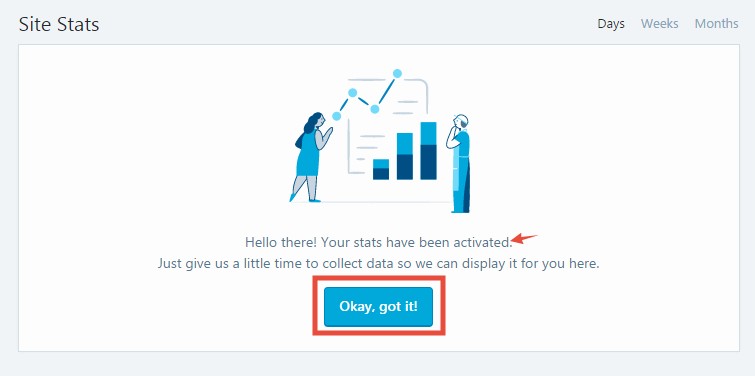
- This setting will be activated by default. Just click on the ‘Okay, got it!’ button. It will show a detailed stats of the visitors of your website
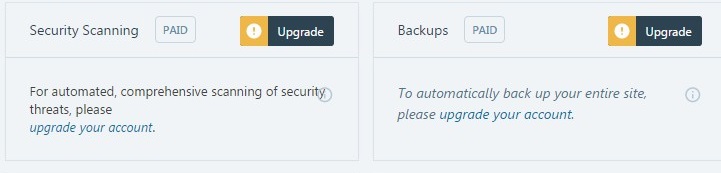
Security:
- Security Scanning & Backups: These two options are only available for paid users
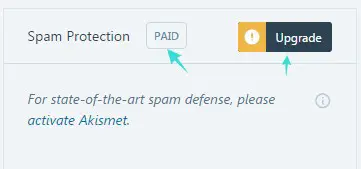
- Spam Protection: You need to have the paid version of the plugin for this setting too
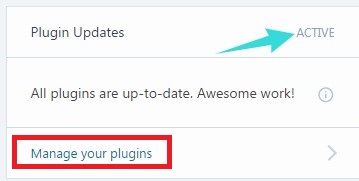
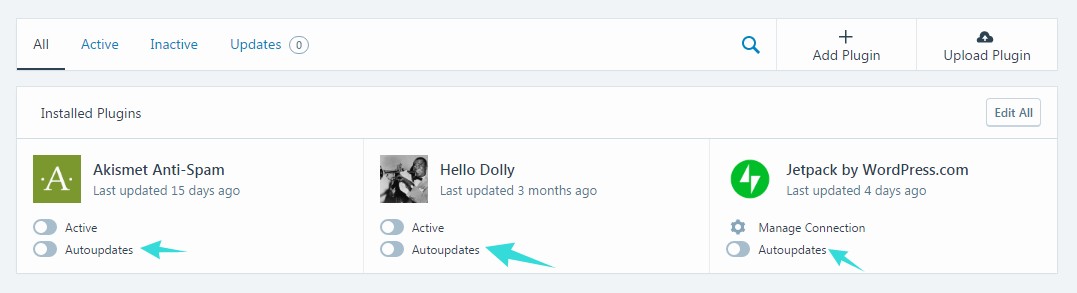
- Plugin Updates: To enable this click on the ‘Manage your plugins’ option. You will be taken to a new page; where you can enable the option to auto-update any plugins by clicking on the ‘autoupdates’ button under the names of each plugin. We recommend enabling the auto-update feature. After enabling, go back to the ‘Jetpack’ dashboard
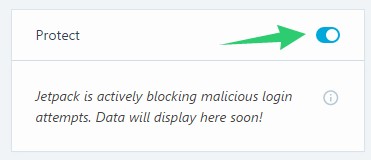
- Protect: We recommend to enable it. The ‘Protect’ feature will help you to block malicious login attempts
- Downtime Monitoring: It will be automatically enabled. Keep it that way. We will talk more about this feature later

Performance:
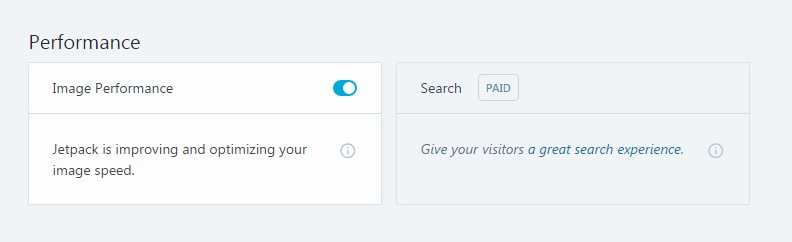
- Image Performance: It should be enabled
- Search: It is only for the paid users
Connections:
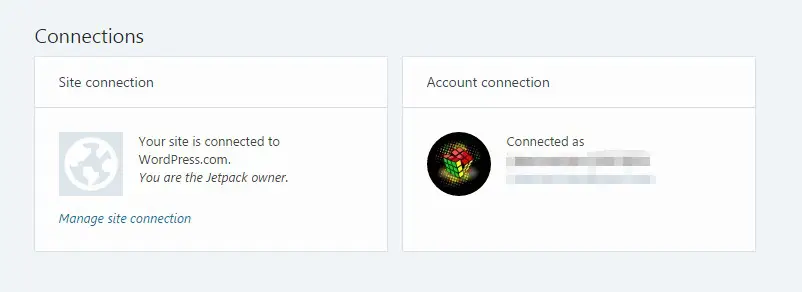
- You will see which sites are connected to which of your account
- You will be able to manage connections from the ‘Site connection’ setting
Download the free apps:
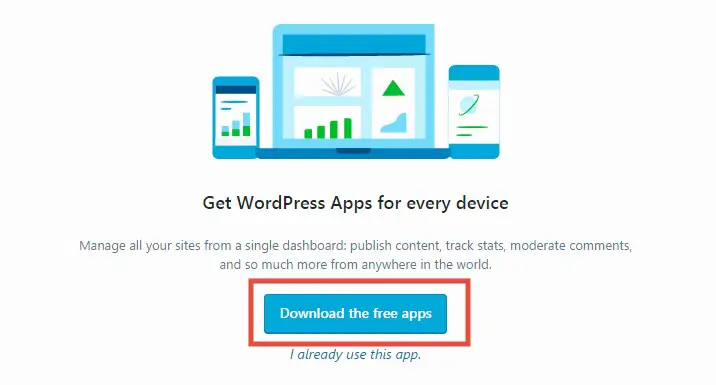
- ‘WordPress’ has an official app. Using which you can manage your site from a mobile device. You can download the app by clicking on the ‘Download the free apps’ button
At this point, you are done configuring the ‘Dashboard’ options. Now we can head to the ‘Settings’ options. To do that…
- Click on the ‘Settings’ button from the top of the page

There are 5 different settings to configure which are: Writing, Sharing, Discussion, Traffic, and Security. We will start with ‘Writing’.
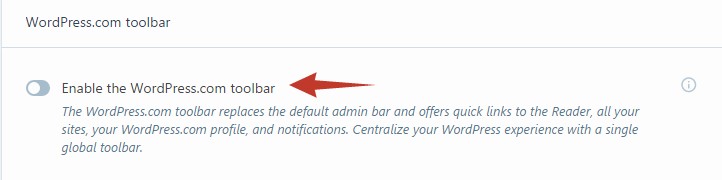
Writing:
- The first setting is the option to replace the default WordPress toolbar with the WordPress.com toolbar. However, we don’t recommend using it. It is up to you
Composing:
- In the ‘Composing’ section we don’t recommend the first option. However, if you want to use plain-text markdown syntax then you can enable it

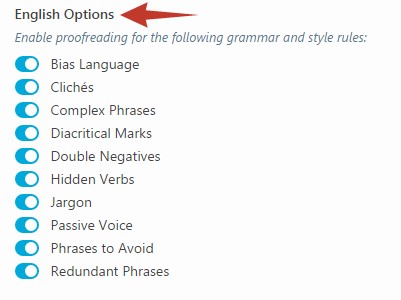
- The second option is very useful. So, you can enable this option. It will help you to write error-free posts on your WordPress website. Click on the arrow icon to bring out some more options. Now, you can start to configure it further

- On the proofreading section, we recommend choosing the option ‘A post or page is updated’. If you want you can use the other option too

- Enable the ‘Automatic Language Detection’

- From the ‘English options’ enable all of the options
- You can write down some phrases on the ‘Ignored Phrases’. These phrases will not be proofed from the next time you write

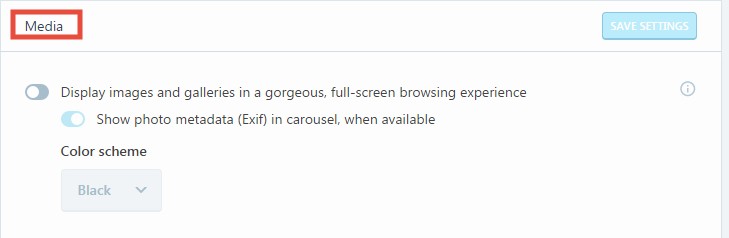
Media:
- You can use this feature to improve the visualization of your website. However, it is not compulsory
- If you upgrade to the paid version of Jetpack, then you can host high-quality videos on ‘Wrodpress.com’ server. But, we don’t think it is necessary. As you can host videos on YouTube like sites for free

Speed up your Site:
- The first option will be enabled automatically. You don’t need to change it

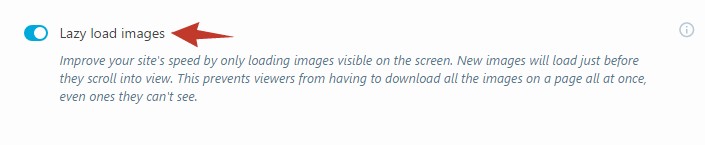
- We recommend enabling the ‘Lazy Load Images’ option. It will help to improve the loading speed of your site
Custom content types:
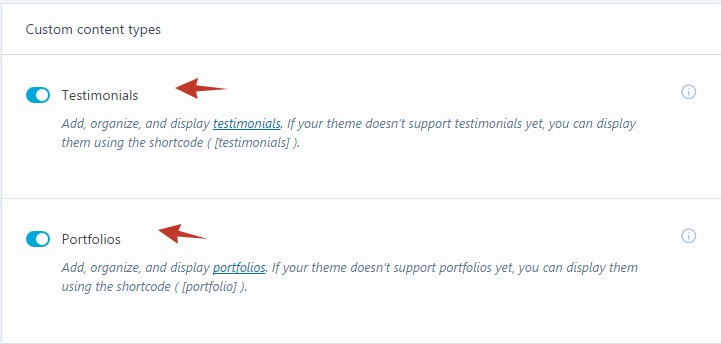
- If you want to use ‘Testimonials’ and ‘Portfolios’ on your website. You can keep both of the options enabled. If your theme already have these options or you simply don’t want to use those. Then you can disable them
Theme Enhancements:
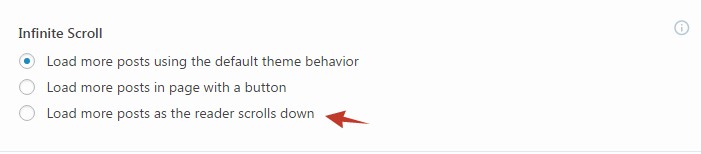
- In the ‘Infinite Scroll’ section, there are three options regarding the infinite scroll. It depends solely on your choice which you want to use. The first one is the default one. If you choose this then your site will act the way your theme handles scrolling.But, the third one is getting popular day by day. If you choose it, then if the visitors keep scrolling after reading a post. Another post will appear automatically. They don’t need to do anything but keep scrolling
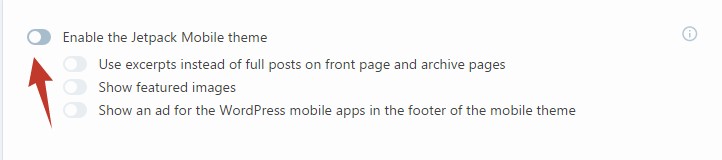
- We don’t recommend the ‘Enable the Jetpack mobile theme’ option. Nowadays, most of the WordPress compatible themes are dynamic. So, they can work both on mobile and PC seamlessly without any issue. But, if you don’t have a dynamic theme then you can enable this option
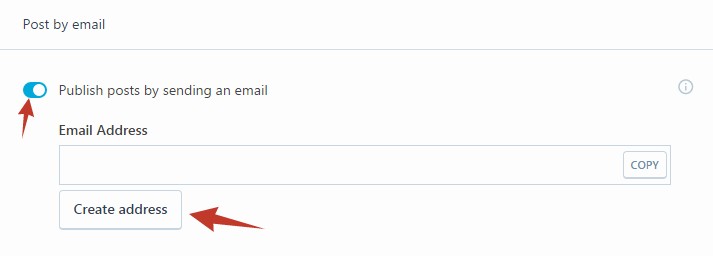
Post by Email:
- If you want to publish new posts on your website by sending an email. You can enable this option. You need to create a new email address by clicking on the ‘Create Address’ button. Then you can send any post to this particular email address. And, Jetpack will publish that as a new post
Sharing:
Now, click on the ‘Sharing’ button from the top menu to configure the settings related to ‘Sharing’.
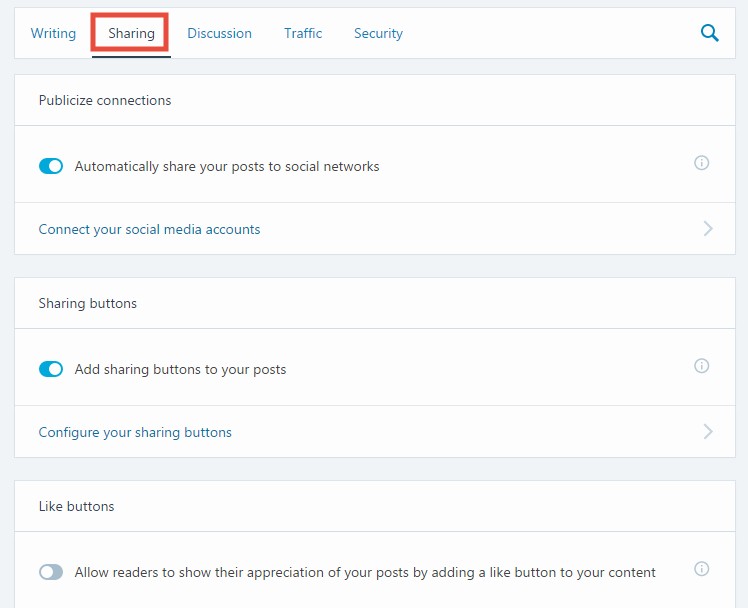
Publicize connections:
- If you want to share new posts automatically, then enable this option. You can connect popular social sites to your website using this option. Therefore, every time you publish a new post, it will be automatically shared to those social sites
- So to do that, click on the ‘Connect your social media accounts’ button

- It will take you to a new page. On the next page, you can connect any social media sites to your website. Click on the ‘Connect’ button next to the social media site’s name to connect that to your website
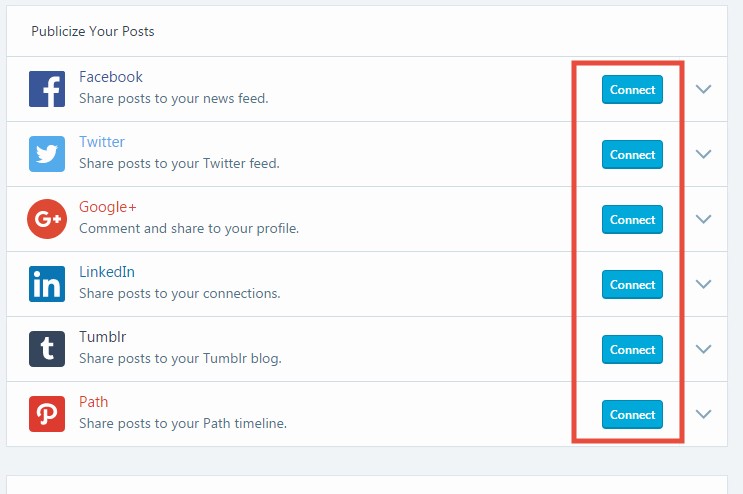
- You can also share photos from your ‘Google’ account by using the ‘Other connections’ option

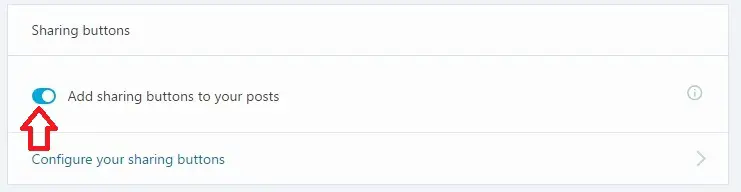
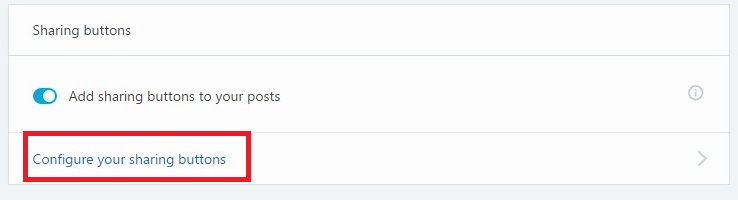
Sharing buttons:
- Enable this option to add sharing buttons to your post, pages, media etc. If you use other plugins for the ‘sharing button’ option, you don’t need this feature
- Yet, if you want to use it. Click on the ‘Configure your sharing buttons’ option
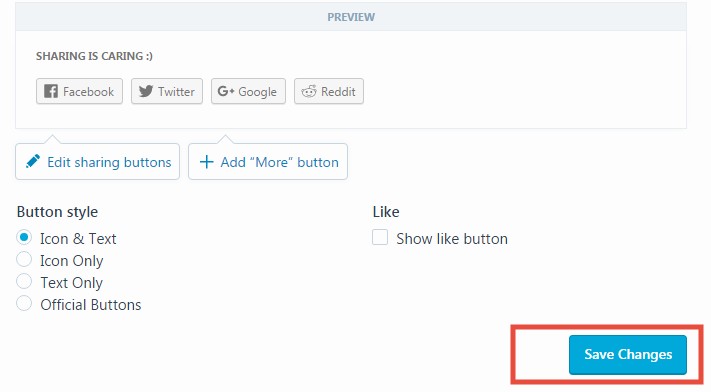
- This will open another new page. You can customize everything regarding the sharing buttons from this page
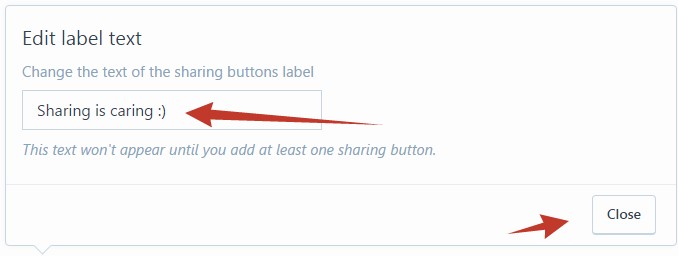
- Click on the ‘Edit label text’ to change the text which will appear above the sharing buttons

- Type what you want on the box. And, click on ‘Close’ to save it
- You can choose button styles. Also, you can choose to show a ‘Like’ button under every post
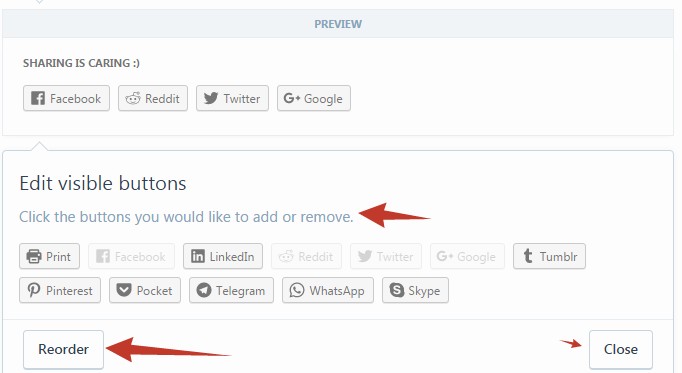
- To add new sharing buttons, click on the ‘Add Sharing Buttons’ option to bring the buttons
- Now, you can click on the particular button which you want to add, and it will automatically be added to the list of sharing buttons. You can see it on the ‘Preview’ section. If you want you can ‘Reorder’ the position of the added buttons easily. After that, click on the ‘Close’ button to save
- You can also add a ‘More’ button to the list of sharing buttons by clicking on the “Add ‘More’ button”
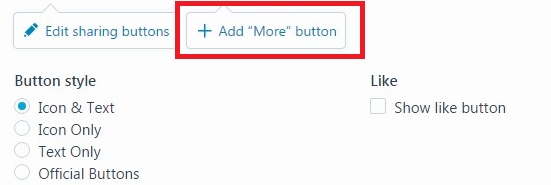
- When you are content with all of the settings, click on the ‘Save Changes’ button to finalize the settings
Options:
- In this section, you can choose which places to show the sharing buttons on
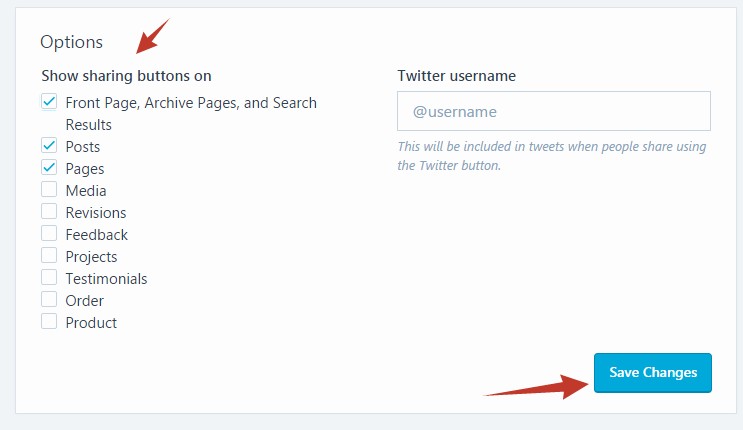
- After that, click on the ‘Save Changes’ button
After this, go to the previous page to continue the setup.
Like Buttons:
- If you enable it, the visitors will be able to ‘Like’ your posts

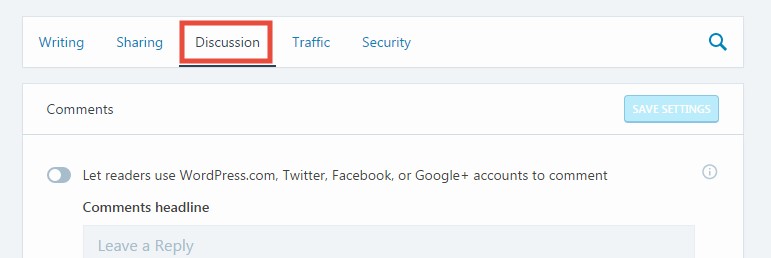
Discussion:
If you are done with the ‘Sharing’ options. Click on the ‘Discussion’ button to proceed.
Comments:
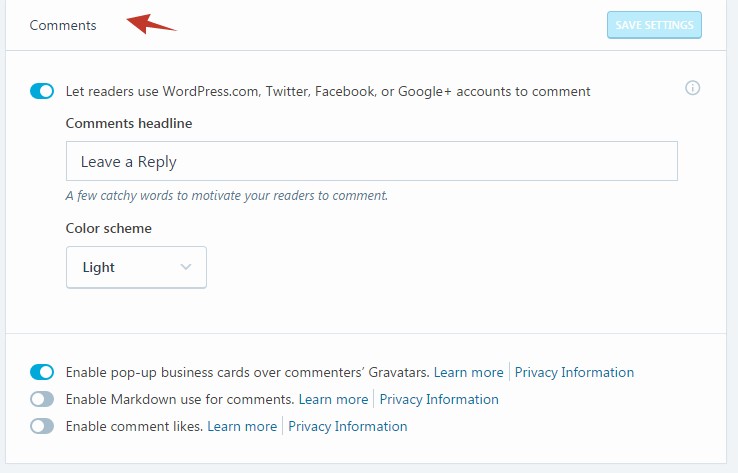
- If you want visitors to comment on your site. Enable this option. You can also change the ‘Comments headline’. The default comments headline will be ‘Leave a Reply’
- You can also change the color scheme of the comment section of your site
- Other three options will be available on the bottom. You can enable or disable them, it totally depends on you. These options are self-explanatory. If you don’t understand them, you can click on the ‘Learn More’ button to learn about these options in detail
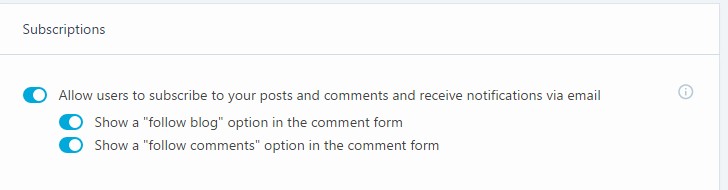
Subscriptions:
- We recommend enabling this option. So, your visitors will be able to subscribe to your site
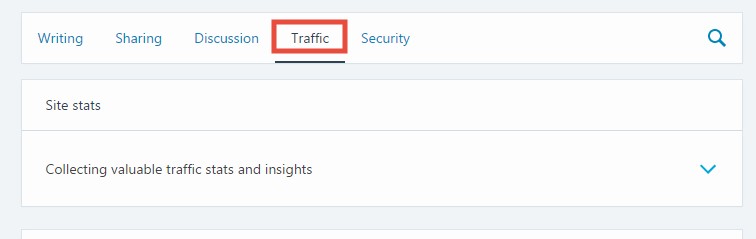
Traffic:
If you are OK with all of the previous options, click on the ‘Traffic’ option from the top.
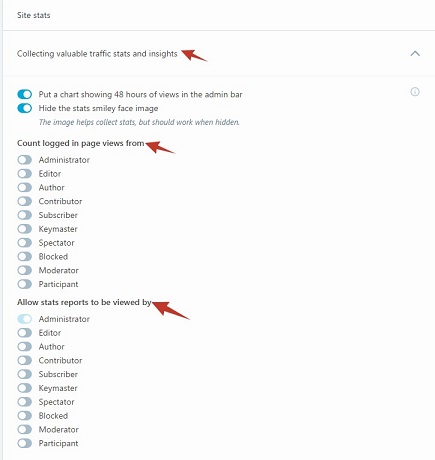
Site Stats:
- We recommend enabling this option. And, you don’t need to change any other settings from this section at all
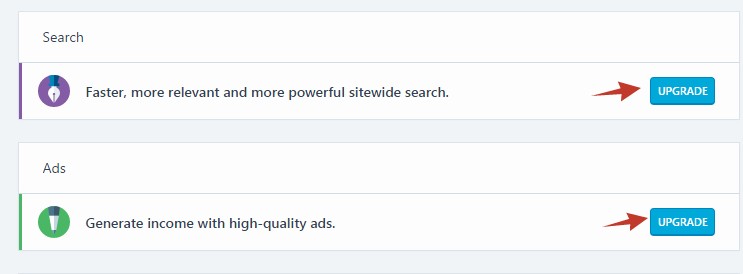
Search:
- This is a premium option. So, it’s unavailable to the free users
Ads:
- Similar to the last section, it is also only available for paid users
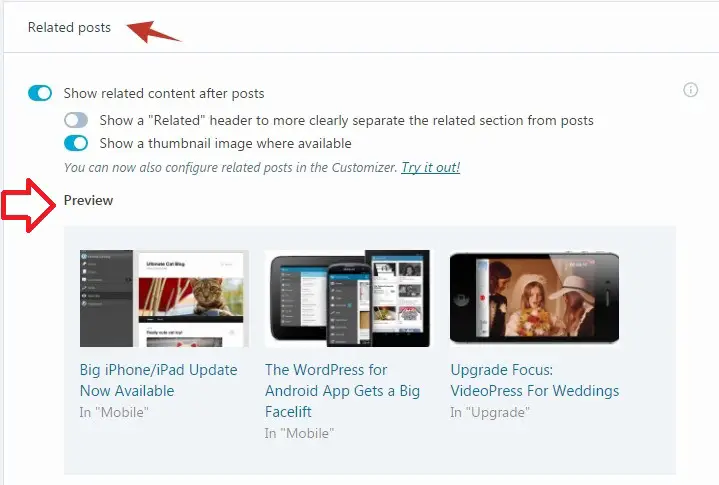
Related Posts:
- You can enable this option if you want to show some related content after each post on your site. You can show the related items in two ways. But, we prefer the second option which is using a thumbnail image. It attracts the visitors easily. You can see the outcome of your settings in the ‘Preview’ section in real time. So, you can decide which to use
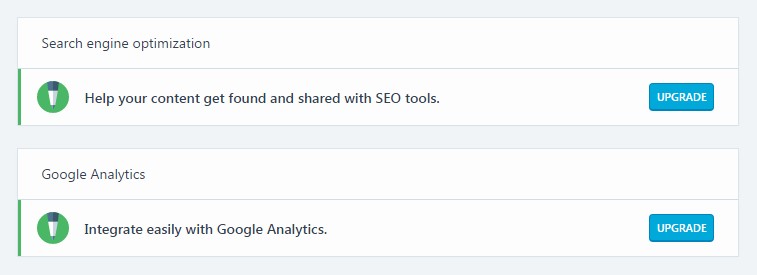
Search Engine Optimization and Google Analytics:
- Both of these are premium options. So, if you want to use these, you need to upgrade
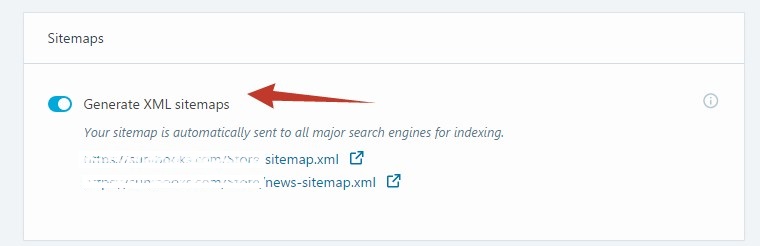
Sitemaps:
- Click on the ‘Generate XML sitemaps’ to enable it. ‘Jetpack’ will create a sitemap of your site and also will send it to the popular search engines. So, your site will be indexed by the search engines
Site verification:
- ‘Jetpack’ supports 4 search engines/services to verify your site with. However, it is not mandatory to verify your sites. Each of the services will provide a unique HTML tag code when you visit their verification pages. You need to copy that code and paste it into the blank box in front of the name of the particular services. Again, if you don’t understand it. You don’t need to do it at all

Security:
Click on the ‘Security’ button form top of the page.
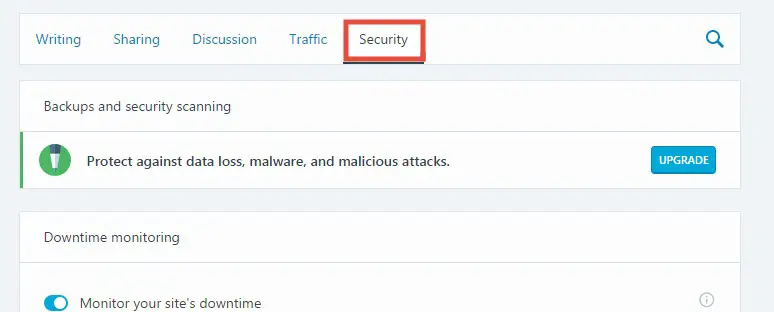
Backups and security scanning:

- It is not available for free users
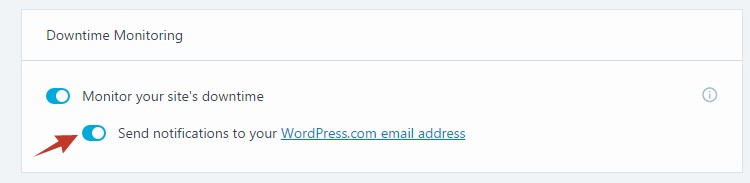
Downtime monitoring:
- We recommend using this feature. It is a very useful one. If you enable it, then you will be notified every time your site goes down via email (to your Wrodpress.com email). So, you can easily keep track of the situation in real time
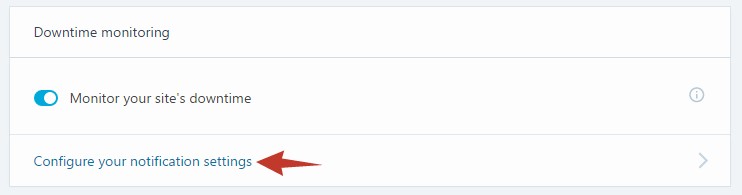
- You can click on the ‘Configure your notification settings’ to customize this feature further
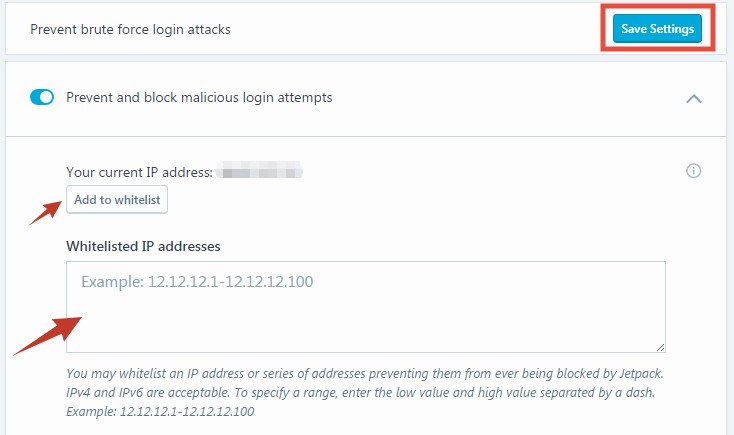
Brute force attack protection:
- Enable this feature. It will prevent any malicious login attempts. Additionally, it will block them afterward

- You can also whitelist some IP addresses. So that, Jetpack will not prevent these particular IP addresses to log in and will not block anytime in future
Spam Filter:
- This is also another paid feature. So, it might not be available to you

WordPress.com log in:
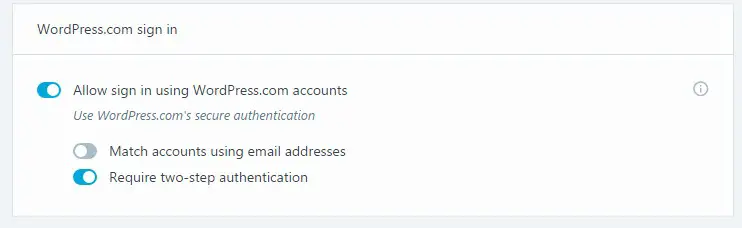
- We encourage you to enable this option if you have multiple WordPress sites. So that, you will be able to login to all of your WordPress sites using the ‘WordPress.com’ login email address and password
- Also, you need to enable the two-step authentication. It could be a hassle to log in using two-step-authentication. But, we can assure you it is one of the best ways to secure your accounts/websites
Wrapping it up:
We know that ‘Jetpack’ has a lot of settings to configure. But, we are telling you that it is worth it. It is unbelievable that a single plugin comes with all of these features. On top of that, it is completely free. So, if you are a WordPress CMS user then you must take this opportunity and get the best out of this plugin.
