DISCLOSURE: This post may contain affiliate links, meaning when you click the links and make a purchase, we receive a commission.
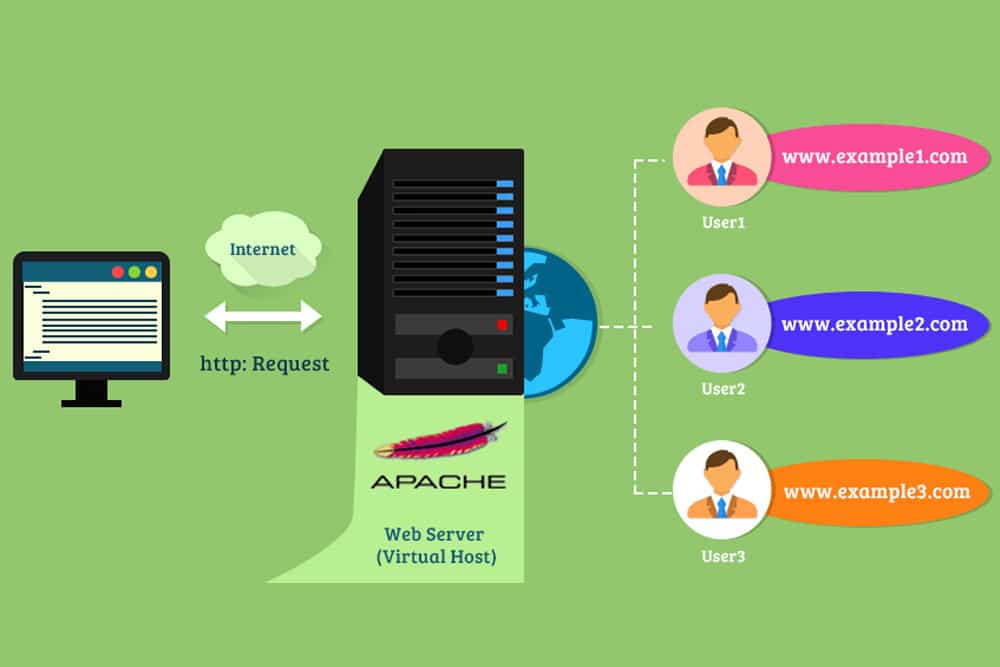
Whether you’re a solo web designer or work in a small team, web hosting services are a mandate of your job. Luckily, cPanel web hosting provides you with all the necessary tools to host your websites and share the administrative rights of the entire server.
Using the Web Hosting Manager (WHM), you can automate the whole system administrative process. You can install the newest versions of cPanel and WHM on CentOS, Red Hat Enterprise Linux (RHEL), CloudLinux OS, and Ubuntu.
However, while running WHM on various systems, you’re bound to run into various issues, including a common configuration error “Apache vhosts are not segmented or chroot()ed”. In this guide, we talk about the possible reason and troubleshooting methods for this error.
Apache Vhosts Are Not Segmented Or Chroot()ed
WHM comes with many features to make web hosting smoother for beginners. One of the best WHM features is Security Advisory, which draws the attention of hosts towards potential security concerns in the service and their possible solutions. The security concerns are flagged as warnings in the Security Advisory panel.
Each warning in the Security Advisory panel is color-coded depending on the severity. There are 4 possible statuses of a warning based on red, yellow, grey, and green colors.
- Red implies a severe security risk that needs to be addressed immediately.
- Yellow advisories indicate possible risks that should be addressed whenever possible.
- Grey warnings are used to indicate permission issues
- Green notifications indicate proper functioning.
In this guide, we are discussing a red warning generated by the Security Advisory panel when you run the scan of the server. The warning produced is “Apache vhosts are not segmented or chroot()ed”, which needs your immediate attention.
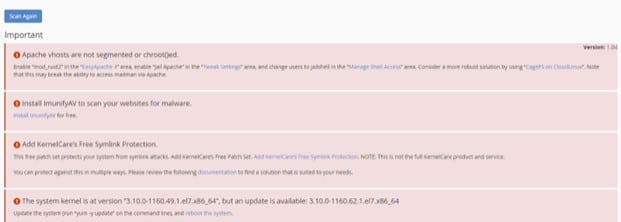
The exact warning notification through the Security Advisory panel is shown below, followed by the fix suggested by WHM Security Advisory.
Apache vhosts are not segmented or chroot()ed.
Enable “Jail Apache” in the “Tweak Settings” area, and change users to jailshell in the “Manage Shell Access” area. Consider a more robust solution by using “CageFS on CloudLinux”. Note that this may break the ability to access mailman via Apache.
Possible Reasons For “Apache Vhosts Are Not Segmented Or Chroot()ed” Warning
In various cases, WHM Shell Server may require access to the cPanel users, which can be quite risky. It is a security breach as it grants cPanel users access to administrative rights outside their jurisdiction. To achieve efficient web hosting, maintaining user rights and protocols is essential.
Your WHM Security Advisory issues the “Apache Vhosts Are Not Segmented Or Chroot()ed” warning when the server is not configured properly to load the user sites in a jailed environment. It means that the users would have access to data that lies outside their environment and is not backed by their rights in the servers.
To address the concern of users having unrestrained access, the Security Advisory sends a notification warning. You can change user shells to Jailed Shell in the Manage Shell Access section to resolve this problem.
Troubleshooting of “Apache Vhosts Are Not Segmented or Chroot()ed”
The fix for this error is generated with the warning by the Security Advisory panel that reads, “Enable “Jail Apache” in the “Tweak Settings” area, and change users to jailshell in the “Manage Shell Access” area”. So, let’s take a step-by-step look at implementing this solution.
There are 3 steps you need to take in order to resolve the Apache Vhosts Are Not Segmented Or Chroot()ed warning from the Security Advisory. The steps are described next.

Step 1: Ensure “mod_ruid2” Is Installed
The first thing you need to do is to ensure that the module mod_ruid2 is installed on your web hosting server. You can do so by either of the following two methods:
- In the command line, run the command rpm -qa|grep mod_ruid2, which lets you know the status of the mod_ruid2 in your server.
- You can access EasyApache from the WHM and search for the mod_ruid2 module in the Apache Module section.
If the mod_ruid2 module is not installed, you can use the next steps for its installation.
- Login to your WHM server and go to Home >> Software >> EasyApache 4 section.
- In the Currently Installed Packages section, click on the Customize button.
- From the EasyApache 4 customization wizard, search for the mod_ruid2 module in the Apache Module section.
- Mark the install button to install mod_ruid2
- Click on the Review section, and you’ll see all the packages that would be ready to be installed as part of this module.
- Click on the Provision button to complete the provisioning process, and finally, click on Done to exit the EasyApache 4 customization wizard.
Once the mod_ruid2 is installed, move on to the next step.

Enable “EXPERIMENTAL: Jail Apache Virtual Hosts using mod_ruid2 and cPanel jailshell” In WHM
After the installation of the required modules for Jail Apache, you need to enable “EXPERIMENTAL: Jail Apache Virtual Hosts using mod_ruid2 and cPanel jailshell” in your WHM server. You can do so by following the steps described below:
- Go to the Home >> Server Configuration >> Tweak Settings section.
- In the Find box, search for jailapache.
- Tweak the jailapache setting to ON.
- Click the Save button to execute the tweak setting.
- The message, “EXPERIMENTAL: Jail Apache Virtual Hosts using mod_ruid2 and cPanel jailshell” was updated will appear on your console screen.
- Go back to the Home >> Security Center >> Security Advisor section and click on the scan again. You will see that the Jail Apache has now been enabled.
Change Users Shell To “jailshell” In WHM
Now you can finally enable the Jailed Shell access for your cPanel users. Once it is done, the notification will disappear from the Security Advisory panel. Follow the next steps to enable Jailed Shell access.
- Simply go to Home >> Account Functions >> Manage Shell Access.
- Under the jail Shell settings, click on the Apply to all button.
- This enabled Jailed Shell access of WHM to all cPanel users.

However, if you’re not satisfied with this workaround, you can look for another more robust solution provided by CageFS on CloudLinux.
Conclusion
This concludes our guide to this common Jailed Shell warning notification in the WHM Security Advisory. Maintaining user rights and data control for efficient web hosting is crucial to prevent any security breaches, and enabling Jailed Shell settings for cPanel users helps you achieve that.