DISCLOSURE: This post may contain affiliate links, meaning when you click the links and make a purchase, we receive a commission.
So, you have just set up WordPress on your new web host account. Now, it’s time to give your website a new look.
In order to do that you need to install a theme on your website. You already may or may not know that there are thousands of free themes for WordPress available. On top of that, you can also use premium themes for extra benefits. But, if you are just starting then any free theme is enough.
Speaking of free themes, ‘SiteGround’ offers myriad of themes free of charge. You can choose any one of them to try on your website.
If you didn’t know how to install a theme on WordPress, this article is exclusively for you. In this article, we have compiled a number of ways to install a theme on WordPress. We will explain all of the methods in a step-by-step manner. As always, you will find screenshots with each step. So, whether you are a beginner or a professional, you will be able to follow this tutorial with ease.
So, without further delay, let’s get to the good part.
How to Install WordPress Theme on SiteGround
Steps to follow:
There are several methods of installing a theme on WordPress. But, the easiest one is to use the built-in theme installer from the WordPress dashboard. You can find thousands of free WordPress themes on the WordPress.org theme inventory. So, let’s begin the process.
- Log in to your WordPress dashboard
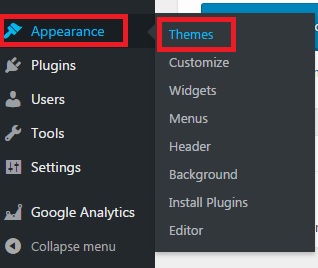
- Hover your mouse over the option ‘Appearance’ and then click on ‘Themes’ button from the new sub-menu
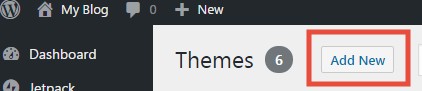
- Then click on the ‘Add New’ button to go the theme installation page
Form that page, you can choose your favorite theme and install it. You can find your favorite in a number of ways.
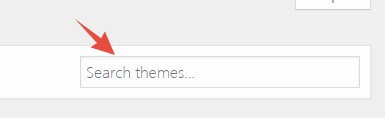
- You can directly search for your theme. It is only possible if you know the name of the theme beforehand. So, type the name of the theme on the search box form the top and press ‘Enter’ key on your keyboard. That way, the theme will be available on the next page under the search results
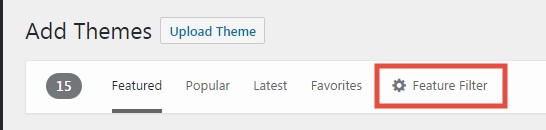
- Another way of choosing a theme is to use the ‘Feature Filter’ option. Click on the ‘Feature Filter’ button from the top right corner of the page
- Now, you can choose between three different attributes such as Subject, Features, and Layout
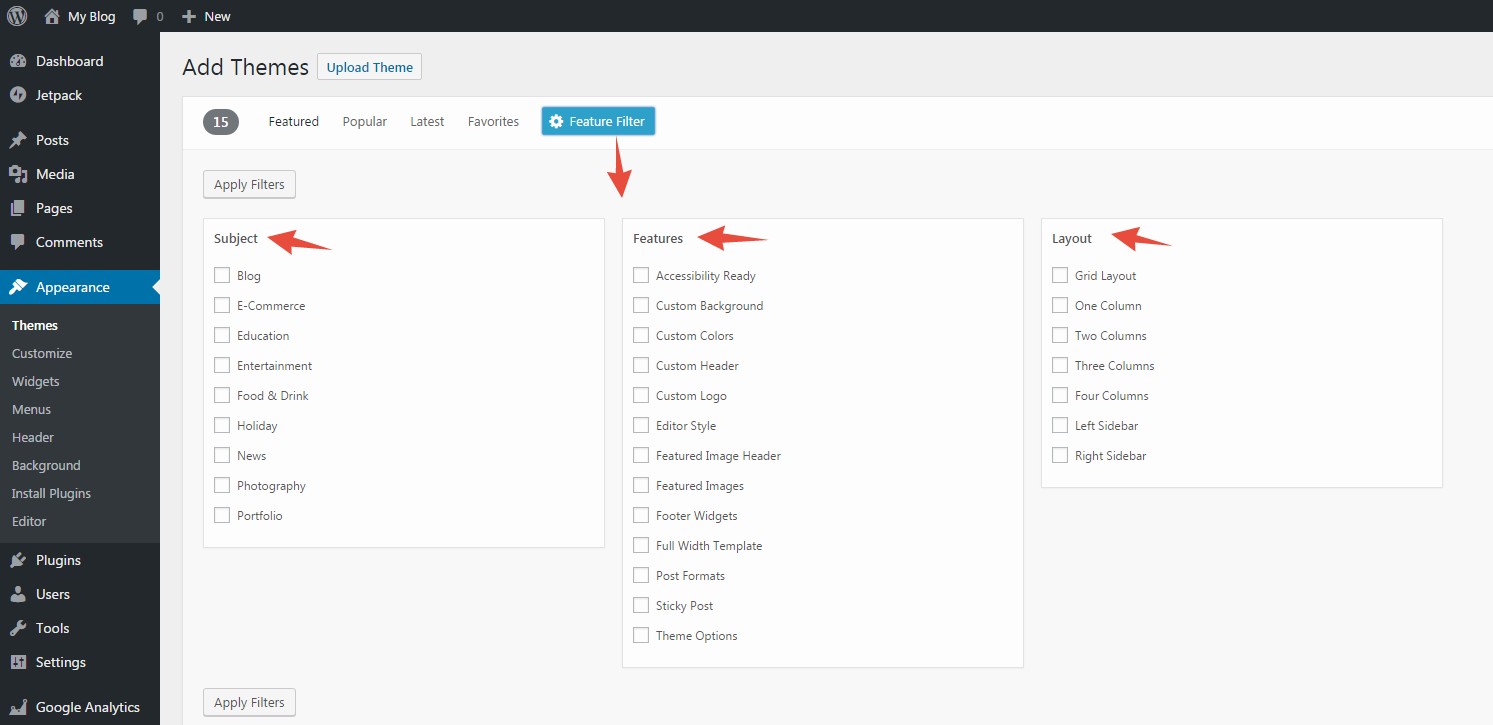
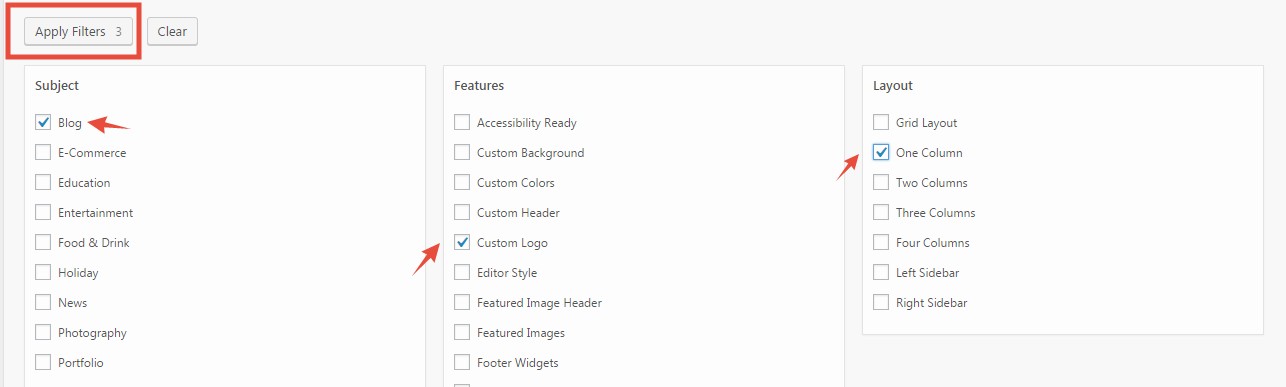
- After selecting the attributes, click on the ‘Apply Filters’ button to proceed
- On the next page, you will find all of the themes according to the filters you set
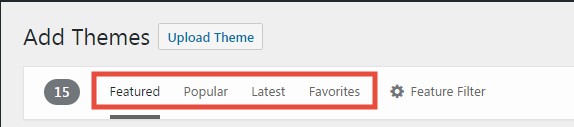
- The last way to choose a theme is choosing by categories. At the top of the screen, you will notice some categories named Featured, Popular, Latest, and Favorites. So, click on any one of them and all of the themes of that particular category will appear
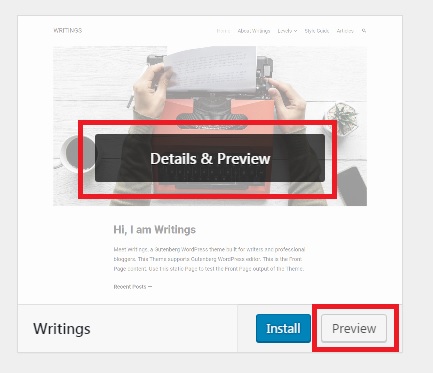
- After you have chosen a theme, you can do 2 things. The first thing you can do is to know more about the theme. To do that, hover your mouse pointer over the theme and click on the ‘Details and Preview’ or the ‘Preview’ button. It will show you a live demo of the theme and also a bit of information about the theme
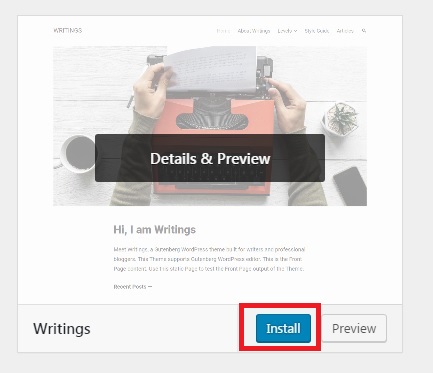
- The second thing you can do is to install the theme
- So, if you like a theme. Then hover the mouse pointer over the theme and click on the ‘Install’ button
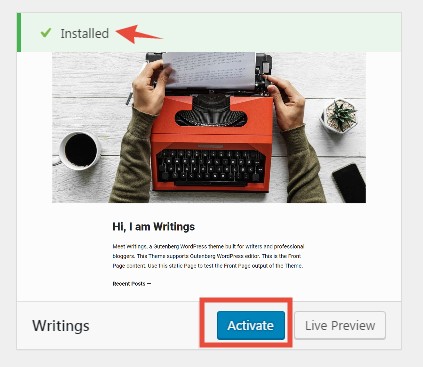
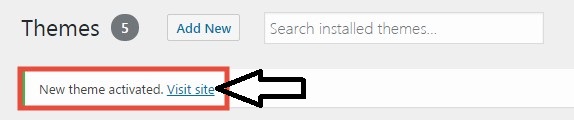
- Within a few seconds, the theme will be installed. Now, click on the ‘Activate’ button to make this theme your website’s default theme
- You will see a notification saying ‘New theme activated. Visit site’. Click on the ‘Visit Site’ link to go to the front-end of your website to view the fresh new outlook of your website
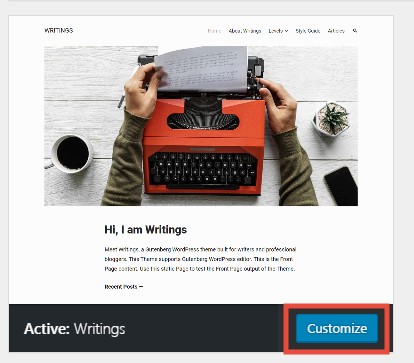
- You can now start to customize the newly activated theme by clicking on the ‘Customize’ button
If you have read the above section. Then you can easily install any theme from your WordPress dashboard. However, if the theme you are searching for is not available on the worpdress.org official theme inventory. Or if you want to install a premium theme. Then the above-mentioned method will not be useful for you at all. So, to tackle this problem, you have to use other methods.
As a result, in the next part of this post, we are going to show a method which will work on every situation. This method consists of two parts. First one is to download the theme first. Secondly, you have to upload the downloaded theme to your Web host server.
As you already know that ‘SiteGround’ provides a lot of awesome themes for free. We will download a theme from ‘SiteGround’ and then we will install it on our site. If you want you can download any other themes too.
Downloading the Theme:
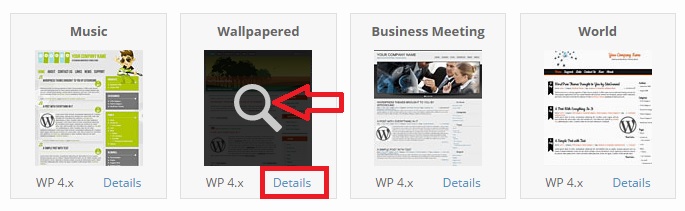
- Go to the official ‘Theme’ inventory of SiteGround
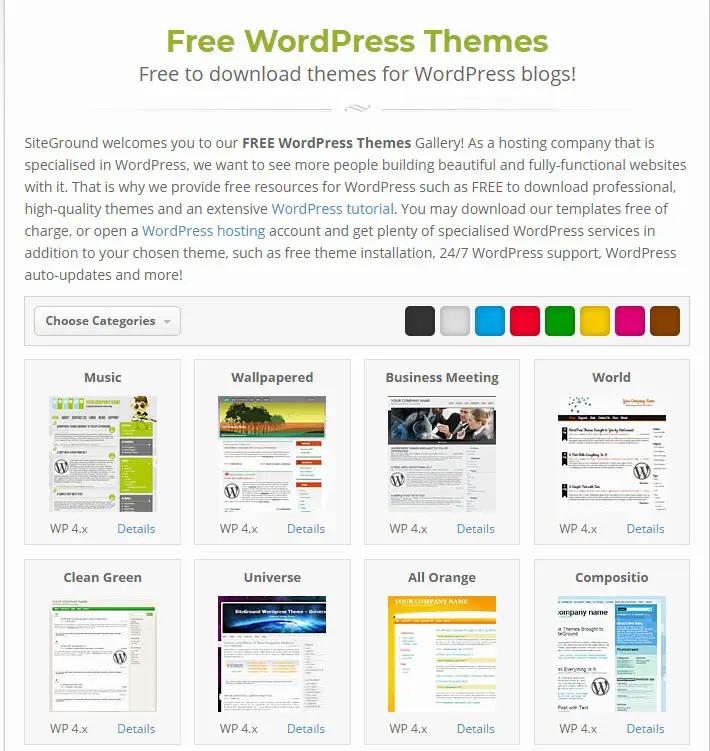
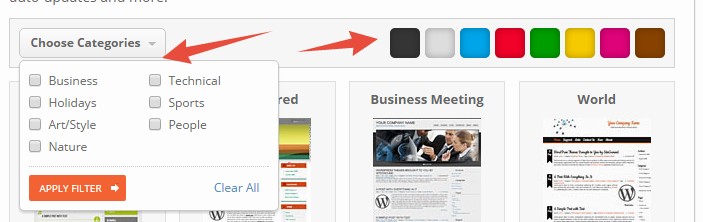
- You will find a lot of themes to choose from on the next page. You can either choose by categories or by colors
- After you have chosen a theme, click on the theme directly or the ‘Details’ button
- In doing so, a new popup will appear with all of the detailed information about that specific theme. You can also see a live demo of the theme by clicking on the ‘View Demo’ button. To view a demo you don’t need to install the theme at all
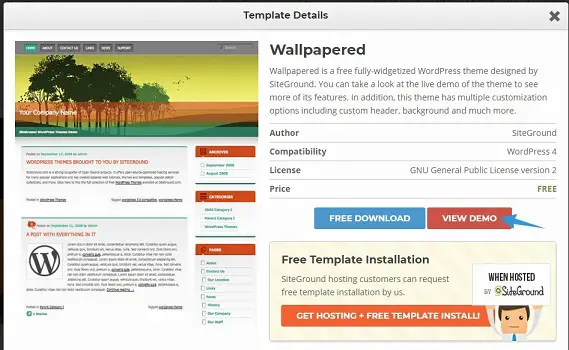
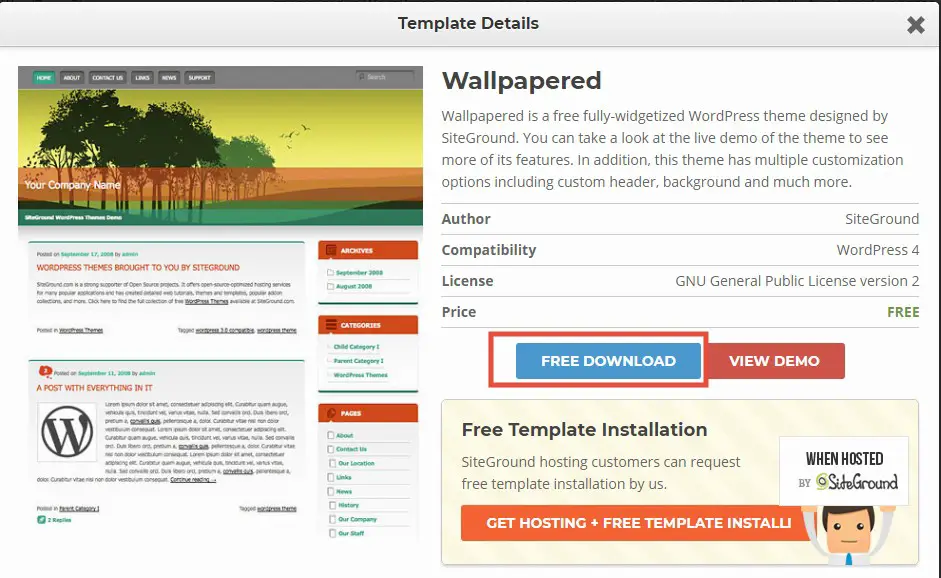
- So, after viewing the demo, if you like it then click on the ‘Free Download’ button
- That will bring a new page. In this page, you need to enter your ‘First Name’, ‘Last Name’, ‘Email’, ‘Website URL’, and ‘Validation Code’ to register
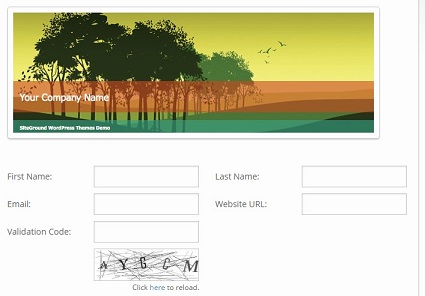
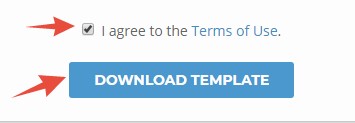
- After entering all the required information, check-mark the box next to the option ‘I agree to the Terms of Use’. At last, click on the ‘Download Template’ button
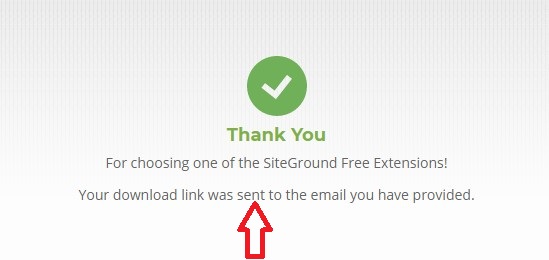
- Now, you will see a notification saying that the download link of the theme was sent to your email address
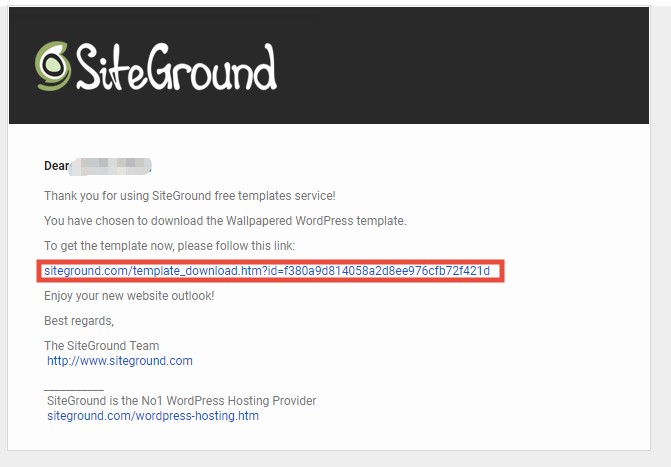
- So, sign in to your email account which you have provided during the registration
- You will find a new email from ‘SiteGround’ in your inbox. So, open that email

- Now, you will see that the email contains a download link. Click on the link, the download will start immediately
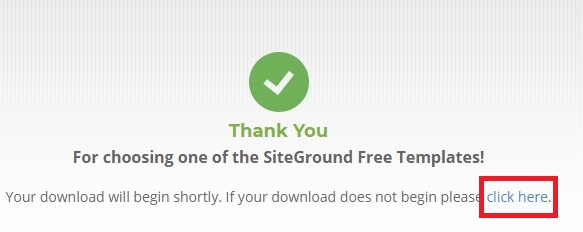
- If the download doesn’t start, you can click on the ‘Click here’ button from the next page to manually start the download
- The downloaded file will be in ZIP format. Remember the location where the file was downloaded as you need to upload it in the next part
At this point, we will tell you how to upload the theme file you have just downloaded. Fortunately, there are 3 ways to upload the theme. So, you will be able to install a theme one way or another. We will reveal all of the 3 methods one by one. You can try any one of these methods. It is your choice. So, let’s see what should we do?
Uploading the Theme:
#1. Uploading & installing via WordPress dashboard:
- Log in to the ‘WordPress’ admin panel/dashboard of your website
- Then from the left sidebar of the dashboard, hover your mouse pointer over the option ‘Appearance’. Then a new sub-menu will appear. You should click on the option ‘Themes’ from the new sub-menu
- Then the ‘Themes’ page will open on the right-hand side of the screen. You will find all of the installed themes of your website on that page
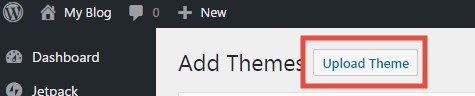
- On top of the screen, click on the ‘Add New’ button which will take you to the ‘Add Themes’ page
- Now, click on the ‘Upload Theme’ button from the top of the screen
- Then click on the ‘Choose File’ option from the new page
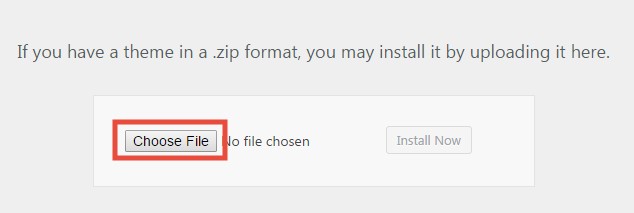
- As you click on the ‘Choose File’ option a new window will appear. Then you need to find and upload the theme you have just downloaded on your computer
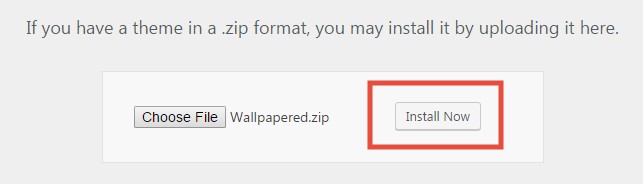
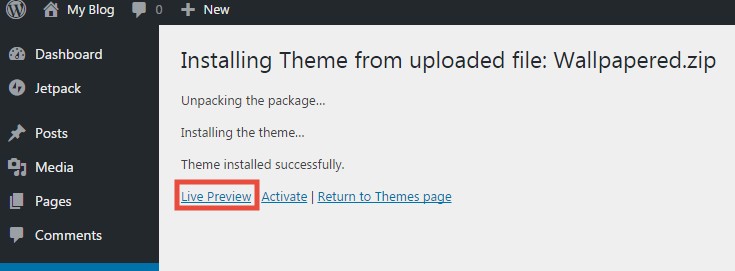
- Then, click on the ‘Install Now’ button. After that, you have to wait for the theme to be uploaded. The required time to upload the theme will depend on the size of your theme and your internet speed
- When the upload is completed, the theme will be automatically installed. Then you need to click on the ‘Activate’ button to make this theme your currently active theme on your website
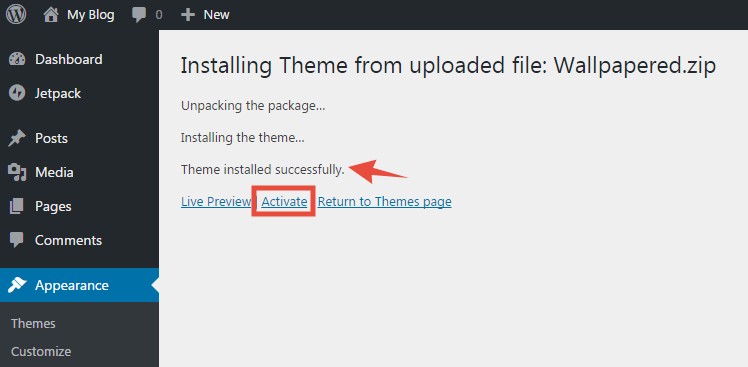
- You can also see a demo of the theme even without activating it. To do that click on the ‘Live Preview’ button
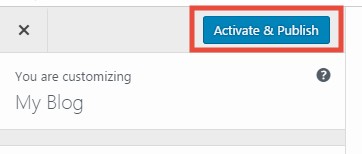
- After that, you can click on the ‘Activate and Publish’ from the top corner of the screen to activate the theme
As you have learned a new method of installing a theme on WordPress. We will explain another method now. So, let’s begin.
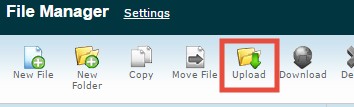
#2. Uploading & installing a theme via cPanel of SiteGround web host:
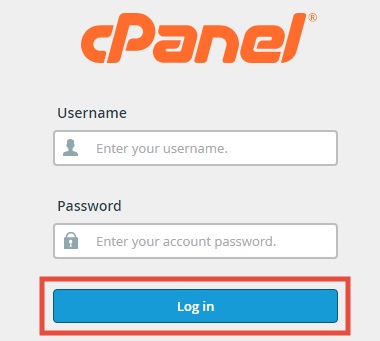
- Log in to your ‘SiteGround’ cPanel dashboard
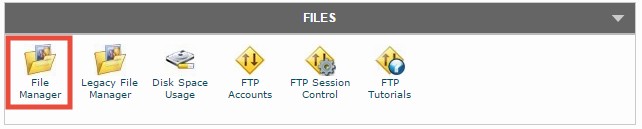
- Scroll down and click on the ‘File Manager’ option
- A popup will appear. Click on ‘Go’ to go to the next page
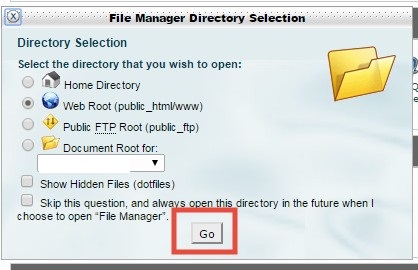
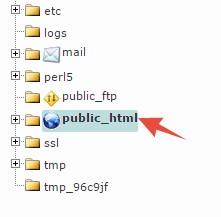
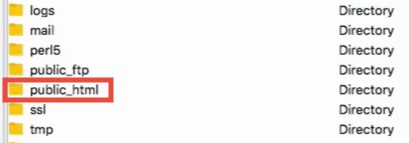
- Select the ‘public_html’ folder from the left sidebar
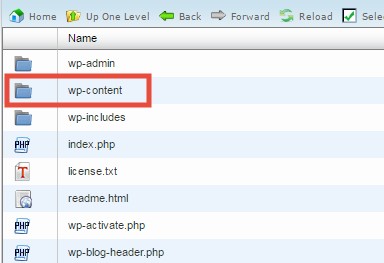
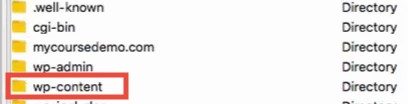
- Then on the right-hand side, double-click on the ‘wp-content’ folder to open it
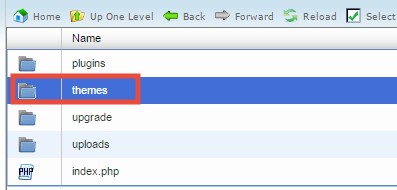
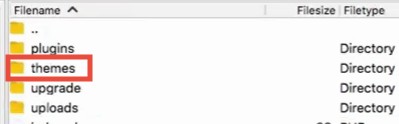
- From the next page, double-click on the ‘themes’ folder. This is the folder where you are going to upload the theme
- As you are still on that ‘themes’ page, click on the ‘Upload’ button from the top menu. This will open a new tab on your browser
- From that new tab, click on the ‘Choose File’ button
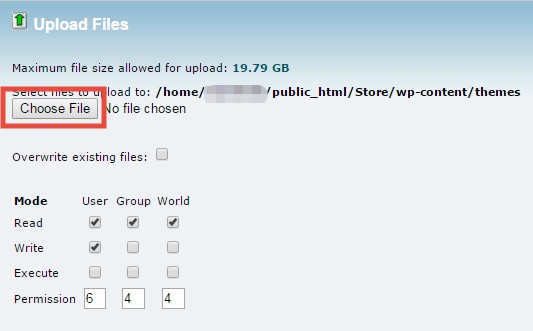
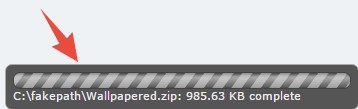
- Then upload the downloaded theme from your computer. You will be able to see the progress of the upload in the bottom right corner of the screen
- When the upload is completed, click on the ‘Go Back to…’ button

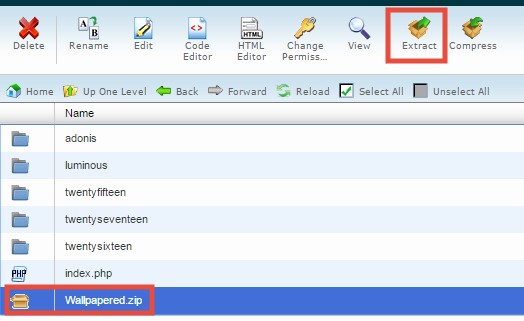
- Now, you will be on the previous ‘themes’ folder. Here, you will see that the new theme is available in a ZIP format. So we have to extract it. If you don’t find the uploaded theme file, refresh the page several times
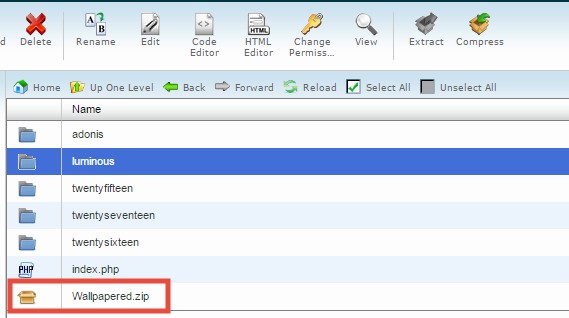
- So, click on the ZIP file to select it first. After that, click on the ‘Extract’ button from the top menu
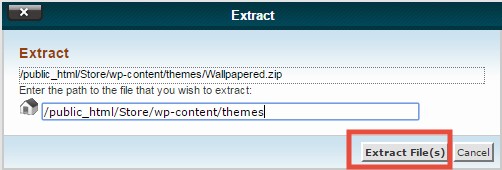
- Another new popup window will be available, click on ‘Extract File(s)’ button to skip this
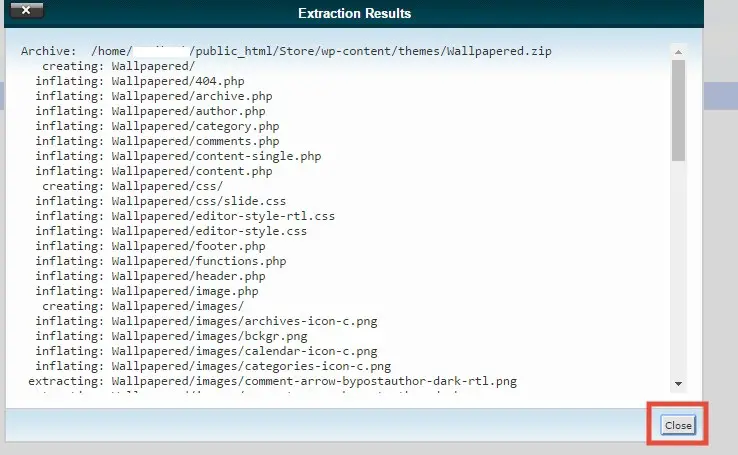
- Click on the ‘Close’ button to terminate the ‘Extraction Results’ popup
- Now, go back to your ‘WordPress’ dashboard
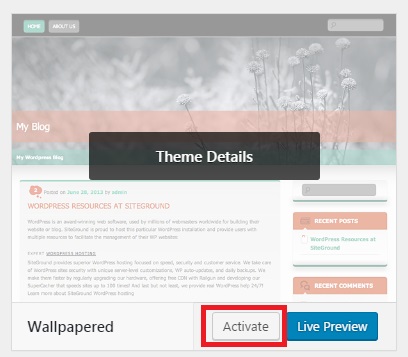
- Navigate to ‘Appearance>>Themes’ and you will see the uploaded theme is there. It will be already installed. You will just need to activate it
- Finally, activate the theme by clicking on the ‘Activate’ button by hovering the mouse pointer over the theme itself
#3. Uploading & installing a theme via FTP:
In this section, we will show you how to install a WordPress theme using FTP software. If you have a theme which is big in size. Then in most cases, it cannot be uploaded directly. So, you can try this method to upload bigger themes. If you are not familiar with FTP then you can read our detailed guide on File Transfer Protocol (FTP).
After you have read this, you can then proceed to read the rest of this article. In this article, we will only tell you about the location where you are supposed to upload the theme file to your web host server. As you can learn all about FTP from our article, we won’t cover that part in this article. So, let’s start.
- Download and connect FileZilla with your hosting account
- Then on the server section, go to the folder, ‘Public_html’
- Then click on the folder ‘wp-content’
- Later, click on the ‘themes’ folder and the folder will open
- You have to upload the theme file (unzipped file) inside the ‘themes’ folder here. To be noted, you need to upload the theme file in unzipped format. Normally, the theme will be downloaded in ZIP format. So, you have to use any ‘archiver utility’ software like WinRAR, WinZip to unzip the file
- After the upload is completed, go to your WordPress dashboard
- Click on the ‘Appearance’ button. Then, click on the ‘Themes’ button. You will find the new theme you have just uploaded on that page. It will be automatically installed
- So, hover your mouse pointer over the theme and click on the ‘Activate’ button to make it the current theme of your website
Last Words:
Congratulations! You have learned a number of ways to install themes on your WordPress website. We hope that this tutorial will help you in future. If you have found it useful, don’t forget to share it with others.